Free Download100% Clear & Secure
Free Download100% Clear & Secure
When it comes to media editing work for macOS devices, built-in tools are usually reliable enough for basic editing. This was made possible by the simple but reliable editing options in the program, such as QuickTime, Photos, and iMovie. In this article, we will focus on discussing audio editing in iMovie, which includes reviewing the program’s audio editing features, providing a basic tutorial, and exploring techniques for audio adjustments. We will also provide an alternative that you can use since iMovie may not be the best option for beginners.

Although primarily developed as a video editing tool, iMovie Video Editor is perfectly capable of handling audio-related tasks. This was made possible by the dedicated audio timeline within the program’s main editing menu. Here, you can edit the audio directly or via the Advanced Tools option in the program.
For smoother audio editing in iMovie, the waveforms of the audio file added to the timeline are also visibly available to the editor. This makes crucial information, such as volume increase, very noticeable, which eliminates the need to listen to the audio repeatedly.
Since volume control is a common adjustment option in audio editing, it is available directly within the audio editing timeline. This eliminates the need to constantly rely on advanced tools for editing videos in iMovie, which can be accessed with a few clicks.
With an overview of the audio editing features in the program, let us now move forward to the tutorials that utilize the audio editing options in iMovie. These options are what make audio editing in iMovie possible.
1. Select the audio file in your audio editing timeline. Then, click Audio Settings in the Advanced Tools of iMovie.
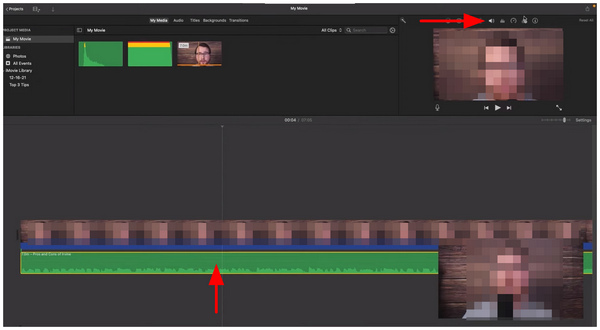
2. After selecting the Audio Settings, you can adjust the volume of your clip using the Volume Bar. Alternatively, you can also use the Volume Slider within the audio timeline.
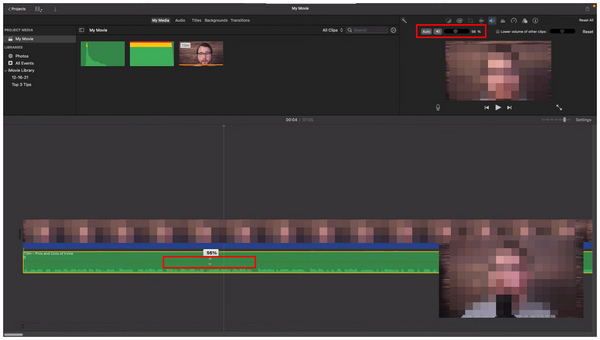
3. For a volume fade effect, click and drag the Fade In/Out buttons at the beginning or end of your video in the timeline.
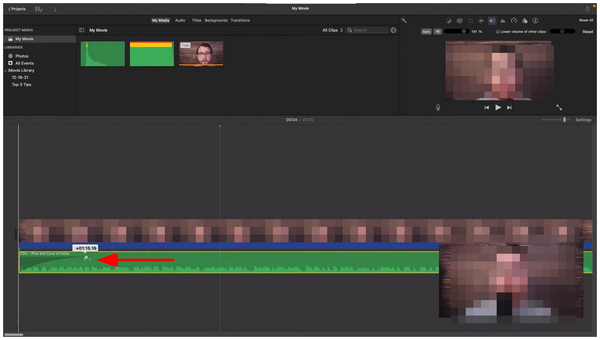
Since volume control in iMovie is accessible directly in the editing timeline, this editing option is made very simple to use. This makes slight audio adjustments and fading audio effects in iMovie very practical and easy to apply.
1. To change the audio balance of your music file, click on the Equalizer option.
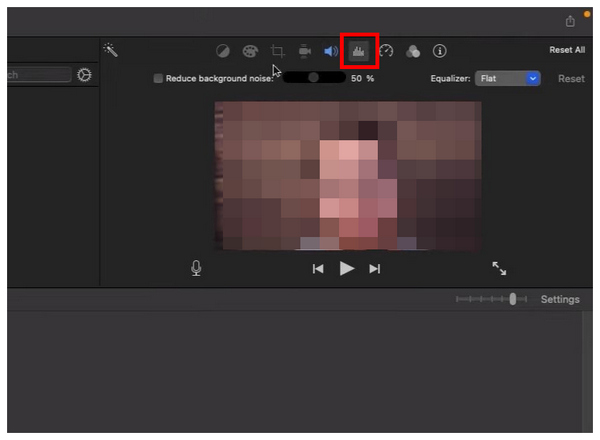
2. Under the Equalizer tool, click Reduce Background Noise to adjust the audio of your file. For more advanced users, you can also click on the Equalizer to adjust the audio balance of your media according to your preferences.
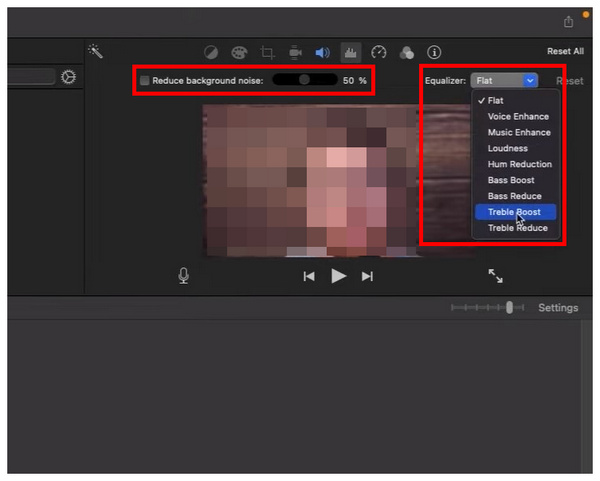
Although the audio equalizer is more suitable for experienced users, amateur audio editors can still use it without any problems. Besides, selecting the Flat EQ option will easily set the audio to its default setting.
1. To change the speed of your audio or media file, click on the Playback Speed option.
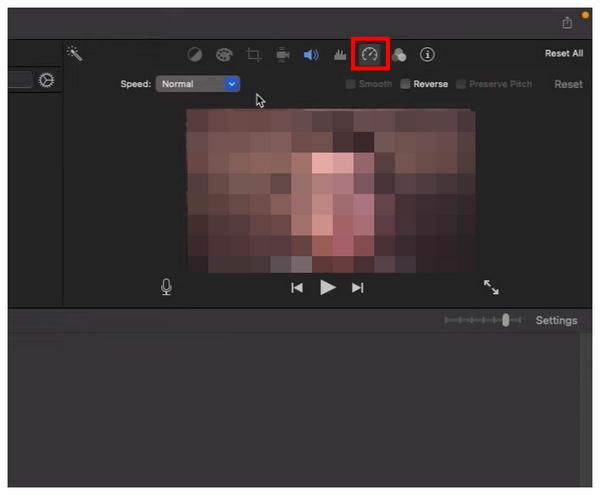
2. Under the Playback Speed settings, click on Speed and choose from the available playback speed templates in the program.
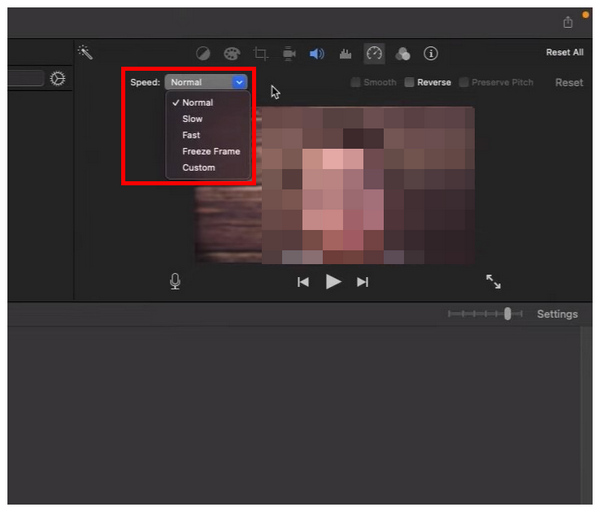
Although changing the video speed is not commonly used, this option still works great in niche scenarios. However, its most common usage is through video duration trimming, usually applied for short-form content.
1. To change the speed of your audio or media file, click on the Playback Speed option.
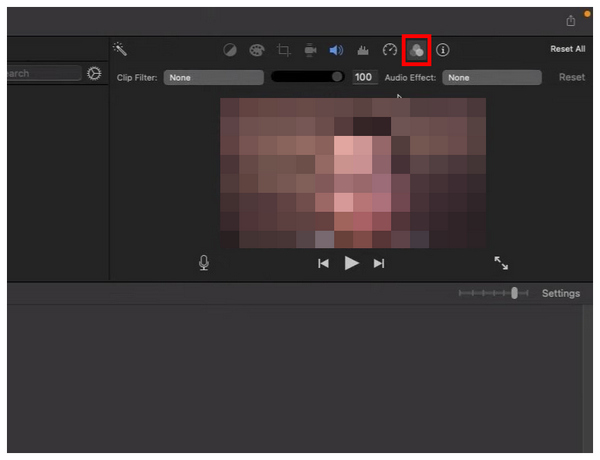
2. In the Filter menu, click on Audio Effect, then select the effect you want to use for your audio file.
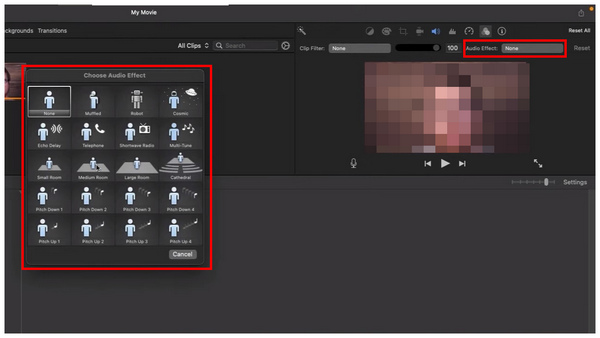
Finally, the audio effect is an editing option in iMovie that is typically used for advanced audio engineering. This essentially works as a filter for your audio that may significantly improve your audio quality when applied correctly.
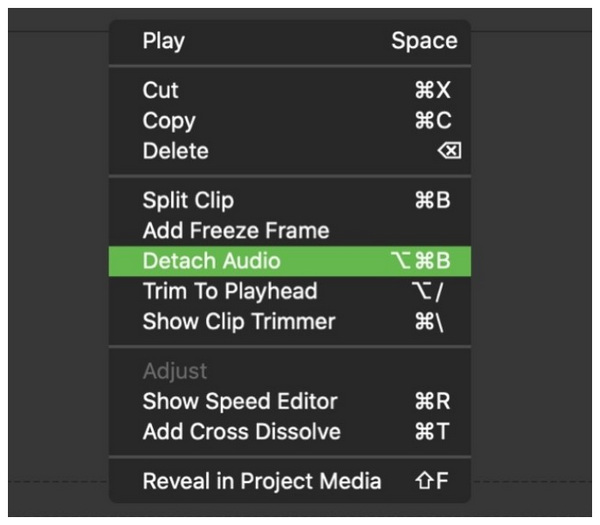
If you are experienced enough with iMovie, you can use the Detach Audio option for videos being edited in the program. This will extract the audio file from your video, allowing you to edit the media separately.

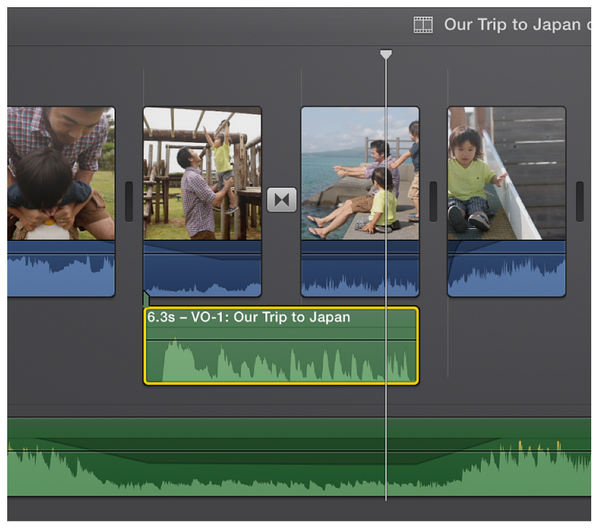
To make audio effects more dynamic, you can use the video trimming function in iMovie to split or delete several sections in your media. Alternatively, these trimmed sections may also have their volume settings controlled separately. This makes it easier to apply individual audio settings.
To improve narration on voice-overs, Audio Ducking is an advanced skill commonly used by advanced audio engineers in iMovie. Unfortunately, this takes experience to use effectively as it involves a combination of audio trimming and advanced audio adjustments.
With the audio editing options in iMovie now reviewed, let's move forward to explore the best alternative to the program for simple and easy audio-centric multimedia editing. In this case, AnyMP4 Video Converter Ultimate should be your top pick.
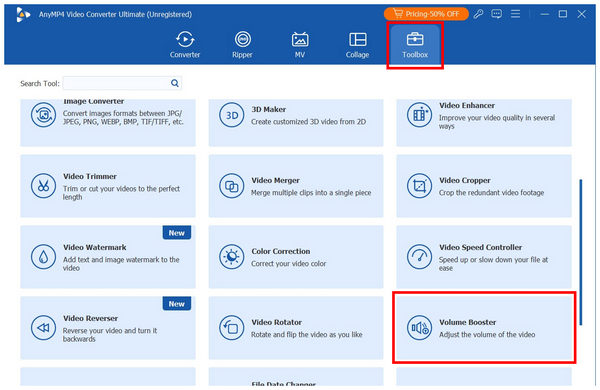
Available to both Windows and macOS computers, AnyMP4 Video Converter Ultimate is multimedia editor software equipped with practical tools all designed for audio editing. These include Audio Compressor, Noise Remover, and Volume Booster tools. All of which are available within the toolbox section of the program.
For maximum practicality, all Toolbox options in the software can be used to automatically adjust the size, background noise, and volume level of audio files. This was supported by the program's wide compatibility with various audio types and formats, including MP3, AAC, AC3, WAV, and over 500 media formats.
Among the editing options in the software, the volume level and sync are typically the most commonly adjusted properties of audio files. As such, our tutorial below will involve using the Volume Booster tool within the program's Toolbox.
To learn more about the program, make sure to read its main features below. Do not forget to download AnyMP4 Video Converter Ultimate as well for an easier time following our tutorial.
Secure Download
Secure Download
Recommendation
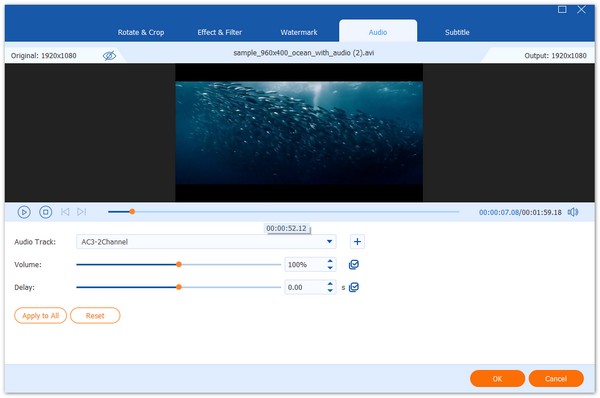
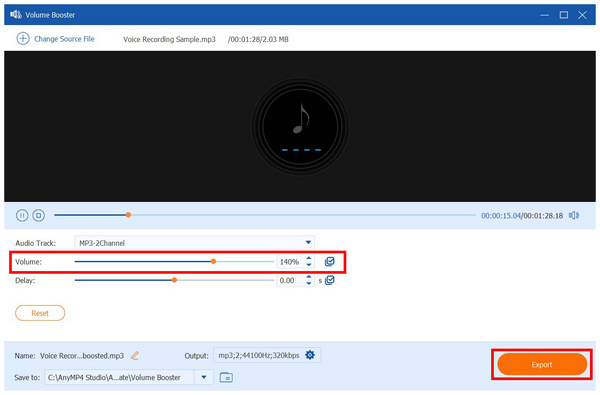
1. Open AnyMP4 Video Converter Ultimate and then go to the Toolbox tab. Then, scroll down to find Volume Booster. Select it and import the audio you want to have its volume edited.
2. Once the audio file you want to boost has been added to the tool, you may now edit its volume level using the Volume slider bar. Simply slide it to the right to increase the volume or to the left to reduce it. When editing a video file, you can also adjust the Delay slider to synchronize your video and audio.
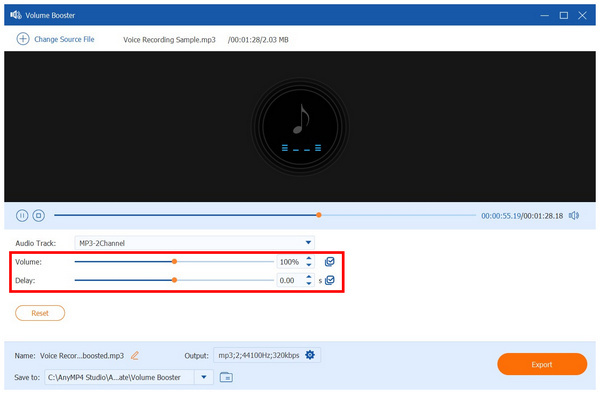
3. Finally, once you are done editing the volume level of your media file, listen to it to check if the boosted audio is sufficient. Then, click on Export to produce the audio file with edited audio.
With the help of the easy-to-use and automated volume adjustment tools in AnyMP4 Video Converter Ultimate’s toolbox, you can now enjoy much simpler audio editing work. This makes the program an excellent choice for beginners or experienced editors who want a more efficient workflow.
Can I edit audio in iMovie?
Yes, you can. iMovie generally supports audio-only editing. This includes basic volume control, fade, filters, and other simple adjustments.
Can I fade audio in and out in iMovie?
Yes. iMovie can fade in/out audio with ease. The effect can be applied directly within the editing timeline.
Is it possible to add voiceovers or narration in iMovie?
Yes, it is. The software also supports adding audio files directly to the timeline. This enables the addition of narration or third-party audio to the videos being edited in the program.
Can I use background music and sound effects in iMovie?
Yes, you can. The video’s background music can be added separately in the program. Alternatively, you can also add a sound effect of your choice.
Is audio editing similar to video editing?
Yes, it is. However, both multimedia skills require different skills to learn. Despite that, there are numerous overlaps in the skills required for audio and video editing.
Now that we have provided our readers with a tutorial on using the audio editing options in iMovie, we hope this article has provided you with sufficient information to begin your multimedia editing journey. If you are looking for an easier alternative to iMovie, we highly recommend AnyMP4 Video Converter Ultimate, which you can download using the link below.
Secure Download
Secure Download
 Updated by Mark Cristobal to Edit Audio
More readings
 How to Add Subtitles in iMovie on Mac and iPhone
Want to learn how to make subtitles on iMovie? This article is made for you since we will discuss five simple steps to learn how to use iMovie to add subtitles.
 How Do You Reverse a Video in iMovie for Mac and iOS
Learn how to reverse videos in iMovie with the help of our detailed tutorial guide on using the video editor on Mac and iOS to apply video reverse adjustments.
 Mastering Audio Editing in DaVinci Resolve: A Comprehensive Guide
Discover how to edit audio in DaVinci Resolve. Learn about an alternative solution and answer common questions about DaVinci Resolve's audio capabilities.
 5 Best Methods to Cut Audio in Windows, Mac, and Online
How to trim an audio file? How to split MP3 into clips? This post shares 5 ways to cut music file on Windows, Mac and online.