In today's visual-first world, simply uploading a video isn't enough. With Instagram flooded by content every second, your content needs to stand out! The power of edited videos on Instagram cannot be overstated. Polished videos help you hook viewers within the first few seconds of your videos. Great editing can transform raw clips into compelling stories that grow your audience and reinforce your personal or business brand. In this guide, you'll learn everything you need to edit Instagram videos. We will cover Instagram's in-app editing tools and explore external software for next-level enhancements.
Instagram is more than a platform for sharing video content. It is also a powerful tool for in-app video editing. It offers built-in editing features that let you enhance your videos without needing third-party apps. It gives you the flexibility to create eye-catching content directly within the app.
Here's how to edit and create a video in Instagram for Feed Post and Story:
1. Open IG and tap the + button at the bottommost of your display. Select Post and record a new video or upload one from your gallery. For Story, swipe right from the feed and hold the Shutter to record a new video. Alternatively, swipe up to upload from the gallery.

2. After uploading/recording the video, Instagram provides editing options:
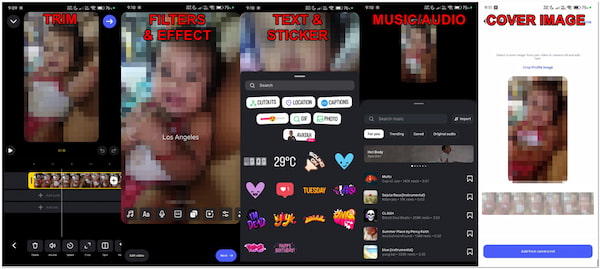
Trim: Tap Edit Video and select the Edit option, represented by a Scissor. Drag the sliders to cut out unnecessary portions from the beginning and end. In Story, videos are automatically broken into 15-second segments. You can re-record or delete specific segments if needed.
Filters & Effects: Swipe left/right to preview filters like Paris, Los Angeles, Oslo, etc. For video effects, simply tap the Four-Pointed stars button to access them. This process applies to both Feed Posts and Story.
Text & Stickers: On Feed video, tap Aa to add a custom text. Tap the Smiley Face button to add Stickers, avatars, GIFs, Locations, Captions, etc. The process is the same for Stories.
Music/Audio: Tap the Music Note button to add a track from the library. Your original audio will automatically mute once you apply music or another audio track. This applies to both Feed posts and Story.
Cover Image: For Feed Posts, Instagram allows you to choose a cover image. You can select from the video itself or upload a custom thumbnail from the camera roll. Just tap Edit Cover.
Editing a video on Instagram for a Feed Post or Story is a straightforward process. The Instagram video editor lets you create engaging content without leaving the app. If you want to enhance your videos and captivate your followers, start making edits with Instagram's built-in tools.
IG Reels has become one of the platform's notable features for sharing short-form video content. It provides various in-app editing options to create polished and creative Reels. If you're aiming for a skit or viral trend, Instagram Reels offers everything you need.
Here's how to edit videos for Instagram Reels:
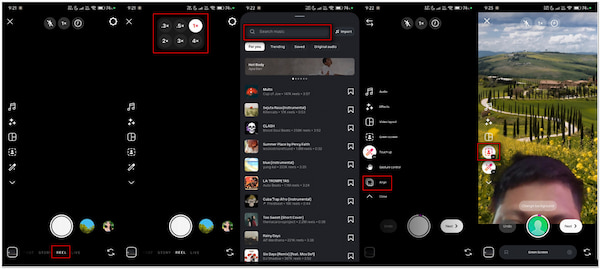
1. Launch Instagram on your phone, tap the + button, and switch to the REEL option. Tap the Shutter button to start capturing your first clip. You can tap again to pause and then continue recording new clips. This action allows you to record your Reel in segments.
2. Before recording, tap the 1× button to slow down or speed up a video on Instagram. You can choose from various speeds like .3x, .5x, 1x, 2x, 3x, or 4×. Speed control applies to each clip individually, letting you change pacing throughout your Reel.
3. Tap the Music Note button to browse Instagram's library of trending sounds and songs. You can search by keyword or explore popular tracks. For voiceover, after recording, tap Next, then tap the Microphone button to record a voiceover.
4. After recording a clip, tap Align in the left toolbar before recording the next one. The app will overlay the last frame of your previous clip, allowing you to perfectly match positions for a smooth transition. This tool is essential for creating transitions without using an external editor.
5. Tap the Green Screen button and replace your background with any image or video from your gallery. The Cutout effect isolates your subject using AI, removing the background entirely. These effects are great for storytelling or placing yourself in different settings.
Editing Instagram Reels in-app is easier than ever. In addition to recording multiple clips, you can also upload a video to Instagram. With so many in-app tools available, Instagram gives you everything you need to make your Reels stand out.
Instagram's in-app editor offers solid features for quick and engaging video content creation. However, if you're aiming for highly customized results, you will find it limited. To take your Instagram videos to the next level, AnyMP4 Video Converter Ultimate is worth a try. It offers complete and advanced editing tools that go far beyond what the Instagram app can do.
In addition to its primary function, media conversion, it also operates as a video editor. To be certain, you can use the software's MV Maker to create outstanding video content. It includes essential tools to trim, rotate, crop, adjust effects, apply filters, and insert watermarks. What's more, it lets you add background music, load multiple clips, and export media to Instagram-supported formats. If you want to access more of its tools, I bet you can get a free download now.
Here's a detailed guide to edit videos for Instagram:
1. Begin by downloading the AnyMP4 Video Converter Ultimate for free. Install the external Instagram video editing software and wait for the installation process to finish. Once completed, run the software on your computer to begin the video editing.
Secure Download
Secure Download
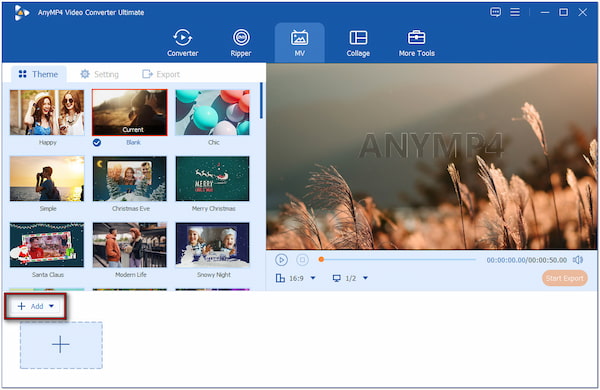
2. By default, you will be taken to the Converter tab. Switch to the MV tab and click the + Add button to import individual video files. You can add multiple video clips at once and arrange them into one video. Aside from video files, you can also upload images.
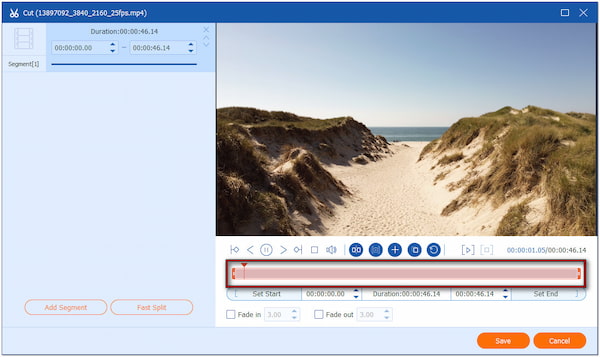
3. Click the Trim button to cut unwanted segments from your video clips and keep only the most relevant parts. Set the exact beginning and ending time for each clip to remove unnecessary content. For further editing, click the Edit button to do the following:
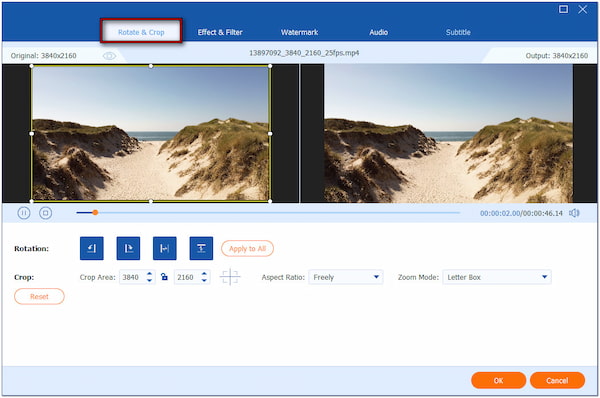
Rotate & Crop: Adjust the orientation and framing of your video content. Corrects sideways or upside-down videos by rotating them or selecting an aspect ratio to remove borders/black bars.
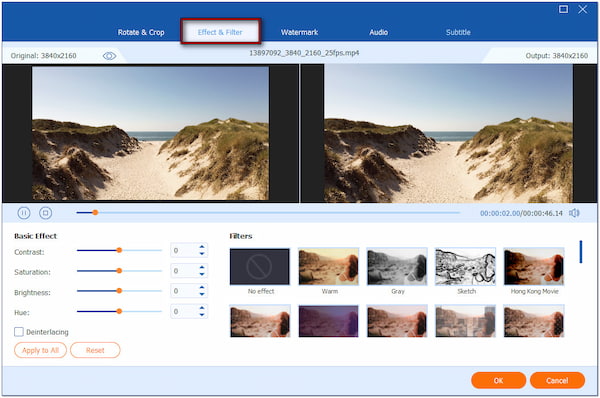
Effect & Filter: Enhance the visual appearance of your video or apply stylistic presets. Modify brightness, contrast, saturation, and hue for balanced lighting and color correction. You can also apply pre-made visual styles to give your video a specific mood.
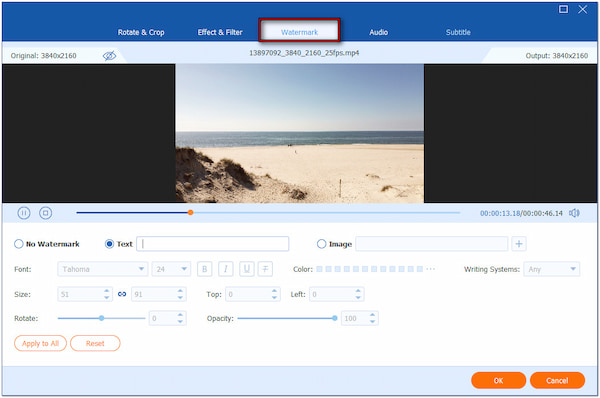
Watermark: Add branding or ownership information to your video. Insert your name or brand slogan with customizable fonts, color, and opacity. On the other hand, you can upload a custom image, graphic, or logo to place anywhere on the video.
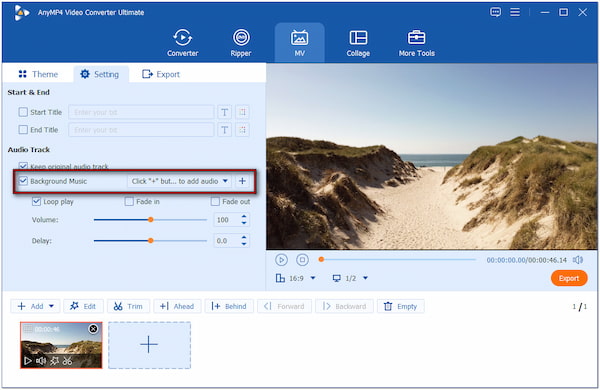
4. Proceed to the Settings tab to add an audio track to your video. Check Background Music and click + to import the audio, music, or voiceover you want to use. Ensure to uncheck the Keep Original Audio Track to avoid audio overlap or clashing.
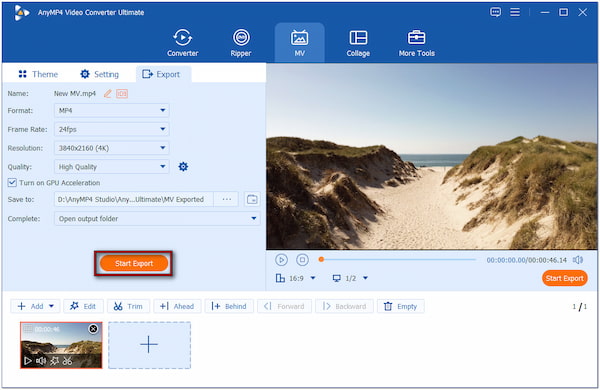
5. After all the edits, move to the Export tab and choose a format optimized for Instagram. If needed, click the Settings button to adjust necessary output parameters. Once everything is ready, click the Start Export button to download and save the final video.
That's how to edit videos on Instagram using external software! AnyMP4 Video Converter Ultimate is indeed the ultimate solution for those who want more than what Instagram's built-in editor offers. In addition to the features mentioned above, this software includes a Video Enhancer tool that can help you improve Instagram video quality.
A compelling story is the heart of every engaging Instagram video. Before pressing the record, think about the message or feeling you want to convey. Structure your video with a clear beginning, middle, and end.
Using the right aspect ratio ensures your video fits the Instagram format and maximizes screen space. For Stories and Reels, use 9:16. For Feed Posts, the recommended ratio is 4:5 to occupy more vertical space on a user's feed.
Aim for good lighting to keep your visuals crisp and vibrant. Use a tripod or stabilizer to avoid shaky footage and use a dedicated microphone to ensure clear, clean audio.
Attention spans on Instagram are short, so your video should hook viewers in the first few seconds. Keep your pacing fast but purposeful; cut out dead air, pauses, or repetitive shots. Avoid letting scenes linger too long unless it's for dramatic effect.
Most users watch Instagram videos with sound off, especially Stories and Reels. Adding captions ensures your message is still understood without audio. Use on-screen text overlays to highlight key points, provide context, or call out important features. A clean edit starts with removing watermark from Instagram videos to eliminate distractions and maintain focus.
The right background music or sound effect can elevate the emotion and energy of your video. For Reels and Stories, Instagram provides a large library of royalty-free, trending audio tracks. Sound effects like swooshes, pops, or ambient noise can also enhance transitions and actions.
In conclusion, simply posting unedited videos won't cut it. Polished videos are key to capturing attention and building meaningful engagement on Instagram. Learning how to enhance and edit Instagram videos makes all the difference. Throughout this guide, we've explored Instagram's in-app features for quick edits and creative touches. Also, we explore AnyMP4 Video Converter Ultimate for more advanced control. Choosing the right video editing software can sharpen your content and amplify your brand. Experiment with different editing styles and explore all the features. But most importantly, start creating content that stands out. Don't forget to share your results and editing experiences in the comments below!
Secure Download
Secure Download
 Posted by Angelica Liwanag to Edit Video
Related Articles
 How to Go Viral on Instagram [Tips and Tricks]
Struggling to gain popularity on Instagram? Want to learn how you go viral on Instagram? Discover the best tips and tricks we have listed in this post.
 6 Ways How to Make Instagram Videos With Music and Photos
Are you looking for an Instagram video maker to create your videos? Then, you are lucky! Find out the 6 tools we have listed and how they work!
 How to Put Music On Instagram Story, Posts, and Reels
Want to learn how to add music to Instagram posts, stories, or reels? Read this article guide to learn how to improve the entertaining value of your posts.
 How to Go Live on Instagram & Connect With Your Audience
Check this guide and learn how to go live on Instagram. Follow the steps for going live in the app and using pre-recorded videos for a polished broadcast.