Apple computers have targeted professionals, mainly when it comes to video editing. However, most of the professional video editing software for Mac comes at a great price. Worry not! Plenty of video editing programs come with a lower price, yet they can provide professional-looking videos. This article will discuss the best pick video editor for Mac. So, if you want to learn what these incredible tools are, continue digging into this post!

AnyMP4 Mac Video Converter Ultimate is the top choice as it is the best video editing software for Mac. It has many powerful video editing features, which you can optimize the video quality and effortlessly create stunning pro-like videos. The program's basic editing features allow you to cut, merge, crop, rotate, etc., your videos. On the other hand, you can use the advanced editing feature of the program powered by AI to upscale the video resolution, remove video noises, reduce video shakes, and optimize the contrast and brightness of your video.
On top of that, AnyMP4 Video Converter Ultimate also functions as a video converter, DVD ripper, MV maker, and Collage maker. It supports various digital formats, including MP4, MKV, AVI, MOV, M4V, and 500+ more. This program comes with a simple interface design for beginners and professionals. Thus, considering the available resources you might already have on your computer will be shown in the list below.
Features
PROS
CONS
Here's how to edit videos on Mac:
1.To begin with, download the best video editor on your macOS, install and run it afterward.
Secure Download
Secure Download
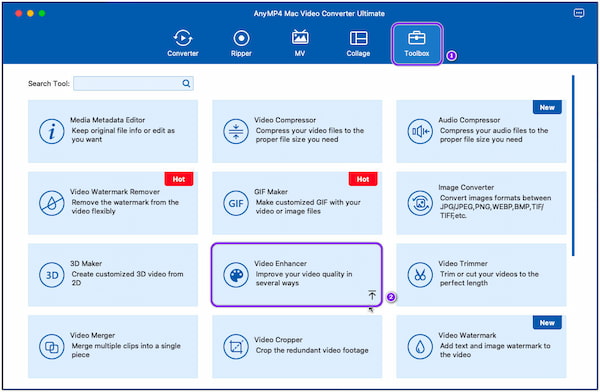
2.Go to the program's Toolbox tab to view the extensive video editing tools. Choose from the program's tools depending on the edit you want on your video. At this point, we will use the Video Enhancer tool as an example.
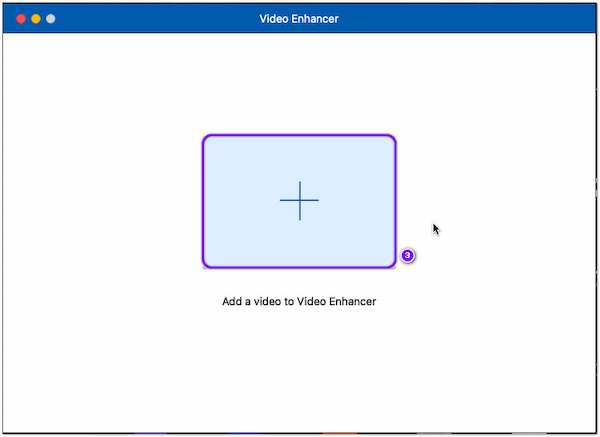
3.After selecting the Video Enhancer, click the + button to add the video. Choose a video from a local file that will pop up on your screen.
4.Next, choose an AI feature you want to apply to the video. Check the box for each feature you prefer.
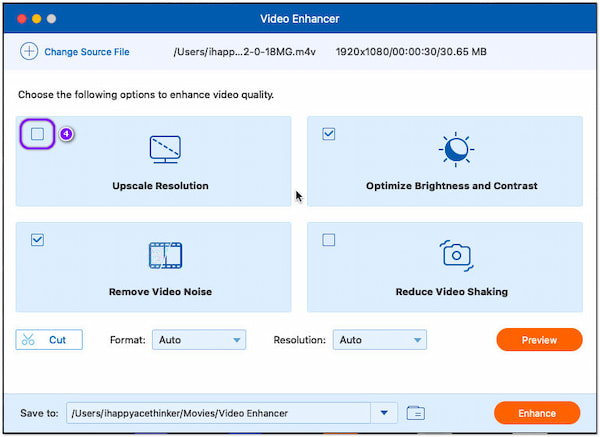
5.To complete the procedure, click the Enhance button on the bottom right corner to finish.

Before saving the enhanced video, preview it to see the pre-output. If you are satisfied with the result, choose the best format and resolution for the best viewing experience.
iMovie is a free video editing software for Mac, ideal for beginners as it is easy to use. It enables you to create titles, trailers, transitions, etc. In addition, iMovie also supports white balancing, color matching, and audio isolation. With it, you can split a large video file, combine clips, crop and rotate videos, and trim video parts.
Features
PROS
CONS
1.Launch iMovie and click Projects, then choose New Movie from the options to edit the video.
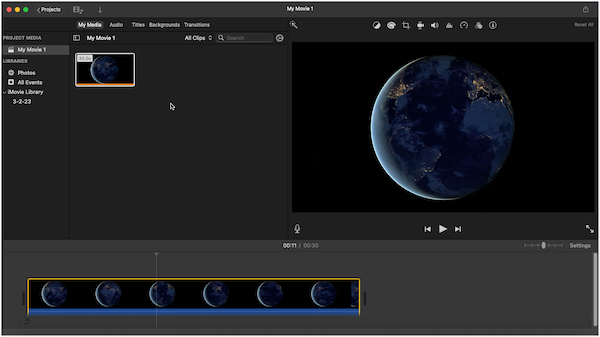
2.Under Project Media, click My Movie, followed by the My Media tab, then import the video afterward.
3.Drag and drop the video on the timeline, then choose from the tool selection on the top menu.
4.Check the edited video on the canvas and click the Export in the upper-right corner. Pick your saving options; you can share the video output directly on social media, email, and iTunes.
You can choose three projects on iMovie: Media, Project, and Theater. The Media is where the video resides, the Project represents the workspace, and Theater is where the finished projects reside.
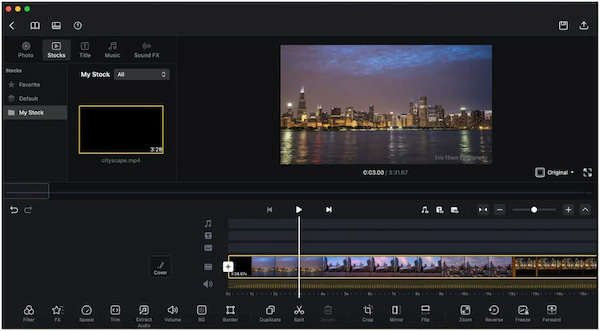
Splice Video Editor for Mac is an intuitive video editor that makes editing quick and simple. It has various editing features, including reverse videos, video blur, sound effects, rapid and slow motion, transition, trim, and crop. In addition, it contains a chroma key for changing the color of the videos.
Features
PROS
CONS
1.First, download the BlueStack emulator on your Mac. After that, open the emulator, the Google Play Store, and log in to your account afterward.
2.Next, download the Splice Video Editor from the Google Play Store. Once done, launch it on your Mac.
3.Afterward, start editing your videos as per your need. You can choose from the selection tools available on the program. Save the video or share it on social media when you're done.
Splice is not designed for Mac; it is only available on IOS and Android devices. However, you can still download it on your Mac with the help of the BlueStack emulator.
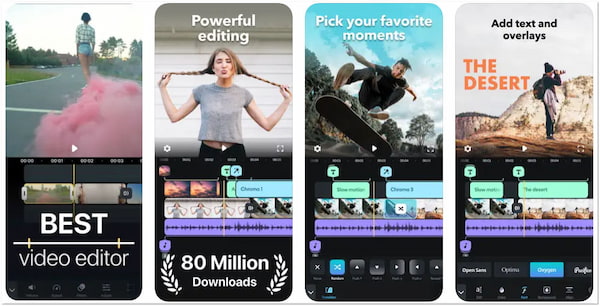
VN Video Editor for Mac is cross-platform and cross-device compatible with creating videos or managing footage. It offers keyframe animation and automated editing demonstration, which make the app convenient for beginners. Some of the VN's exceptional features are; fade-in/fade-out, L-cut, and J-cut. Also, you can freeze a video for 1.5 sec. to make it a static picture.
Features
PROS
CONS
1.Open the VN Video Editor on your Mac and click the New Project. Next, import the video footage from your files and click the arrow button on the bottom-right corner to proceed.
2.From the main interface, depending on what edit you would like to do with the video, choose a video editing tool below the video timeline; you can choose template, filter, fx, speed, trim, etc.
3.After editing the video, click the Export option in the upper right corner and choose your export setting. To complete the process, click the Export button on the bottommost part of the main interface.
When the video is saved, you can playback the video to make sure you are satisfied with the edit. Going to the playback process is ideal for a more precise idea of how the volume sounds.
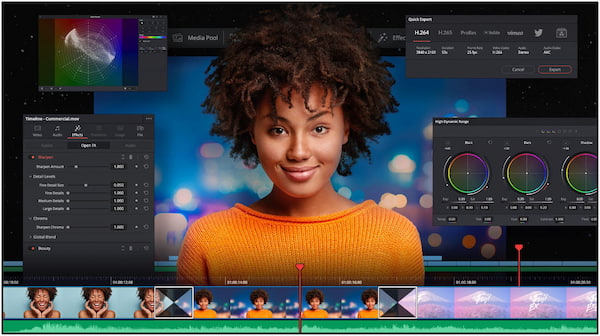
DaVinci is another program for editing videos on Mac, which is the best choice for professional video editors. It includes video editing, color grading, video effects, and audio mixing tools, enabling you to make great videos. If you are a beginner at video editing, you might get intimidated. Yet, this program is a great place to start if you are a pro video editor.
Features
PROS
CONS
1.Run the DaVinci Video Editor on your Mac, and click the New Project option at the bottom right corner.
2.Next, import the video you will use in the Media, Edit Pages, and Cut.
3.From the timeline, put your videos in sequence. You can use the Edit Page or Cut Page for this. Then, start the edit you want in your video. You can select from the tools available on the program.
4.After all the necessary edits, you can now save the video output.
DaVinci Resolve has two versions; the standard free version, which is fully free and functional. The other one is the studio version, which contains various enhanced features that aren't available in the standard free version.
How do I edit videos on Mac without losing the video quality?
With the aid of AnyMP4 Mac Video Converter Ultimate, you can edit videos with no quality loss. On the other hand, it allows you to choose the video resolution for better quality before saving it.
What to consider in Mac video editing software?
Pick a video editing program that comes with both basic and advanced video editing features. In addition, choose a program with an intuitive interface and easy-to-use.
Is there any video editor for Mac that can remove video watermarks?
Definitely YES! Plenty of video editors for Mac offer a video watermark remover tool. One of them is the AnyMP4 Mac Video Converter Ultimate. This feature is available under the program's Toolbox tab.
These are all the video editing software for Mac to edit your movies or Gopro videos. Some are easy to use, while others are too challenging to utilize. However, with the help of the provided steps for each program, you can easily edit videos. So, which program do you think is the easiest to deal with? Let us know by commenting down below!
 Posted by Riley Mitchell to Edit Video
More readings
 How to Edit Videos on Android [Beginner's Guide]
The easiest way to edit videos on Android can only be shown here. Check out the simple and various ways to create eye-catching videos here.
 How to Edit Videos on Windows 7/8/10/11 [Detailed Guide]
If you are a beginner exploring video editing on Windows, you are certainly in the right place! Discover the best Windows video editor here and how they work.
 Top 10 Free Online Video Editing Applications without Download Require
Don't like to install software on the computer? Online video editors are a good alternative solution and we are going to share the top-10-list in this article.
 Top 5 Photo and Video Editor Applications Based on Lab Tested Reviews
If you need a powerful tool to make video stories with photos and video clips, read this post and get top 5 editors for iPhone, Android, computer and online.