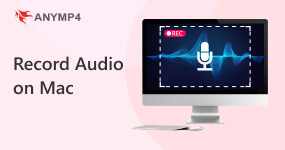
Do you want to know how to record voice on your MacBook? If this is what you are looking for, then this article is suitable for you! This article will introduce three of the best methods to teach you how to record external audio from a Mac. It also provides some necessary tips for recording high-quality external audio on a Mac. If you are interested, please keep reading!
In our daily lives, it is common to record external audio from a Mac for various reasons. The main reason is often that users want to obtain higher quality audio or capture sounds that the built-in microphone may not capture. Although the built-in microphone on a Mac is convenient for basic uses such as voice memos or video calls, it typically does not support recording system sounds and can only record external microphone sounds. Additionally, it often picks up unnecessary background noise and may lack clarity.
To record high-quality external audio on a Mac, several preparations are necessary, including a good recorder, a quiet space, headphones, monitors, as well as adjusting recording settings and post-processing the recorded audio. Next, we will introduce each of these in detail below.
Although Mac's built-in QuickTime player or Voice Memos can record audio, they lack the advanced features needed for high-quality recording. So, for better control over your recordings, consider using dedicated audio recording software.
• AnyMP4 Screen Recorder: A professional audio and video recorder. It features system and external audio recording, file formats and quality settings, real-time editing, and microphone noise reduction.
• GarageBand: Pre-installed on all Mac computers, this is an excellent tool for beginners. It offers multi-track recording, basic editing functions, and a variety of built-in effects.
• Audacity A free open-source option, it is a powerful tool for recording and editing audio. It provides features such as noise reduction, equalization, and compression.
A quiet space is essential for reducing unnecessary noise. If your recording environment is noisy, even the most expensive microphone will be of little use.
Using headphones during recording isolates sound and prevents the microphone from picking up system audio from the headphones. Monitors can be used to check for unnecessary background noise during recording.
Before recording begins, you will need to configure the software settings to obtain the best quality of the recorded file. Some common settings include recording volume, audio format, quality, sampling rate, and so on.
After capturing the audio you want, you can optimize it to professional standards through post-processing to meet your needs.
| AnyMP4 Screen Recorder | GarageBand | Audacity | |
| Ease of Use | Very simple and intuitive | Beginner-friendly, but with a learning curve | Functional, but less intuitive interface |
| Compatibility | macOS 10.13 or above (macOS 27 Golden Gate beta, Tahoe 26 included), Windows | macOS, iOS, iPadOS | macOS, Windows, and Linux |
| Audio Quality | High quality, with lossless options | Professional-grade, studio quality | Professional-grade, studio quality |
| Multi-track Recording | |||
| Ideal for | Tutorials, webinars, and synced audio-video projects | Musicians, complex podcasts, and creative projects | Podcasters, those who need to edit or export audio quickly |
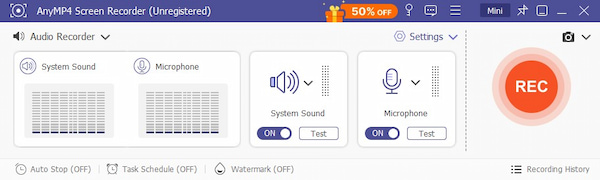
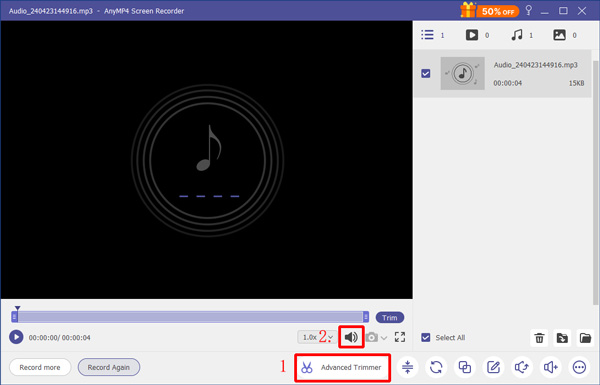
AnyMP4 Screen Recorder is a good audio and video recording tool compatible with Mac OS X 10.12 or later. With it, you can easily record external audio, such as microphone sound, from your Mac and preview recorded audio files. It also supports multiple output formats, including MP3, M4A, WMA, AAC, OPUS, FLAC, and WAV. The quality of recorded audio files can be customized to meet your specific requirements. Furthermore, it includes features such as microphone noise reduction, scheduled recording tasks, and automatic shutdown.
The steps to record external audio files from your Mac using AnyMP4 Screen Recorder:
1. Download and install it on your Mac computer. After installation, launch it.
Secure Download
Secure Download
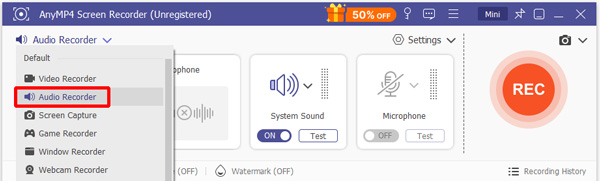
2. Select the Audio Recorder option from the Recorder section menu to begin recording audio from your Mac.
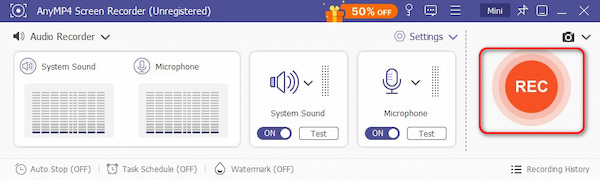
3. Toggle the microphone on your computer to record your voice, and, if necessary, also record the system sound. Then, click REC on the right side to begin recording.
4. When you finish the external audio recording from the Mac, the recorded audio will be saved to your computer automatically. You can preview and edit the recorded audio file on the toolbar.
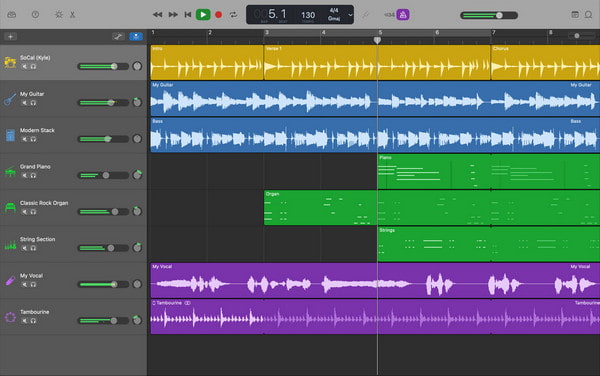
GarageBand is an excellent external audio recording tool for Mac developed by Apple. It provides all the basic features needed to record high-quality audio, including real-time monitoring, multi-track recording, and professional editing tools such as equalizers and compressors.
Here are the steps to record external audio from your Mac using GarageBand:
To record external audio from your Mac using GarageBand, first connect an external microphone by plugging its USB cable into one of your Mac's USB ports.
1. Open GarageBand and select the microphone track type as the input source from the control bar, which is for recording live audio. Then, click Create.
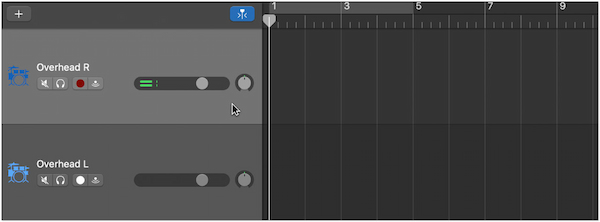
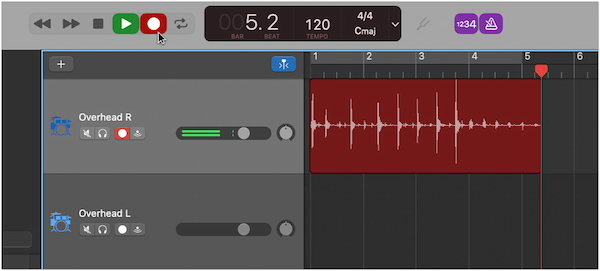
2. Click the red record button to start recording. Speak into the microphone or make the sounds you want to capture. When finished, click the stop button or the spacebar to end the recording.
Audacity is a powerful, free, and open-source audio recorder and editor designed for capturing external audio across many operating systems, including macOS, Windows, and Linux. It provides all the essential features needed for high-quality recording and editing.
The following are the steps to record external audio from a Mac using Audacity:
To record external audio on a Mac using Audacity, you first need to connect a microphone/audio interface to your computer.
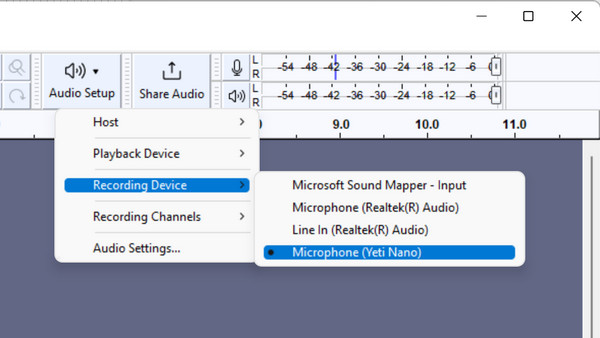
1. Open Audacity, navigate to the Audio Setup, and select the microphone or other audio interface from the Recording Device dropdown menu.
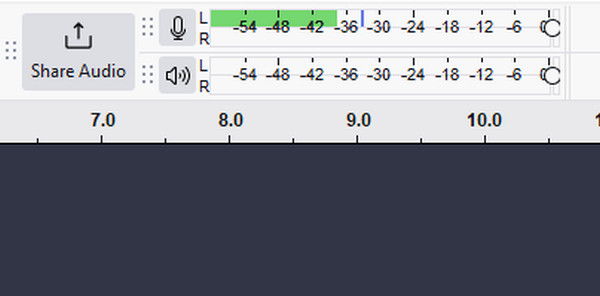
2. OClick the microphone-shaped Start-Monitoring button and speak. If you see a green progress bar moving, you're doing it correctly.
3. Then, you can start recording by clicking the red record button in the transport toolbar. When finished, click the square button to stop recording. If needed, you can also click the triangle button to listen to the recorded audio.

This article provides three methods for recording external audio from a Mac and compares them based on ease of use, compatibility, audio quality, support for multi-track recording, and other factors. Additionally, detailed introductions and steps are provided for your reference. We sincerely hope it helps you understand how to do it. If you find it helpful, please comment in the section below and share it with your friends.
 Posted by Alice Thorne to Record Audio
Related Articles
 How to Record Mac Audio on Adobe Audition: Full Guide
Want to learn how to record with Adobe Audition? Discover how to use it to capture system and microphone audio on your Mac computer by reading this guide.
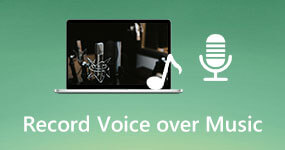 A Complete Guide to Record Voice over Music on PC/Android
From preparation to recording voice over music on computer and Android phone, learn the concrete how-to from this single article quickly with no pro skills.
 Record Voice and Sound on Mac in 5+ Straightforward Solution
This guidepost will outline six ways how to record voice on Mac. We’ve curated the perfect toolkit for your internal and external audio recording needs.
 Get Your Best Mac Screen Recorder to Record Screen Video and Audio
Read and get your best screen recorder for Mac software. Here're top 10 free and paid screen video recorders for MacBook Pro and Air users.