iCloud was used to expand the internal storage of iPhone and back up your photos and other data. It is simple to upload photos to iCloud from iPhone, but what about downloading photos from iCloud? According to a recent survey, some iPhone users still do not understand how to access the photos in iCloud on computer or iPhone. If you encounter the same question, you are in the right place. This guide will show you how to transfer photos stored in iCloud to PC, Mac or iPhone.

Apple utilizes unique technology to encrypt iCloud backup, so you cannot access it without a third-party tool. From this point, we recommend AnyMP4 iPhone Data Recovery.
In a word, it is the best option to transfer photos from iCloud to PC or Mac.
Secure Download
Secure Download
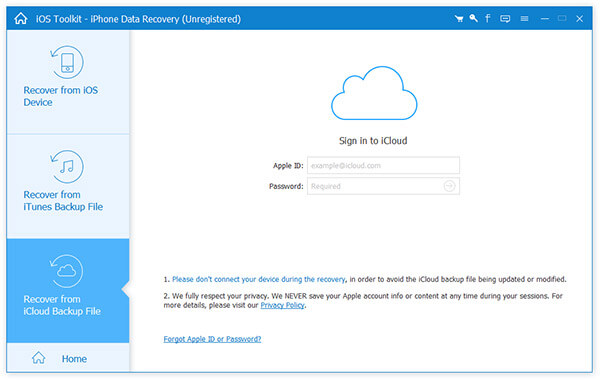
Step 1. Install iPhone Data Recovery
There are two versions of iPhone Data Recovery, one for PC and the other for Mac. Then launch it and choose Recover from iCloud Backup File tab.
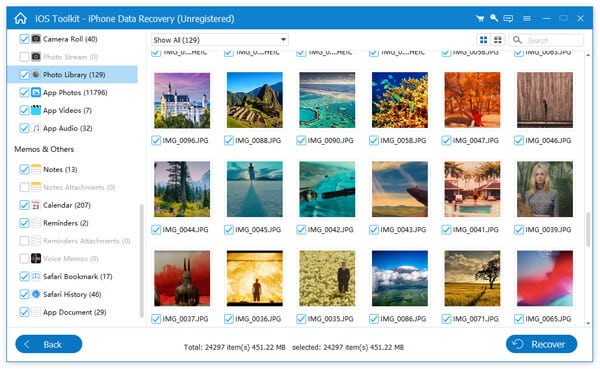
Step 2. Preview photos in iCloud
Sign in your Apple ID and password to display all iCloud backup files. Click the Download button next to the desired backup file. When downloading finishes, you will be presented all data in the backup. Choose Camera Roll or Photo Library to preview photos in iCloud.
Step 3. Download photos from iCloud
Select the photos to download from iCloud to PC, and click the Recover button. When prompted, click Open button to set a specific folder to store the photos, and click Recover to initiate the process.
The easiest way to download photos from iCloud to PC is the iCloud website. As a cloud service, you can access it within your web browser.
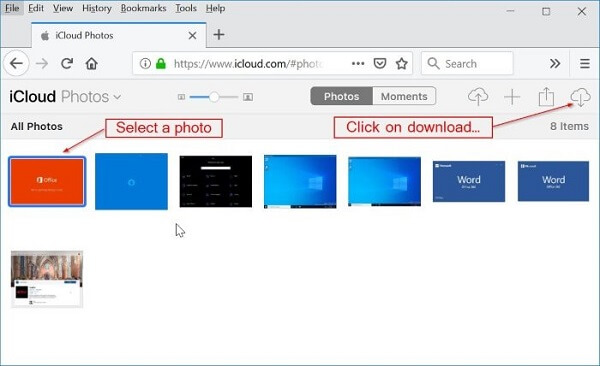
Step 1. Visit https://www.icloud.com/ in a browser, sign in your Apple ID and password. If you enabled two-factor authentication, enter the code.
Step 2. Choose Photos in the home page and you can view all photos stored in iCloud.
Step 3. Select the desired photos, and click the Download icon at the upper right side to begin transferring photos from iCloud to PC.
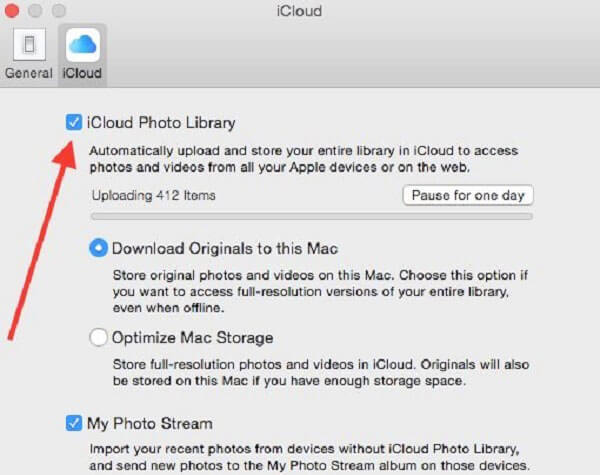
In addition to website, Apple also provides a client for accessing iCloud. By default, it is pre-installed on Mac. When it comes to PC, you need to download and install it from Apple's website.

Step 1. Open iCloud client on your computer, sign in your account to open it.
Step 2. Check the Photos option and click the Options button next to it. On the pop-up dialog, check iCloud Photo Library and select Download Originals to this Mac, and click Done button to confirm it.
Now, the iCloud photos will be downloaded to your photo library.
Sometimes, you just want to download the photos from iCloud to your iPhone for sharing or editing later. However, the way to download photos from iCloud and iCloud backup is a bit various.
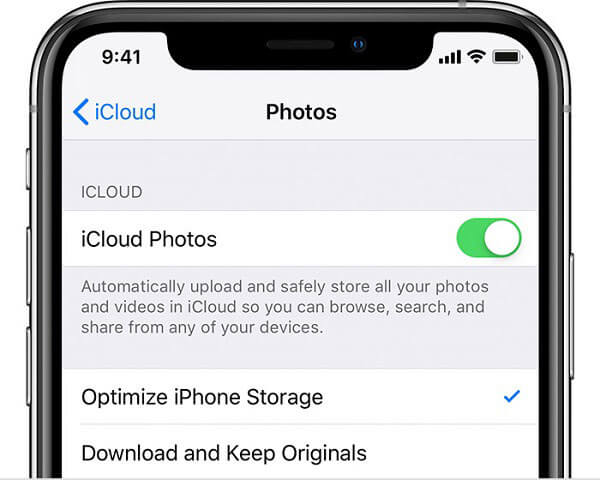
Step 1: Go to Settings -> [your name] -> Photos.
Step 2: Toggle on iCloud Photos and select Download and Keep Originals. Now, your photos should go back to the Photos app.
Note: If you choose Optimize iPhone Storage, the photo resolution will be reduced.
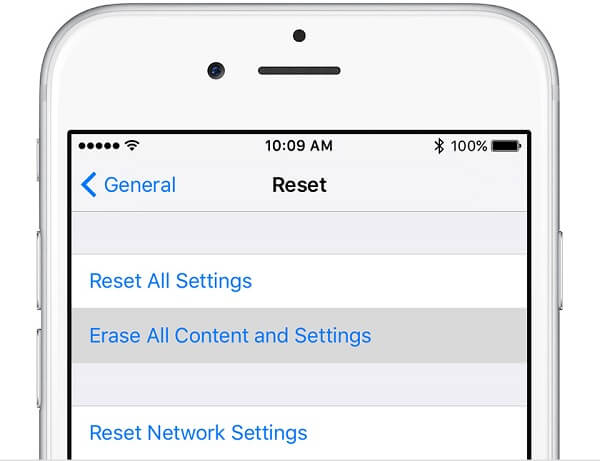
Step 1: Back up your iPhone with iTunes or third-party software. Then head to Settings -> [your name] -> General -> Reset and choose Erase All Content and Settings.
Step 2: When your iPhone restarts, the welcome screen will show up. Set up your handset until you reach the Apps & Data screen.
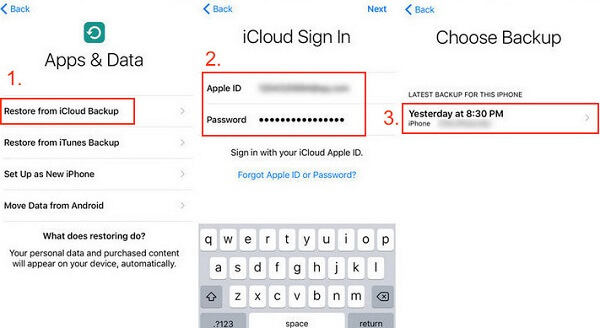
Step 3: Select Restore from iCloud Backup, enter your iCloud account, and select the desired backup file to restore photos from iCloud to iPhone along with other data.
As mentioned previously, iCloud is a good way to expand internal memory of iOS device. All you need to do is to follow the steps to transfer photos from iPhone to iCloud.
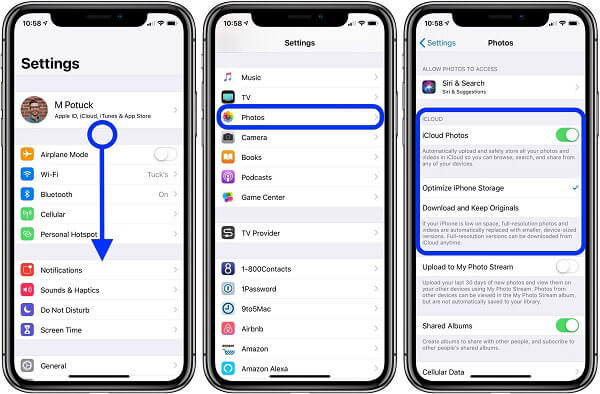
Step 1. Open the Settings app, scroll down and tap Photos, turn on iCloud Photos, and choose Optimize iPhone Storage.
Step 2. Toggle on the Upload to My Photo Stream option too. Next, connect your iPhone to a Wi-Fi network and your photos will be transferred to iCloud on iPhone.
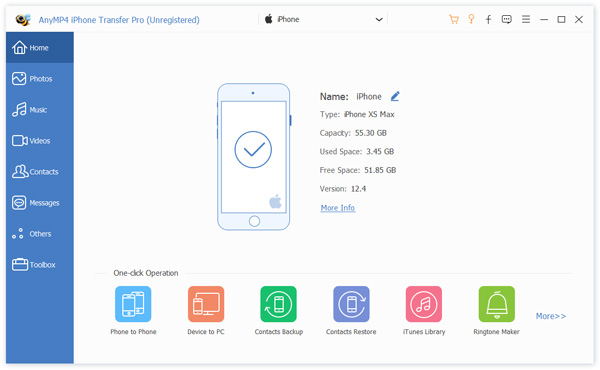
Many people download photos from iCloud to computer in order to transfer photos between iPhone and PC or Mac. However, the free storage is not enough sometimes. AnyMP4 iPhone Transfer Pro is the best alternative solution.
Apparently, it is the easiest way to transfer photos between iPhone and PC or Mac without iCloud.
Secure Download
Secure Download
Conclusion
This guide has shared how to transfer photos from iCloud to Windows, Mac and iPhone. The iCloud website is one option to access and download photos from iCloud. All you need is a browser and your iCloud account. If you use iCloud photos frequently, iCloud client is another choice. However, they are not available to the photos in iCloud backup. AnyMP4 iPhone Data Recovery is the easiest way to open iCloud backup, and then you can download any photos. Encounter other questions related to iCloud photos, please write it down below.
 Posted by Ted Klarso to Mobile Transfer
Related Articles
 8 Proven Ways to Transfer Music from iPhone to iPhone 17/16/15/14/13/12/11/XS/XR/X/8/7/6
How can you sync music from one iPhone to another one? This article gathers the easy 8 ways to make it via iTunes, Wi-Fi, Bluetooth, Finder, Apple Music, AirDrop, Home Sharing, and other apps.
 3 Easy Ways to Transfer Songs and Playlists from iPhone to iTunes
How do you transfer music from iPhone to iTunes? Here is the full guide in 3 easy ways to sync songs and playlists to iTunes from iPhone 17, 16, 15, 14, 13, 12, 11, XS, XR, X, 8, 7, 6, 5, iPad, and iPod.
 The Ultimate Guide to Transfer Videos from iPhone to PC/Mac
Need to transfer videos from your iPhone to computer in order to free up more storage space or edit videos on computer more easily? This article will tell you all possible ways to import videos from iPhone to PC or Mac.
 4 Ways to Transfer Videos from PC/Mac to iPhone with/without iTunes
Wondering how to transfer videos from PC/Mac to your iPhone? In this post, we will show you 4 easy-to-use methods to transfer videos efficiently on PC and Mac.