"I cannot listen to my voicemail on my iPhone, it does not play after pressing the arrow icon, I used to be able to listen to, what I can do to fix this problem?" Apple's Voicemail service is useful for iPhone owners, whose hands are busy on something else. You left an incoming call and then you can play and listen to it.
Unfortunately, some iPhone users face the issue relevant iPhone voicemail won't play. Don't worry! There are potential factors responsible for this issue. Moreover, we will share the solutions to fix this problem on iPhone XR/XS/X/8/8 Plus/7/7 Plus/6s/6 and earlier.
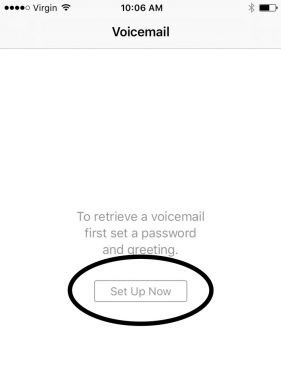
Step 1: Open the Phone app on your device when iPhone Voicemail won't play.
Step 2: Tap Voicemail at the bottom right corner. If it is the first time to set up your voicemail service, tap Set Up Now button.
Step 3: When prompted, enter and confirm your voicemail password. Then you will be reqired to choose the default voicemail greeting or record your own.
Step 4: Then dial your phone number from your iPhone dialer and follow the prompt to verify whether your voicemail configured correctly.
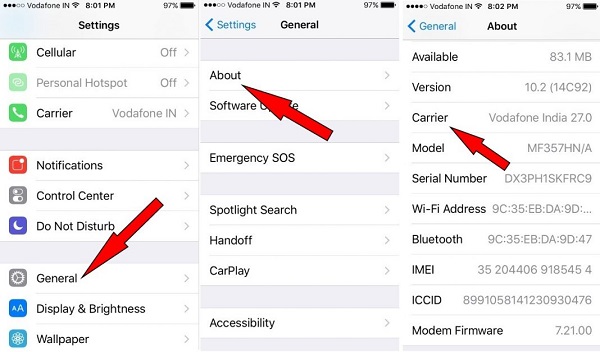
Step 1: Open the Settings app from your home screen, tap on your name and go to General -> About -> Carrier.
Step 2: If you get any update here, do the upgrade with the onscreen instructions.
Note: Generally, iOS will up the Carrier settings to date automatically. However, you are allowed to install update manually too. It will improve the mobile network connectivity performance.
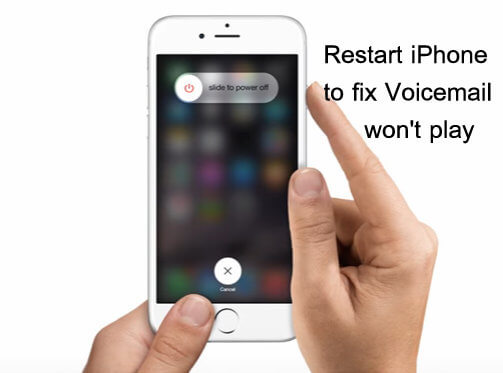
Step 1: Press the Side button or Power button on the right side until the power off screen appears.
Step 2: Move the slider to the right side and power it off completely.
Step 3: After the screen turns to black, wait for at least 20 seconds and then hold down the Side button until the Apple logo appears.
Step 1: On any screen of your iPhone, locate the top area and you can see the signal cellular network connection.
Step 2: If your iPhone has very low coverage or is out of a coverage area with a no service indicator, you cannot receive voicemails.
Step 3: In such situation, you just need to wait until you get better cellular coverage.

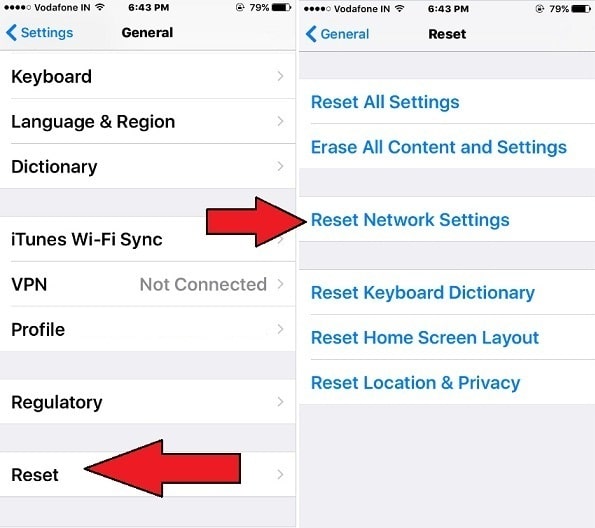
Step 1: Run the Settings app, head to General -> Reset.
Step 2: Select and tap Reset Network Settings. If prompted, enter your password.
Step 3: Wait for your iPhone to turn off and restart. Then go to Settings -> Wi-Fi, select your Wi-Fi network and enter the password.
Step 4: Now, try voicemail again and that problem that iPhone voicemail won't play should be fixed.
Dial *611 for Verizon user and press SEND. Wait for a while and you will get the recovery information from your carrier. Then you can follow the voice assistant to reset your password for the Voicemail service.
For AT&T, call 611 on your iPhone.
For Sprint, dial *2.
If you are using T-Mobile, type #PWD# or #793# to reset voicemail password by your own
After fixing the problem that iPhone won't play voicemail, you may need to recover the old voicemails backed up on your iPhone. From this point, we recommend AnyMP4 iPhone Data Recovery.
1. Recover lost voicemails and other files from iPhone with a single click.
2. Support a wide range of data types, including voicemails, photos, videos, SMS, contacts, etc.
3. Restore lost iPhone files from device, iTunes or iCloud backup.
4. Get back deleted or lost data in the original conditions.
5. Available to iPhone XS/XR/X/8/7 and earlier, iPad and iPod.
In a word, it is the best way to get back lost voicemails after fixing iPhone voicemail won't play.
Secure Download
Secure Download
Step 1: Connect iPhone to the best voicemail recovery tool
Download and install iPhone Data Recovery on your computer. Launch the program and connect your iPhone to the computer using a Lightning cable. It will detect your iPhone automatically.
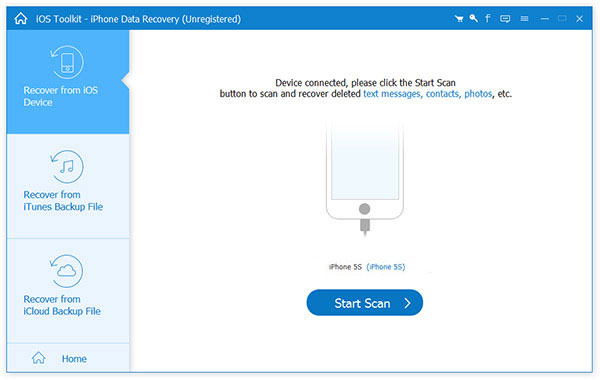
Step 2: Preview lost voicemails
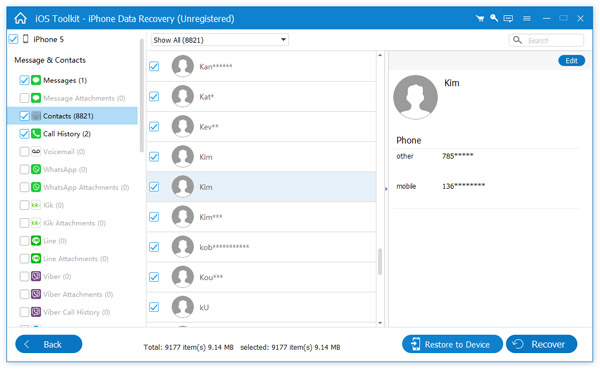
Select Recover from iOS Device from the left column and click the Start Scan button. When scanning is done, you will be presented the data type window. Locate the left side and select Voicemail under the Message & Contacts section. Then you can see all voicemails recoverable on the right detail panel.
Tip: If you want to recover lost voicemails from iTunes or iCloud backup, select Recover from iTunes Backup File or Recover from iCloud Backup File.
Step 3: Get back important voicemails from iPhone
After previewing, tick the checkboxes next to the voicemails you'd like to recover and click the Recover button at bottom right corner. When prompted, drop a location to save your voicemails and start recovering. When it is done, quit the program and disconnect your iPhone. Now, you can your voicemails on any devices.
Note: According to our testing, it only takes a few seconds to recover hundreds of voicemails from your iPhone, iTunes or iCloud backup.
Conclusion
This tutorial has showed you how to fix iPhone voicemail won't play. There are a lot of factors could lead to the voicemail service working abnormal. For ordinary people, it is difficult to discover the real reason, but can still fix this problem. We have shared 6 effective solutions to fix this issue. You can try them one by one. On the other hand, some people may face the problem of old voicemails loss. Therefore, we also recommended a powerful tool, AnyMP4 iPhone Data Recovery, to help you recover lost voicemails in order to prevent important information to lose.
 Posted by Riley Mitchell to Player, iOS Issues
Related Articles
 Get Your Best AVI to MP4 Converter from the Updated Top 15 Freeware List
How can I convert AVI to MP4 for free? Get the free AVI to MP4 converter. Which is the best freeware to change AVI to MP4? Check the updated list of best 15 open source software.
 The Best Way on How to Convert VLC Files to MP4
Have trouble in converting your VLC files to MP4 format? Read this passage then you will learn the best VLC to MP4 converters to solve your issue.
 Top 10 Slow Motion Video Players to Apply Slow Motion Effects
The following are the top 10 media players with the slow motion feature to let you reduce the speed rate of the video while playing your favorite movies.
 Top 3 DAV File Player to Play DAV You Should Know
Want to watch the video files created by a DVR digital video recorder? Here we list the best DAV file players and converters for enjoying your videos effectively.