Part 1. Enlarge Image with AnyMP4 Image Upscaler Online
Platform: Web
Price: Free
Supported image formats: JPG, JPEG, PNG, BMP
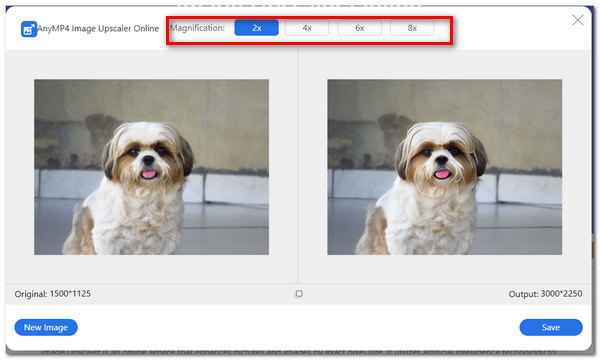
AnyMP4 Image Upscaler Online is a web-based tool that focuses on upscaling and enlarging an image online without watermarks. Unlike traditional tools that simply stretch pixels, this platform utilizes Deep Learning models to perform 'pixel compensation.' This means the AI intelligently predicts and reconstructs missing details, such as fine hair strands and complex textures, ensuring your images gain clarity as they grow in size. Moreover, this free tool has a magnification level that ranges between 2X, 4X, 6X, and 8X. The excellent thing about this tool is that it does not add any watermark to your finished work.
Additionally, it uses a particular algorithm to improve the photo's details, edges, and lines. Indeed, this will make your work easier in enlarging your images without losing quality. The great thing is it improves the quality of images instead. Below are the straightforward steps you can follow to enlarge your photos without losing quality.
PROS
- Easy user interface.
- Has magnification level option.
- Accessible online.
- Free to use.
- Shows output size.
CONS
- Limited features since it's free.
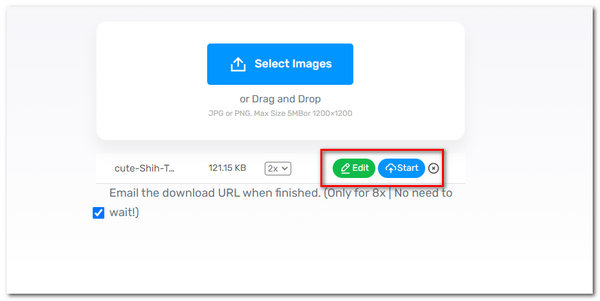
1. Visit the AnyMP4 Image Upscaler Online on its official site.
2. On the main interface, start importing your photo by clicking Upload Photo.
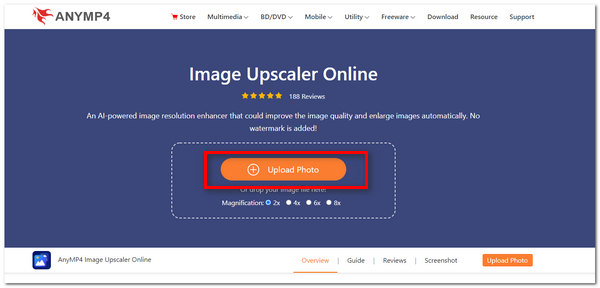
3. After uploading your photo, you can enlarge the image without quality loss by selecting any magnification between 2X, 4X, 6X, and 8X.
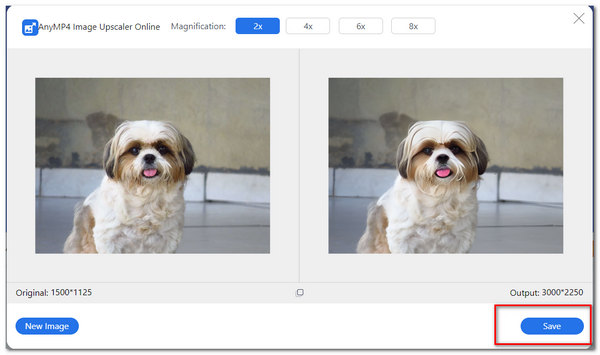
4. After upscaling your photo, you can click Save to save and download your image on your phone and successfully upload the finished work on Instagram.
In summary, AnyMP4 Image Upscaler offers an incredibly smooth and efficient experience for quick, watermark-free enhancements. However, it lacks manual fine-tuning, occasionally resulting in AI over-smoothing natural textures that some users might prefer to keep.
Part 2. Make Image Larger With Adobe Photoshop
Platform: Windows 10,macOS
Price: $20.99
Supported image formats: JPEG, JPG, PNG, GIF, SVG
Adobe Photoshop is a powerful photo-editing software you can install and download on your PC. Additionally, Photoshop is used by many editors, graphic artists, and professional photographers globally. It is composed of the most advanced features in photo editing tools. It can enhance different images and other illustrations. As the industry standard, Adobe Photoshop offers unmatched precision with its Preserve Details 2.0 algorithm, which utilizes advanced resampling to enlarge images while suppressing noise. Beyond simple upscaling, it provides full-spectrum control, allowing you to seamlessly transition from magnification to professional sharpening, color correction, and layer-based editing within a single workflow.
PROS
- Advanced photo-editing tools.
- Multi-purpose software.
- Better quality of images.
- Can generate high-end graphics.
CONS
- Complicated user interface for beginners.
- You still need to purchase it before getting the whole experience.
1. Download and install the latest Adobe Photoshop
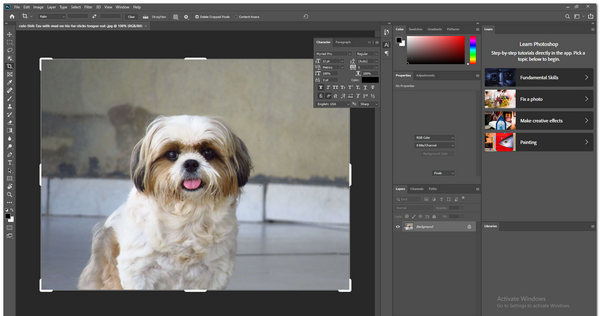
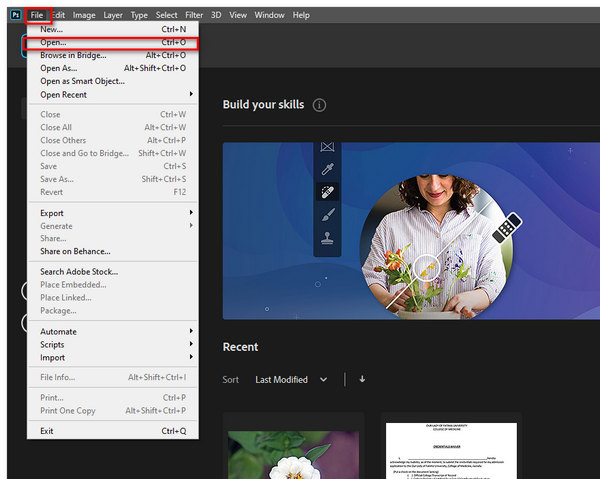
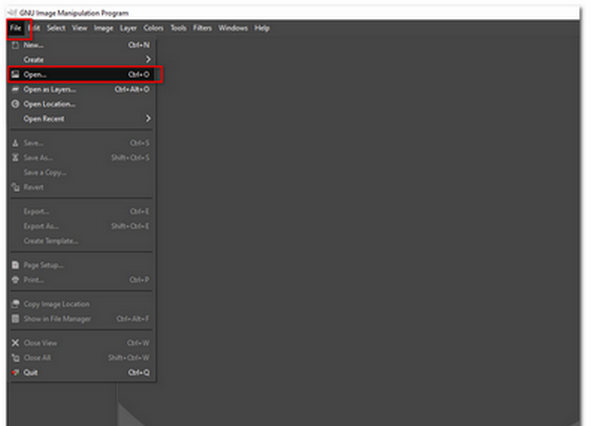
2. To import your image to the software, click File. Then select Open. You can now like the image file you want to enlarge.
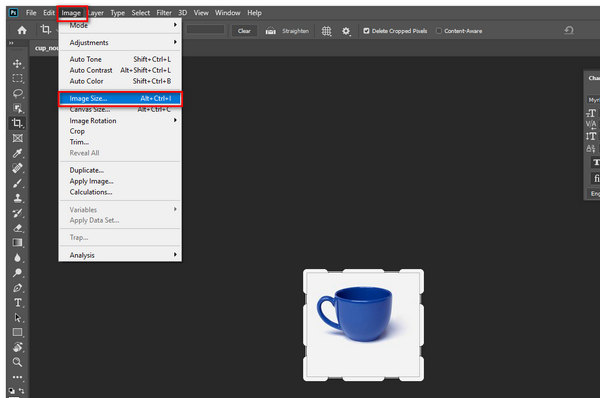
3. To enlarge your image, click the image. Drag down your cursor, then select Image Size.
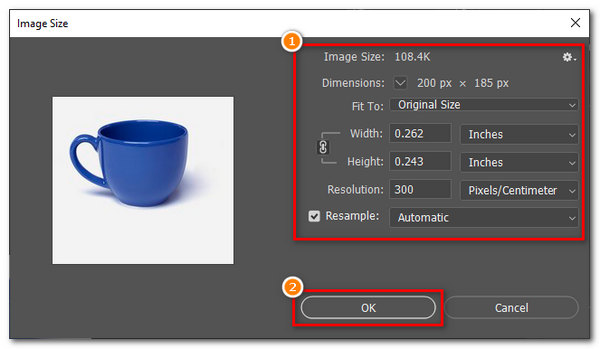
4. A dialog box will appear. It will let you edit the image size by entering values on its height and width to enlarge your image.
5. After enlarging your image, click OK on the lower part of the box to finalize.
Adobe Photoshop provides an unmatched professional experience, allowing for seamless transitions from upscaling via Preserve Details 2.0 to high-end retouching. However, it lacks the aggressive generative reconstruction found in pure AI tools, making it less effective for extremely low-resolution 'thumbnail' images.
Part 3. Enlarge a Photo with Adobe Illustrator
Platform: Windows, MacOS
Price: $19.99
Supported image formats: PNG, GIF, JPG, JPEG, SVG, BMP, HEIC, JPEG2000
Adobe Illustrator is an application powered by Adobe that focuses on editing vector graphics. It stands as the ultimate solution for infinite scalability through its Image Trace feature, which transforms bitmaps into high-quality vectors that can be enlarged to billboard size without any loss of resolution. It reigns supreme in edge precision, making it the 'gold standard' for upscaling logos, icons, and illustrations where razor-sharp lines are non-negotiable. The tool also provides features for photo-resizing in pictures. It also has different scaling options to select. Thus, you can indeed enlarge an image without quality loss by using this software. Moreover, it maintains the integrity of the image through the advanced features available in the tool.
PROS
- Has free trial.
- Creates image files in manageable sizes.
- Has extra features.
CONS
- It requires a lot of space on your PC.
- Limited support for some graphics.
1. Download and install the latest Adobe Illustrator
2. To import your photo into the tool, click File on the menu toolbar. Select Open to import your image file.
3. To start enlarging the image, click the three dots icon on the app's left pane. Then select the Selection tool with a cursor icon on top of the tools. This will let you highlight the image.
4. Highlight the image on the tool. Then you will see the drag-sizing handles around the sides of the image. You can drag them to enlarge your photo according to your preference.
5. To export your enlarged image, click File on the menu toolbar. Drag down your cursor, then select Export. Then click Export As.
Adobe Illustrator offers a unique 'infinite scaling' experience through its Image Trace feature, making it the perfect choice for crisp logos and illustrations. However, it is unsuitable for realistic photos, as vectorizing landscapes or portraits often results in a 'painterly' or posterized effect that destroys photographic detail.
Part 4. Make Image Bigger with FastStone Photo Resizer
Platform: Windows 10/11
Price: $19.99
Supported image formats: JPG, JPEG, JPEG2000, PNG, BMP, GI, TIFF, PCX, EMF, ICO, HEIC,WEBP
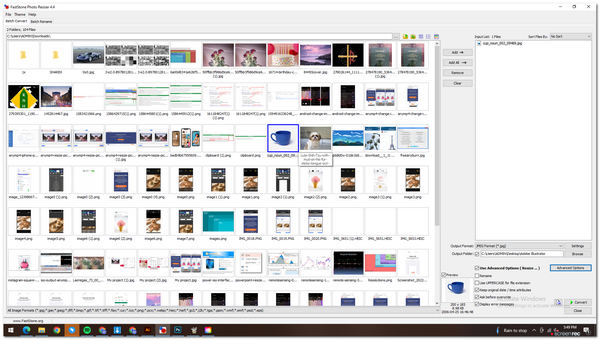
FastStone Photo Resizer is an offline-based tool that focuses on resizing an image. This is a great tool to enlarge your images without losing quality. It is a batch-processing powerhouse, offering unmatched speed and stability for users needing to upscale hundreds of images simultaneously. It features a diverse range of classic interpolation algorithms, such as Lanczos3, while providing seamless tools for lightning-fast renaming and conversion in one unified workflow. Moreover, it has crop and rotate features as well. It uses the drag-and-drop mouse operation for you to utilize the tool well. Below are the steps to follow in enlarging photos.
PROS
- Can do a batch resize in images.
- Can do the basic enlarging of image.
- Has advanced options to enlarge an image.
CONS
- It doesn't have a friendly user interface.
- Offline use only.
1. Download and install FastStone Photo Resizer on your PC.
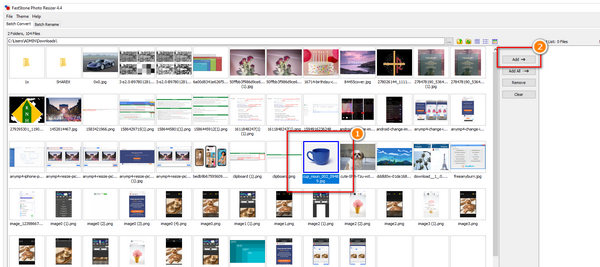
2. The tool will automatically let you see your computer stored image files. Select any file you want to enlarge, then click Add with an arrow icon.
3. Highlight the image name on the box. Then select Advanced Options on the bottom part.
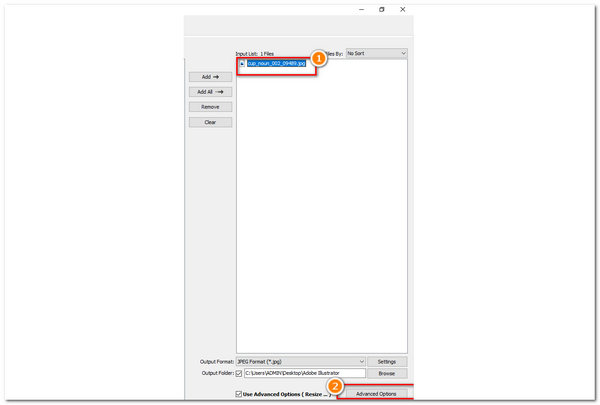
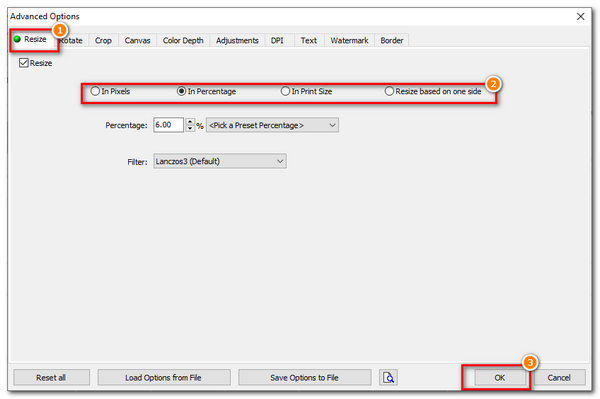
4. A dialog box will appear in Advanced Options to start enlarging the image. Select Resize; then you can select if you want to enlarge your image in Pixels, Percentage, Print Size, or on one side only. Select OK to finalize.
FastStone Photo Resizer is an unrivaled tool for batch processing, offering incredible speed and stability for handling hundreds of images at once. However, its dated user interface feels like a relic of the Windows 98 era, which can be intimidating for beginners to navigate.
Part 5. Enlarge a Picture with ImgLarger
Platform: Web
Price: Free
Supported image formats: JPG, JPEG, PNG, GIF
ImgLarger is an online-based tool that can make your photos larger. It excels through its niche-specific modules, such as 'AI Anime' and 'AI Sharpener,' which offer tailored optimization for different image types. Utilizing these targeted deep-learning models, it provides a higher level of precision for tasks. It not only enlarges your images but also makes them better and smoother, reducing noise and sharpening. It improves low-quality pictures in an instant.
PROS
- Can enlarge images easily.
- It has a lot of extra features in editing.
- Amicable user interface.
CONS
- Requires you to log in to a free account.
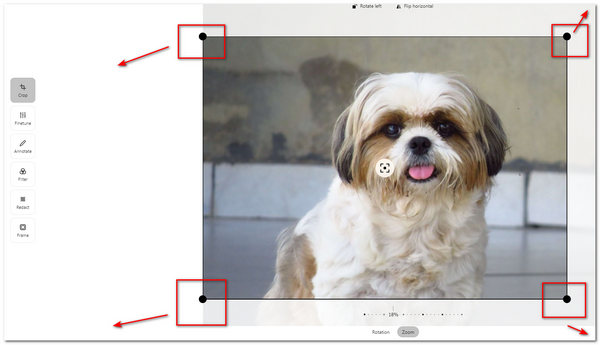
1. To start uploading your photo to be enlarged, you can browse an image file or drop the File. Ensure that you have logged in to your free account.
2. After uploading the photo, click Edit beside the file name you uploaded.
3. It will then redirect you to the editing part of the tool. The editing tools are in the left pane of the tool. You can start enlarging your image by dragging the handles on the image's edges.
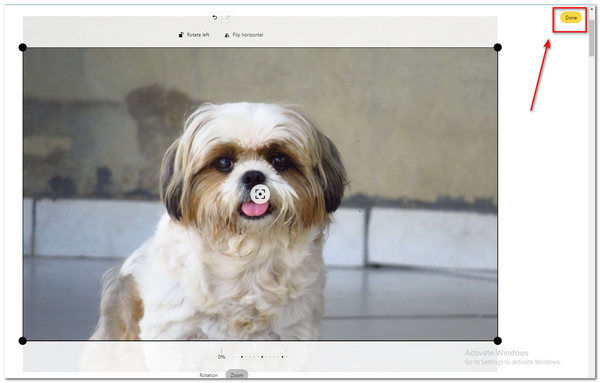
4. Click Done to finalize.
ImgLarger provides a highly tailored experience with its specialized AI modules, making it exceptionally effective for niche tasks like enhancing anime or sharpening specific textures. However, the restrictive credit system and mandatory login create significant friction, making it less convenient than 'plug-and-play' tools like AnyMP4.
Part 6. Make Photos Larger with GIMP
Platform: Windows, macOS, Linux
Price: Free
Supported image formats: BMP, GIF, PNG, SVG, PSD, TIFF, JPEG, TGA
GNU Image Manipulation Program (GIMP) is an advanced image editor. It serves as the premier open-source alternative to Photoshop, offering a professional-grade toolkit at absolutely no cost. Its true strength lies in its extensibility, allowing users to integrate powerful AI upscaling plugins to achieve high-end results without a subscription. Moreover, it is also used mainly by many graphic designers, illustrators, and photographers globally. Also, it is similar to Adobe Photoshop because of its user interface and extra features. The tool is capable of enlarging your image without losing quality. Additionally, you can be creative in using the customization options. Similarly, it has image management features available for digital images. Below are the steps for enlarging the image without losing quality.
PROS
- It has a lot of advanced features as well.
- Can do essential functions of enlarging an image.
- Free to use.
CONS
- Complicated user interface.
- Requires a lot of space on your computer.
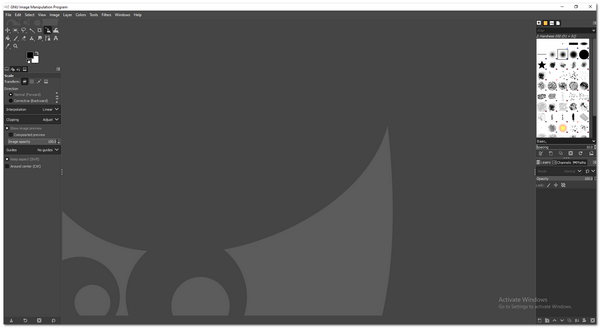
1. Download and install GNU Image Manipulation Program on your PC.
2. Open GIMP. To add your image, select File. Then click Open to import your image.
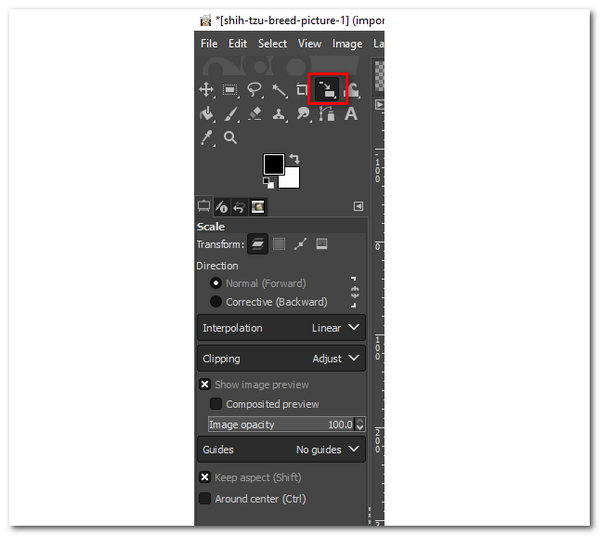
3. On the editing toolbar on the left, select the Scale tool.
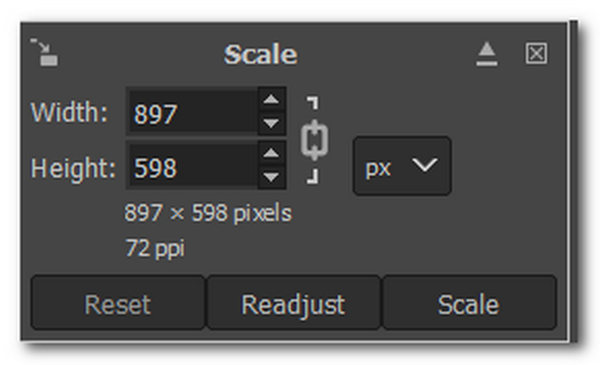
4. To enlarge your image, set the measurements by putting up the values. You also have the option to click Scale to adjust the handles on the image manually.
GIMP is a good free professional tool to enlarge pictures. It includes many AI-powered tools to help you make the picture with better effects. However, its operation differs entirely from Adobe's systems, making it extremely challenging for average users to learn.
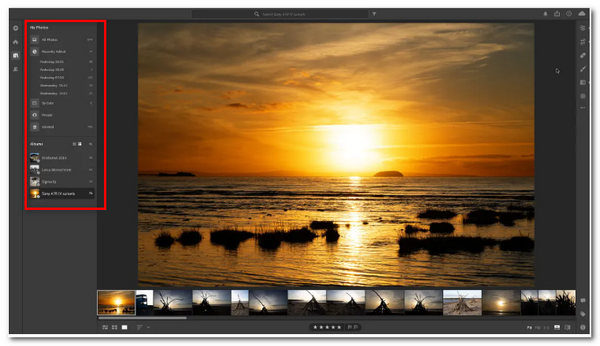
Part 7. Enlarge an Image with Adobe Lightroom
Platform: Windows, macOS
Price: $9.99
Supported image formats: JPEG, HEIF, TIFF, PSD, DNG, HEIC, CMYK
Adobe Lightroom is also a powerful editing software created by Adobe. It is the premier choice for photographers, featuring a dedicated 'Super Resolution' tool specifically optimized for RAW files. It effectively quadruples the pixel count while preserving professional-grade color depth and dynamic range, ensuring your high-end captures remain gallery-ready. Unlike other Adobe tools, Lightroom has the most straightforward interface.
PROS
- The most straightforward user interface to use among Adobe tools.
- Can do basic resizing of images.
CONS
- Limited features because it is not free.
1. Download and install Adobe Lightroom to your PC.
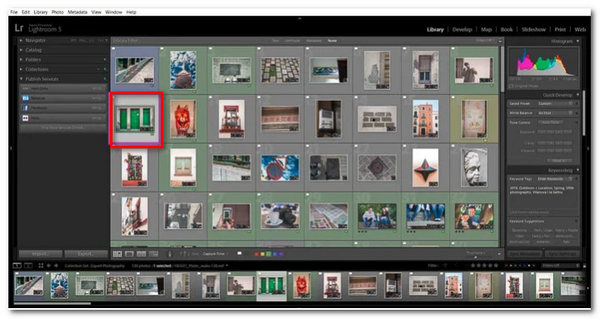
2. You can enlarge your images when they are exported. Go to the Grid mode of the library. Or press the shortcut G. Highlight the image you want to enlarge. Click on the Export button.
3. A dialog box will show. Under Image Sizing, adjust the image resolution. You have the option to put a check on Resize to Fit. This feature will let you enlarge photos in specific measurements.
With this powerful tool, we can enlarge images without simply stretching the pixels. The image quality can be well maintained. The only real catch is that it’s a bit of a format snob - it works wonders on RAW files, but if you try to feed it a heavily compressed JPEG, the results won't be nearly as impressive.
Part 8. FAQs on How to Enlarge Photos Without Losing Quality
How to enlarge a JPEG file?
Open your image file using photo-editing software. Select the Resize option and then enter the preferred size. Save and download your image.
Will my photo become blurry once enlarged?
If you use the right software that you prefer, that cannot happen at all. Some tools can make your photos blurry once enlarged, but most won't.
How can file size affect the quality?
It does not affect the image quality. It only slows down the viewing time for the viewer.
Conclusion
To sum up, enlarging pictures is one way to display them better. The purpose of enlarging is to make our images more visible to viewers who will check our works. Now that you know how to enlarge your pictures, you may try the abovementioned tools. Without requiring many technical skills, you can achieve it.