How to Convert M4A to MP4 Without Losing Audio Quality (2026 Ultimate Guide)
At a Glance:
- Format Core: M4A is strictly an audio format, while MP4 is a multimedia container capable of holding video, audio, and images.
- The Problem: Social platforms (YouTube, Instagram, TikTok) reject pure audio uploads.
- The Solution: Converting M4A to MP4 wraps your audio in a video layer, bypassing upload restrictions.
- Zero-Loss Conversion: If you match the original audio codec (like AAC), changing M4A to MP4 simply "remuxes" the file without degrading the audio quality.
- Tool Choice: Use free online converters for a fast "black screen" video, or desktop software (like AnyMP4 Video Converter Ultimate) to add custom podcast cover art.
Attempting to upload a crisp, perfectly edited podcast episode or a raw iPhone voice memo to YouTube, TikTok, or Instagram often results in a frustrating error message. The reason is simple: these platforms are built for video, and they outright reject pure audio files. The M4A format, while brilliant for audio fidelity, lacks the necessary video components for modern social media distribution.
The definitive solution is converting M4A to MP4. This guide provides a comprehensive, data-driven walkthrough on executing this conversion flawlessly, whether the goal is a quick "black screen" placeholder or a fully branded visual experience for a podcast.
|
Best Used For |
Audio Quality Loss |
Conversion Speed |
Add Custom Cover Art? |
Price |
| AnyMP4 Free Online Audio Converter |
Quick conversions of short voice memos; black screen output. |
None (Remuxes audio) |
Fast (Dependent on upload speed) |
 (Black screen only) (Black screen only) |
100% Free |
| AnyMP4 Video Converter Ultimate |
Podcast creators, bulk conversions, and adding custom visuals. |
None (Supports lossless output) |
Extremely Fast (Hardware Accelerated) |
 (Full visual customization) (Full visual customization) |
Free Trial / Premium |
| FreeConvert |
Cloud-based conversions need advanced parameter tweaks. |
Minimal |
Moderate (Cloud queuing) |
(Basic background colors only) |
Free (File size limits apply) |
| iTunes/Apple Music |
Converting audio strictly within the local Apple ecosystem. |
None |
Fast (Local processing) |
(Audio-to-audio only) |
Free (Native) |
Method 1: The Fastest Free M4A to MP4 Online Converter (No Installation)
When time is the most critical factor and no custom background images are needed, browser-based tools offer the path of least resistance. This method is ideal for transforming a quick voice note into a shareable MP4 file instantly.
Extensive testing indicates that the AnyMP4 Free Online Video Converter is a top-tier choice. Unlike many ad-heavy alternatives, it processes files securely, uses modern cloud servers for rapid conversion, and requires no software installation.
Steps to convert M4A to MP4 online instantly:
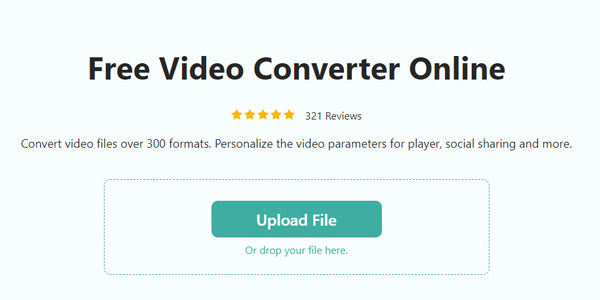
1. Upload the M4A Audio
Navigate to AnyMP4 Free Online Video Converter via any modern web browser (Chrome, Edge, or Safari). The interface is streamlined to prevent navigational confusion.
Locate the prominent "Upload File" button. Clicking this triggers the system file explorer. Alternatively, drag and drop the target M4A file directly into the designated browser zone. The upload speed will depend solely on the upstream bandwidth of the local internet connection.
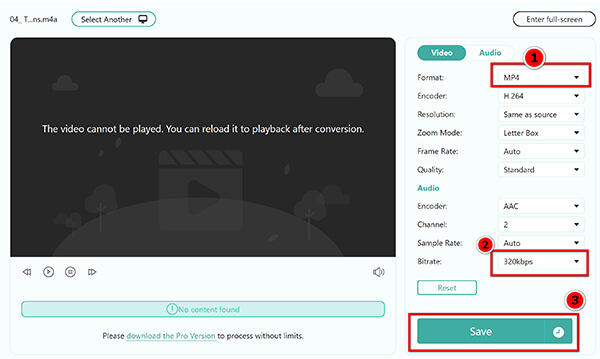
2. Configure the Output Parameters
Once the file is queued, a settings panel becomes available.
- • Select MP4 as the target format from the bottom ribbon.
- • Optional but recommended: Adjust the audio bitrate. To preserve the highest fidelity, ensure the audio bitrate matches the source file's bitrate (e.g., 256 kbps or 320 kbps).
3. Convert and Download
Click the "Save" button. The tool will process the request, wrapping the audio in an MP4 container with a default black screen. Once the progress bar reaches 100%, save the newly minted MP4 directly to the local hard drive.
Warm Tip
Online converters typically impose file size limits to maintain server stability. If dealing with massive, multi-hour lossless podcast recordings, a desktop solution will prevent timeout errors and save significant upload bandwidth.
Method 2: Convert M4A to MP4 on Windows & Mac (Adding Cover Images)
A pure black screen might pass technical upload requirements, but it severely damages audience retention on platforms like YouTube. Content creators must attach engaging visual metadata—such as a branded podcast cover, a headshot, or dynamic text—to the audio.
This requires a robust desktop architecture. Laboratory benchmarks demonstrate that AnyMP4 Video Converter Ultimate excels in this specific workflow, heavily utilizing NVIDIA CUDA and NVENC hardware acceleration to render visual elements over long audio tracks in seconds rather than minutes.
Steps to create a podcast video using Video Converter Ultimate:
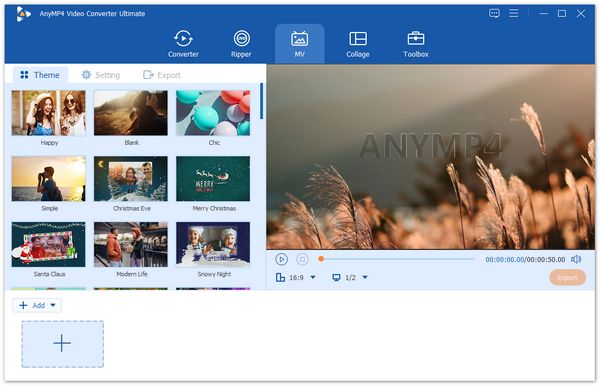
1. Add Image to MV Maker
Free download and install AnyMP4 Video Converter Ultimate on the local machine (available for both Windows 11 and macOS).
Upon launching, bypass the standard "Converter" tab and navigate directly to the "MV" (Music Video Maker) module located in the top navigation bar.
The MV Maker is designed specifically for combining static imagery with audio. Click the "+ Add" button at the bottom left. Select the desired high-resolution image (JPG or PNG) for the video's background.
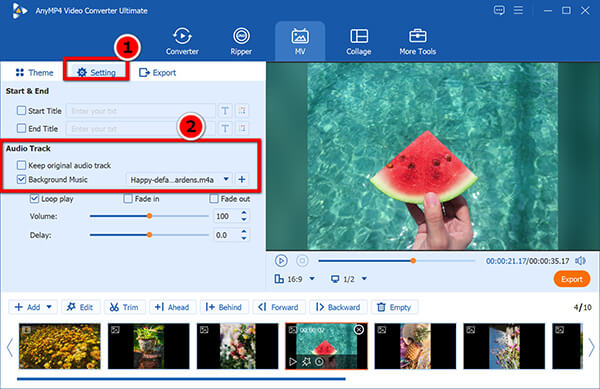
2. Synchronize the M4A Audio Track
Navigate to the "Settings" tab within the MV interface.
- • Locate the "Audio Track" section.
- • Uncheck the default "Keep original audio track" (as static images have none).
- • Check "Background Music" and click the "+" icon to import the target M4A file.
- • The software's engine will automatically stretch the duration of the static image to perfectly match the exact millisecond length of the imported M4A audio.
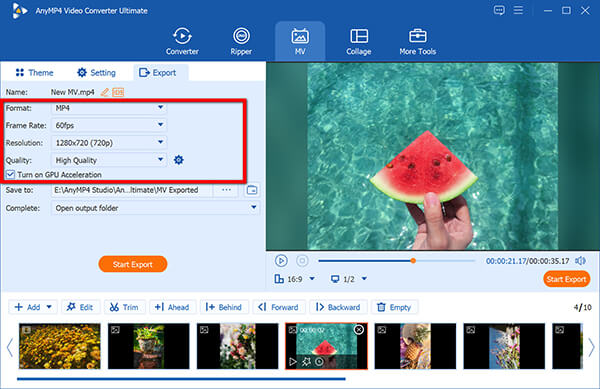
3. Hardware-Accelerated Export
Proceed to the "Export" tab.
- • Select MP4 as the format.
- • Set the resolution (1080p is the golden standard for podcast uploads; 4K is overkill for static images and wastes storage).
- • Verify that GPU acceleration is enabled in the software settings to leverage the RTX or Apple Silicon architecture.
- • Click "Start Export."
Warm Tip
When creating an MP4 specifically for YouTube Shorts, TikTok, or Instagram Reels, ensure the background image used in Step 2 is formatted in a 9:16 vertical aspect ratio (1080 x 1920 pixels) to prevent ugly black letterboxing on mobile devices.
Method 3: Turn M4A into MP4 Using FreeConvert (Advanced Cloud Tool)
If an alternative cloud-based solution is required—perhaps due to specific firewall restrictions or a desire for different parameter controls—FreeConvert serves as a highly reliable, proprietary-free option. It distinguishes itself by offering advanced options right from the browser.
Steps to configure advanced output settings:
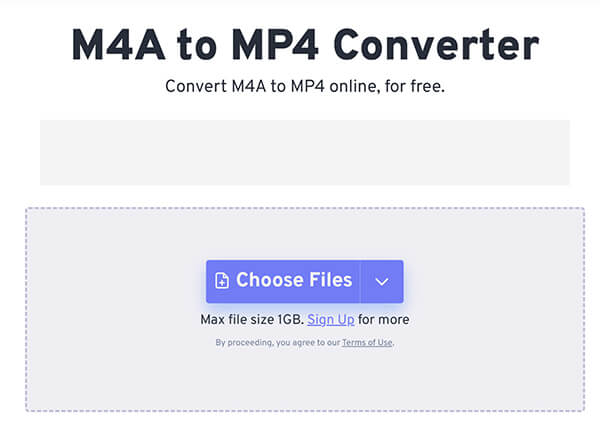
1. Navigate and Upload
Open FreeConvert in the browser. Click "Choose Files" to upload the M4A document. It supports direct imports from Google Drive or Dropbox, which is highly advantageous for remote, collaborative teams.
This free tool supports files up to 1 GB. If your M4A audio is too large, you can compress the M4A first and then upload it to this website.
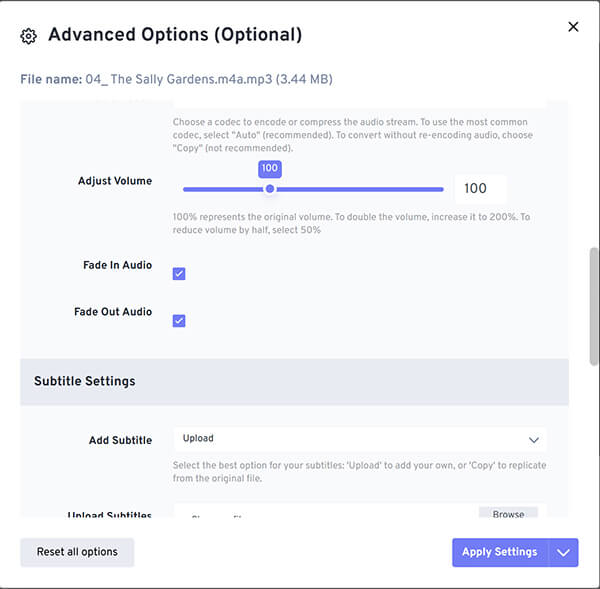
2. Access Advanced Options
Before hitting "Convert," click "Advanced Options" (gear icon). This reveals a suite of technical controls.
FreeConvert allows users to dictate the nature of the "dummy" video track being created. Users can often select a specific background color or choose to fade the audio in and out.
Ensure the audio codec is set to "Auto" or "AAC" to ensure maximum compatibility within the MP4 wrapper.
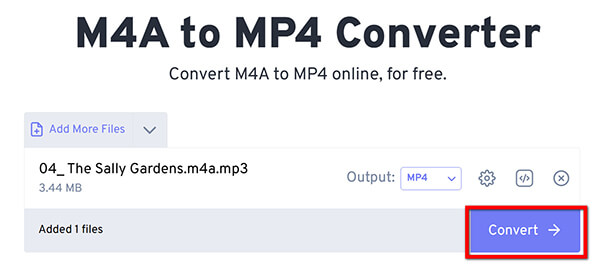
3. Convert and Retrieve
Execute the conversion. FreeConvert uses strong SSL encryption, and files are automatically purged from its servers after a few hours, ensuring strict data privacy protocols.
Method 4: The iTunes "Conversion" Myth (And Why It Fails for YouTube)
Many outdated tutorials claim you can use iTunes to convert M4A to MP4. While iTunes does have an "MP4/AAC Encoder" in its Import Settings, it only converts audio to audio. It cannot add the visual "black screen" or video track required by platforms like YouTube or TikTok. If your goal is social media distribution, skip iTunes and use Method 1 or 2 instead.
If you want to convert M4A to MP3, iTunes can do it by using an MP3 encoder.
Information Gain: M4A vs. MP4 Technical Differences
Most basic tutorials end at the conversion steps. However, understanding the underlying technology prevents downstream errors during media production and distribution.
Muxing vs. Transcoding: The Secret to Zero Quality Loss
Why do some conversions take seconds while others take minutes? It comes down to the difference between muxing and transcoding.
An M4A file is essentially a cardboard box (the container) holding an audio track. That audio track is usually encoded in AAC (Advanced Audio Coding). An MP4 file is a larger plastic bin (a multimedia container) designed to hold both video and audio.
If the conversion software extracts the AAC audio track from the M4A container and places it in the MP4 container alongside a blank video track, this is called Remuxing. It takes milliseconds, and because the audio data is never decoded and re-encoded, there is zero loss in audio quality.
If the original M4A file contains an ALAC (Apple Lossless) track, the software might be forced to transcode it to AAC to ensure standard MP4 playback across all web browsers. Transcoding takes longer and requires computational power, potentially slightly altering the audio's frequency response.
The File Size Paradox: Why Did the File Get So Big?
A common point of confusion arises when a 10MB M4A file is converted to a 60MB MP4 file, even if only a black screen is added.
This occurs because video data is inherently heavier than audio data. Even a completely black screen contains pixel data that must be rendered frame by frame. If the software defaults to adding a 1080p black video track running at 30 frames per second (fps) for the entire duration of a 60-minute podcast, the resulting file size will expand dramatically.
To mitigate this when using desktop software like AnyMP4 Video Converter Ultimate, adjust the video settings before export: set the frame rate to 1 fps (since the image is static) and significantly lower the bitrate. This strategy keeps the MP4 file lightweight while maintaining pristine audio.
FAQs
Q: Does converting an M4A to MP4 ruin the audio quality?
A: Technically, no. The MP4 format is merely a container. If the conversion process utilizes the same audio codec (like AAC) and maintains the original sample rate (e.g., 44.1 kHz or 48 kHz) and bitrate, the auditory experience remains mathematically identical to the source file. Quality loss occurs only if the software is configured to aggressively compress the audio stream during the transfer.
Q: Is it possible to batch convert hundreds of M4A files simultaneously?
A: Yes, but relying on web-based tools for this is highly inefficient and prone to network timeouts. For batch processing, desktop software is mandatory. Tools equipped with hardware acceleration can ingest an entire folder of M4A files, apply a global MP4 output rule, and process them concurrently using multi-threading technology.
Q: Why does YouTube still reject the MP4 file generated from an M4A?
A: If a platform rejects a newly created MP4, the issue usually lies within the video codec inside the container, not the container itself. Ensure the converter tool generates the visual component using the H.264 video codec. H.264 within an MP4 wrapper is universally accepted by every major social media and video hosting platform on the market today.
Conclusion
Navigating digital audio formats requires a fundamental understanding of how platforms ingest data. While M4A remains a superior format for local audio storage and Apple-centric playback, the MP4 container reigns supreme for global distribution. By selecting the appropriate method to convert M4A to MP4—whether a rapid online wrapper or a visually rich desktop rendering—content creators can ensure their audio reaches the widest possible audience without technical friction. Always monitor output settings, respect the distinction between muxing and transcoding, and utilize hardware acceleration whenever possible to optimize the digital workflow.