Recording the screen and webcam separately with OBS provides great flexibility and excellent quality control for post-production of recorded video files. Specifically, this allows you to adjust each element independently, such as size, position, and effects applied to each video. This ultimately enhances the overall quality of the recorded video. This article will guide you through the detailed steps for separately saving webcam video and capturing game footage with OBS. If this is what you are looking for, keep reading!
Sometimes, you may need to record the screen and camera separately for various reasons, such as when manipulating the gameplay and webcam footage independently, applying special effects, optimizing recording settings, backing up files, and so on.
The first scenario is when streaming game content. Recording the gameplay and webcam separately allows you to maintain high-quality gameplay footage while also providing a clear picture-in-picture view to show your reactions. Additionally, you can freely adjust the size and position of the gameplay and webcam footage as needed. Separate tracks make all of this easy and convenient!
Separate applications for screen recording and webcam allow for easy adjustment of each element, such as color correction, sharpening, and other visual effects. This independent recording also simplifies the editing process, making it easier to adjust and apply each special effect.
When recording separately, each source can be recorded at its optimal quality setting without being limited by the processing power required for simultaneous recording. Separate recording also has lower system requirements, thereby reducing resource usage.
If you encounter problems when recording the screen and camera separately (such as freezing, background interference, etc.), your screen recording will be retained and unaffected. Similarly, if there are problems with the screen recording, you can also salvage the webcam recording content, effectively backing up your files.
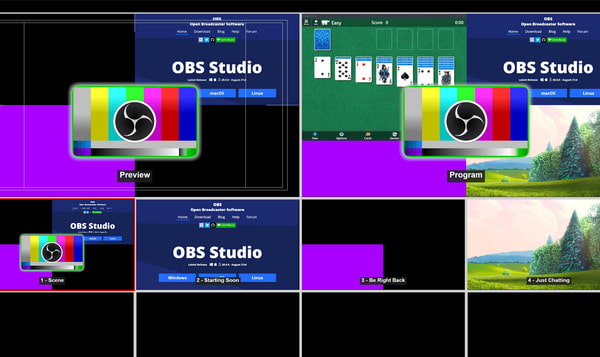
OBS Studio is a program specifically designed for recording and live streaming. It allows you to set up an unlimited number of scenes and add multiple live sources. So, you can use it to add a game source to capture game footage, and then add a webcam to the same scene. Follow the guide below to record the game and camera separately with OBS.
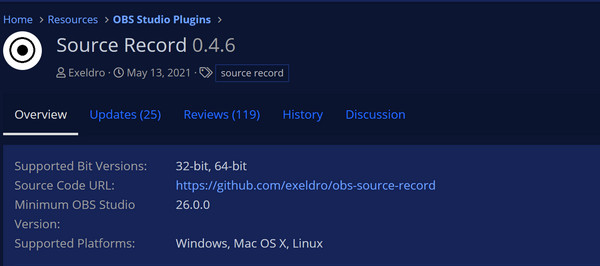
1. Install the Source Record plugin.
Search for an OBS plugin called Source Record in your browser, which is a filter that allows you to record sources. Once you find it, download, install, and add it to your source, then launch OBS.
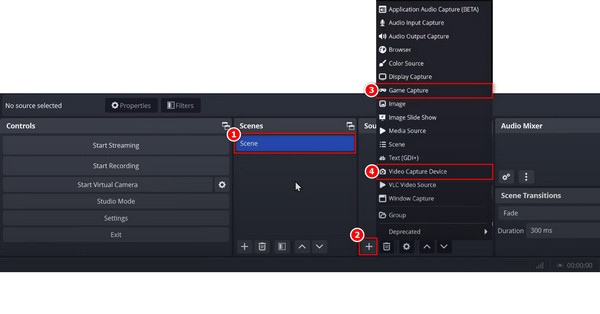
2. Set up your recorded sources in OBS.
Click on the first scene under the Scene tab. Then, click on the plus button under the Source tab and select the Game Capture and Video Capture Device options to set up the game window and camera you want to record.
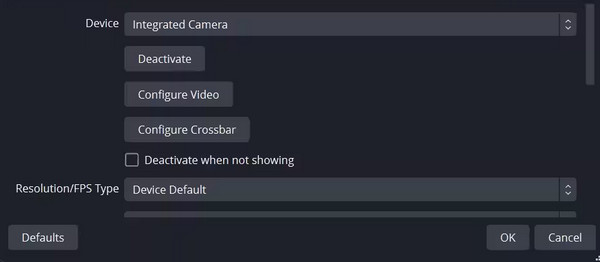
3. Set up your recorded sources in OBS.
Adjust the settings for added sources.
Then, you can adjust settings such as resolution and FPS type in the pop-up window, and adjust the size and position of the webcam according to your preferences.
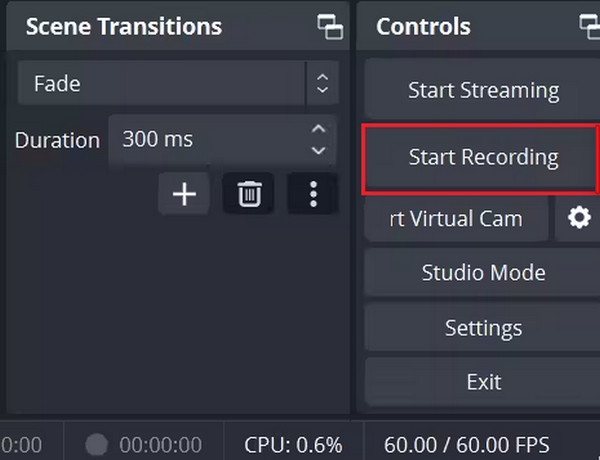
4. Start recording your gameplay and camera.
Finally, click the Start Recording button under the Controls tab to start recording your game and camera footage separately in OBS.
In the previous part, we introduced how to record the game and the camera separately with OBS Studio. Overall, it is a good method, but according to some user feedback, the Source Record plugin that needs to be installed has issues such as not displaying or not running properly in the latest version of OBS. If you have encountered the same problem, in this section, we will use the best screen recording tool to help you record the screen and camera separately.
AnyMP4 Screen Recorder is one of the best third-party screen recorders compatible with Windows 11/10/8/7 and macOS 10.12 and above. When it comes to recording the screen and camera separately, this convenient screen recorder provides you with the best solution. It can record any screen activity, including the desktop, applications, and browser pages. Additionally, it allows you to simultaneously record both the computer screen and the webcam, overlaying your face and video from the webcam recording. Furthermore, it enables you to exclude certain windows and continue recording a specific window or multiple windows in the background without interruption.
Below are the steps for using it to record the camera and screen separately:
1. Download and install AnyMP4 Screen Recorder on your Windows/Mac computer. After installation, launch it, and it will open the Video Recorder mode automatically.
Secure Download
Secure Download
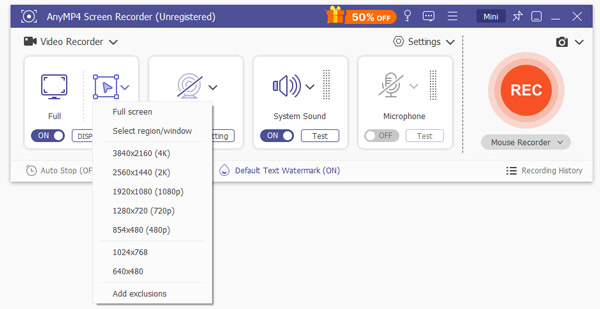
2. Select the area to record the screen. You can select a fixed area from the Custom drop-down list, or select the size by dragging the red dotted box, or directly entering the length and width.
3. Then, click the OFF button below the Webcam to turn it ON, and your computer's built-in webcam will open. Of course, you can also use an external camera to capture video or images.
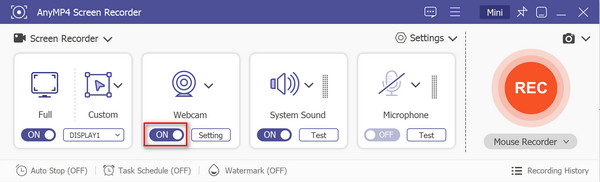
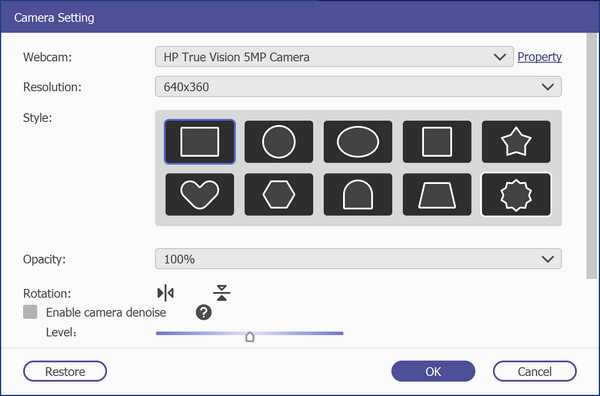
Then you can adjust some settings of the webcam by clicking Settings below Webcam, such as resolution, recording style, opacity, whether to enable camera denoise and its level, etc.
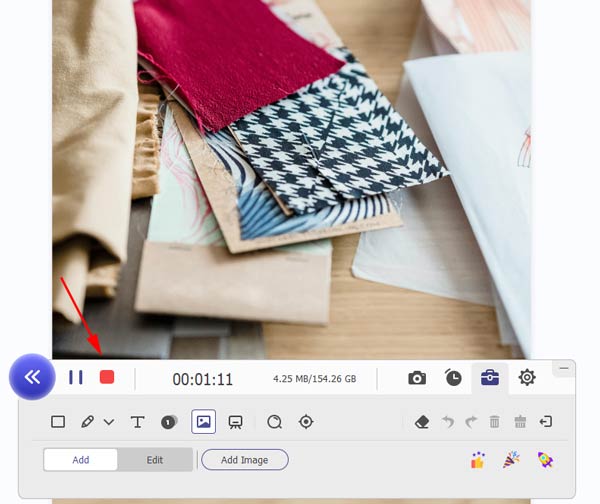
4. After setting the options above, click the REC button to start recording. When you are finished recording, click the stop button to end. Preview and edit the video on the pop-up window (if necessary). The recording file will be automatically saved to your computer.
This article primarily covers how to record your screen and webcam separately with OBS. It is feasible to save webcam videos and capture games or any other computer screen separately using OBS Studio. However, some of the settings for this method may be relatively complex, and there appears to be an issue with the compatibility of a required plugin with the latest version of OBS Studio. Therefore, AnyMP4 Screen Recorder is a good alternative to OBS. Click the download button below to download and try it for free, and we are sure you will be satisfied with it!
Secure Download
Secure Download
 Posted by Riley Mitchell to Record Video
Related Articles
 How to Record Webcam Videos on Windows and Mac
Learn how to record webcam videos with ease. Explore five tools and methods for high-quality webcam recordings in this comprehensive guide.
 How to Record Computer Screen and Audio on Windows PC and Mac
When you need to record the computer screen and audio, you can learn more about the 2 efficient methods to get the desired screen videos as desired here.
 Verified Solutions to Fix Black Screen in OBS Studio When Recording
We did an extensive survey and analyzed why the OBS black screen occurs. This article helps you fix this problem and capture your favorite gameplay.
 Where You Can Find OBS Recording Video Files on PC and Mac
Cannot find the video files after screen recording in OBS? Here is a step-by-step guide to tell you where OBS recordings go on Windows and Mac.