While the daily usage of your iPhone, various search histories gathered on Safari, Google Chrome and apps. For different reasons, you need to clear search history on iPhone or iPad frequently. Do you know how to clear browsing history on iPhone?

Safari or Google Chrome browser provides a convenient way to help you quickly search for and access everything on the internet. But as it mentioned, along with your search, all types of histories, caches, and cookies will be collected with the searching results. To protect your privacy, it’s quite necessary to delete search history on iPhone from time to time. Here in this post, we will show 3 simple ways to help you delete search history on iPhone or iPad.
As an iOS user, you may often use Safari to search for something on your iPhone. So here at the first part, we like to show you a regular way to delete browser history on Safari app.
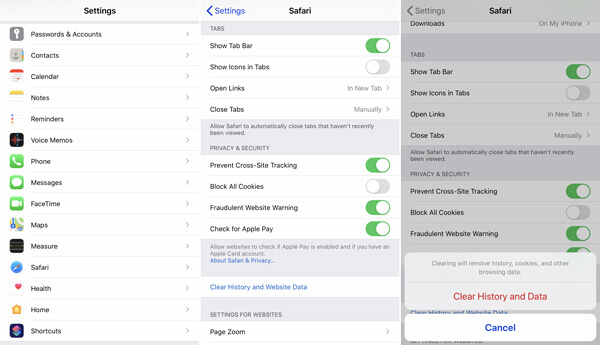
Step 1: Unlock iPhone and go to the “Settings” app.
Step 2: Scroll down until you find the “Safari” option. Tap on it to enter the main settings interface of Safari app.
Step 3: Scroll down and then tap the “Clear History and Website Data” option. There will be a pop-up message prompting that “Clearing will remove history, cookies, and other browsing data”. During this step, you need to tap “Clear History and Data” to confirm the operation of deleting Safari search history on iPhone.
Within just a few taps, you can easily remove the browsing histories, cookies and caches on Safari. It is better to clear your iPhone Safari browsing history in the Settings app instead of the Safari app. Learn more about how to delete history on iPhone.
If you frequently do your searches with Google chrome browser, you can handily remove the search history within the Chrome app. The following guide will show you detailed steps to clear Google search history on iPhone.
Step 1: Turn on your iPhone and go to Chrome app.
Step 2: Tap the (⋮) icon and then scroll down to locate the "Settings" option. Tap on it and will be a new menu with a variety of reset options.
Step 3: Tap "Privacy" > "Clear Browsing History" to clear search history in Chrome browser.
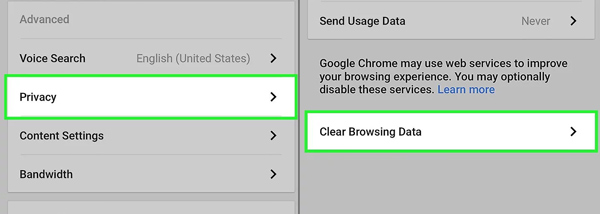
Step 4: Tap "Clear All" option to remove all your browsing data. Here you can also tap "Clear Saved Autofill Form Data" to delete all autofill data.
Secure Download
Secure Download
Besides 2 clearing methods above, you can also choose to uninstall and then re-install Safari or Chrome browser app to quickly clear search history on iPhone. But you should know that there are still ways to restore these deleted search histories. You’d better clear search history and other data permanently if you want to sell the iOS device. Here we strongly recommend a professional iPhone data eraser tool, Tipard iPhone Eraser to help you delete iPhone search history thoroughly. You can free download it from its official site (https://www.tipard.com/iphone-data-eraser/) and then follow the steps below to clear browsing history on iPhone.
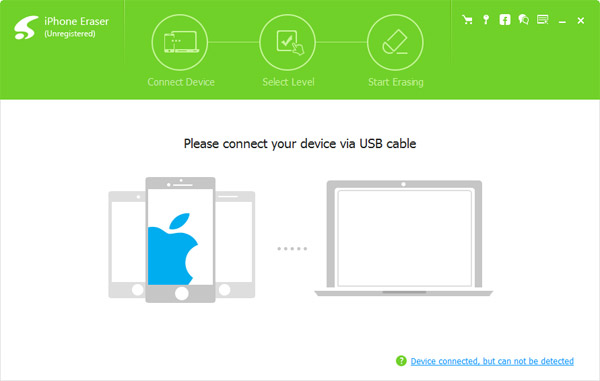
Step 1: After installing this iPhone search history clearing software on your computer, launch it and then connect your iPhone to it with a lightning USB cable.
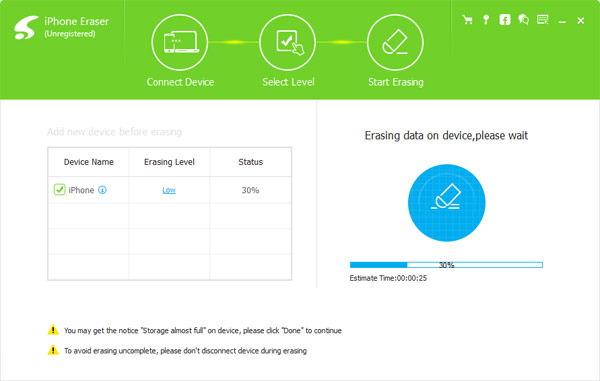
Step 2: When you get to the main interface, select a suitable erasing level. It offers you 3 options, Low, Medium and High.
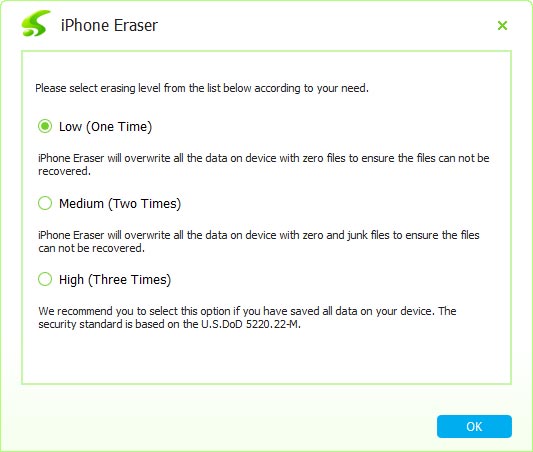
Step 3: Click "Start" button to clear search history on iPhone. During the erasing process, all contents and settings on your iPhone will also be removed at the same time.
We mainly talked about how to clear search history on iPhone in this page. You can get 3 simple and effective methods to delete your iPhone browsing history. You can share it in the comment with other reader if you also have any better idea.
 Posted by Riley Mitchell to iOS Tips
Related Articles
 Record Audio from Web Browser – 3 Best Methods You Should Know
Whether you need to capture audio files from browser, or programs running in computer, you have to record audio from browser, here are 3 frequently used methods you should know.
 How to Recover Call History on iPhone with The Easiest Way
Can't find call history or Face Time history on your iPhone after unintentionally deleting? Go through this article to recover it.
 The Ultimate Guide to Clear All History for Browsers
This post is a full-scale tutorial about how to clear all history and cache in different vision of browsers. Please read on and learn the detailed information.
 How to Delete History on Mac (Safari & Google Chrome)
This is your latest tutorial of how to delete history on Mac. So you can check and clear Safari and Chrome history on Mac easily here.