Google has been leading in visual area for years. However, for ordinary people, Google Photos is an amazing service, which was released in May 2015. Initially, it only can store and backup photos. The service immediately penetrated among smartphone owners, hitting 500 million users in two years. Now, users upload over one billion photos per day.
To meet users’ needs, Google has introduced a photo editor into Google Photos. It means that users are able to process their photos using Google photo editor online or on smartphone. What Google photo editor can do? How to use it? This article will show you the answer in detail.

Key features:
Pros
Cons
Step 1: Open Google Photos and select the photo you’d like to edit. Tap the Edit menu with a slider icon at the bottom to open the photo in Google photo editor screen.

Step 2: There are three options on the bottom menu bar, Filter, Adjustment, and Crop/Rotate. To apply filters on your photo, tap Filter, swipe left and right to find the desired filter and tap it. Tapping Adjustment will open the adjust screen and allow you to modify Light, Color and Pop. The Crop and Rotate option lets you to change the aspect ratio of your picture.
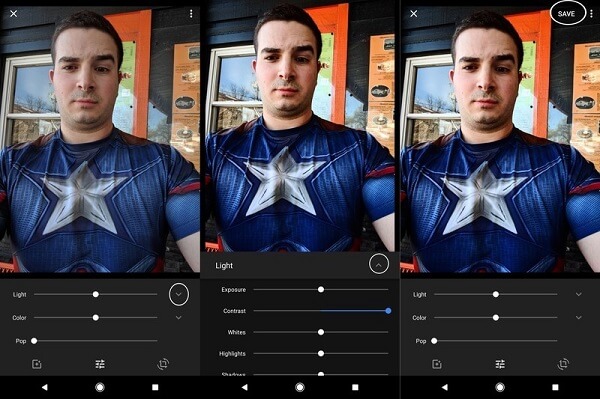
Step 3: Every time when editing is done, tap Save at upper right corner to save the modification.
Step 4: If you want to undo the editing, select the desired photo, tap the three-dot icon and choose Undo edits.
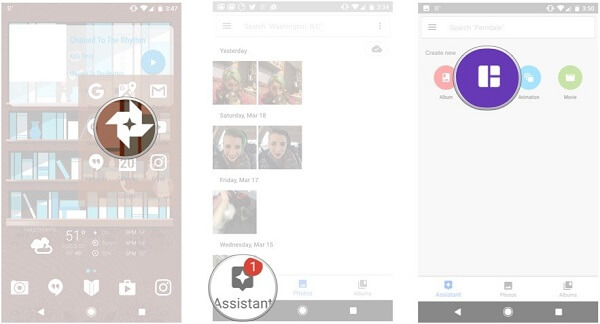
Step 1: Run Google Photos and tap Assistant at bottom of the screen.
Step 2: You will be presented several options, like Album, Collage, Animation, and Movie.
Step 3: Select Collage or Animation based on your need. You will be taken to the photo library. Tap the photos you want to use in the photo collage or animated picture.
Step 4: Once hit Create, the output will be saved to your Google Photos.
1. How to set up Google Photos?
Step 1: Sign in your Google account in Google Photos and select the desired quality settings.
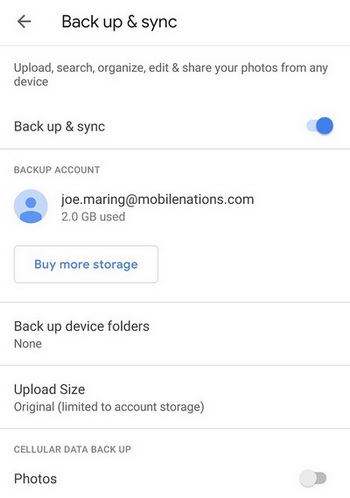
Step 2: Wait for your photos to upload. Then tap the three-line icon at upper left corner, and go to Settings > Back up and sync.
Step 3: Now, you can set up Google photo editor base on your need.
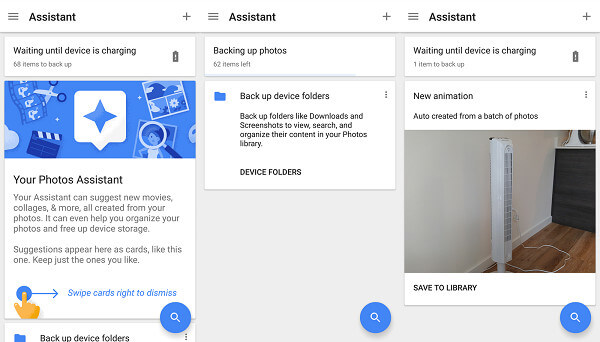
2. What is Google Photos Assistant and how to use it?
The Assistant is one of latest features in Google Photos and Google photo editor. You can find it on the menu bar of the mobile or web app. It has the capacity to show when photos are being backed up, new creations and other notifications. Moreover, it allows you to make collages, animated pictures and movies using your photos.
3. How to back up photos to Google Photos?
Google photo editor is able to back up photos on your device automatically if you have set it up. However, your settings may impact the process.
Step 1: Go to Menu > Settings > Back up and sync > Back up device folders in your Google Photos.
Step 2: Here you can set which folders you want to back up to the service.
Step 3: Locate the Back up and sync screen and tap Upload Size. Now, you can decide to use the unlimited storage or upload photos in the full resolution.
4. How to recover deleted photos from smartphone?
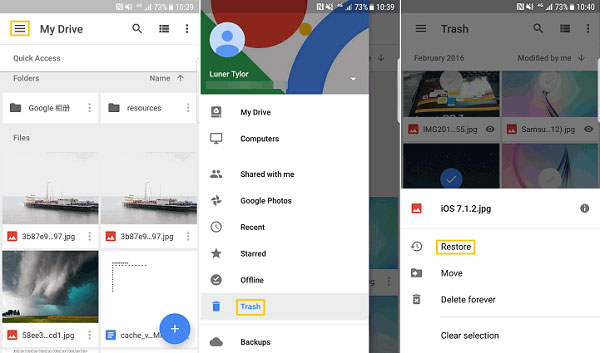
Step 1: Make sure the photo has been deleted less than 60 days. Open your Google photo editor app on your device.
Step 2: Tap Menu with a three-line icon at the top left corner and then select Trash.
Step 3: Touch and hold the photo or video to get back, and tap Restore at the top right side.
Note: If the photo is permanently deleted, you have to use a professional data recovery tool.
Pros
Cons
Secure Download
Pros
Cons
Pros
Cons
This tutorial has showed you what Google photo editor is, what it can do and how to use it. Plus, you can find more photo editing software with unique advantages.
 Posted by Riley Mitchell to Editor
Related Articles
 Top 10 3D Photo Editors for Android/iPhone and Computer Users
By using the best 3D photo editor, you can convert 2D images into 3D or create 3D pictures with your camera.
 Top 10 Black and White Photo Editor Applications for PC and Mobile
Here we list 10 great black and white photo editor applications for you to remove color from your photos.
 Everything You Should Know about Free Microsoft Photo Editor
Microsoft Photo Editor is a simple graphics editor component of Microsoft Office. You can get the introduction, review, how-to and top alternatives to Microsoft Photo Editor in our post.
 Top 6 Online Photo Editing Software like Photoshop (Free and Paid)
Are you looking for a professional photo editing software to edit and modify your photos online? Let's take a look at some of the best online photo editors in detail.