The backward video effect has become one of the most powerful and eye-catching tricks on social media platforms like TikTok, Instagram, and YouTube Shorts. This creative effect turns ordinary videos into captivating clips that instantly grab attention. If you're wondering how to reverse a YouTube video to create a stunning rewind effect, you're in the right place. In this guide, we’ll explore three main methods to reverse a YouTube video. This includes online tools, desktop/professional software, as well as all-in-one solutions. By the end, you’ll know exactly which method suits your needs.
| AnyMP4 Video Converter Ultimate | Adobe Premiere Pro | Ezgif | Kapwing Reverse Video | |
|---|---|---|---|---|
| Best For | High-quality and long video reversal | Reversing video with maintained audio | Flexible video reversal | Reversing video clips quickly |
| Platform | Windows and Mac | Windows and Mac | Web | Web |
| Cost Model | Price starts at $18.75 | Price starts at $20.99 | Free | Price starts at $50 |
| Max File Size / Length | No file size limit | 3.9 GB for videos up to 60 seconds long | 200MB | 6GB |
| Audio Reversal | ||||
| Portion of Video You Can Reverse | Entire Clip or Trimming Segment | Entire Clip or Trimming Segment | Entire Clip | Entire Clip or Trimming Segment |
| Watermark on Free | ||||
| Free Trial/Version Available | ||||
| Quality/4K Support | Up to 8K | Up to 4K | 720p | 4K |
AnyMP4 Video Converter Ultimate is a highly recommended, beginner-friendly desktop software to reverse a YouTube video. This all-in-one media software bundle is fully compatible with both Windows and Mac. In addition to its primary function, media conversion, it is equipped with a Media Toolbox. This toolbox kit boasts more than 20 essential tools for editing, including the Video Reverser. It allows you to achieve a video backward effect with minimal intervention. It enables you to reverse the video sequence or apply a flip effect to a selected segment. It supports MP4, MKV, MOV, AVI, WMV, and over 500 other media formats. It can also export reversed videos at up to 4K resolution.
1. Get started by securing the free download of AnyMP4 Video Converter Ultimate. Install the desktop video reversal software and complete the setup process. Once the installation is finished, open the software to begin the video reversal.
Secure Download
Secure Download
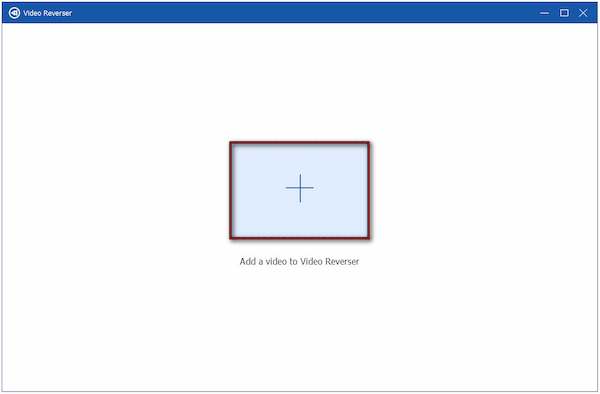
2. From the moment it loads, the Converter tab is your default pre-selected destination. Navigate to the More Tools tab and choose the Video Reverser from the list of tools. In the Video Reverser window, click the big Plus to add the YouTube video you want to reverse.
3. Use the Set Start and Set End boxes to define the exact portion you want to reverse. To reverse the entire clip, simply select the full duration. After setting your desired segment, click Export to generate your reversed YouTube video.
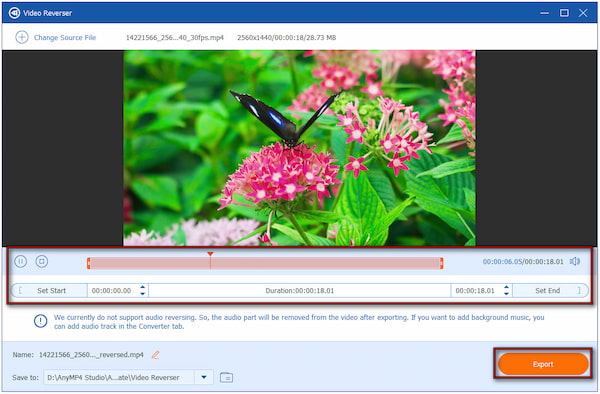
Important Note: The Video Reverser currently does not reverse the embedded audio. If you need to reverse the sound, you can manually import or edit the audio later.
AnyMP4 Video Converter Ultimate provides a straightforward solution to reverse high-quality, long clips. This software guarantees you can achieve a rewind video effect with up to 4K resolution. Additionally, it features a real-time preview window, allowing you to instantly view how the reversed motion appears before saving.
Adobe Premiere Pro, part of the Adobe Creative Cloud suite, is a robust video editing software. It includes a reverse video feature, allowing you to backwards videos from YouTube. It gives you full control over playback speed, direction, and audio behavior.
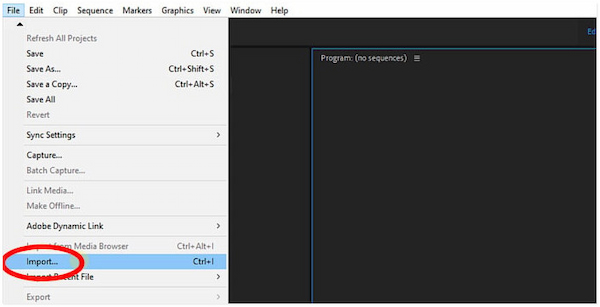
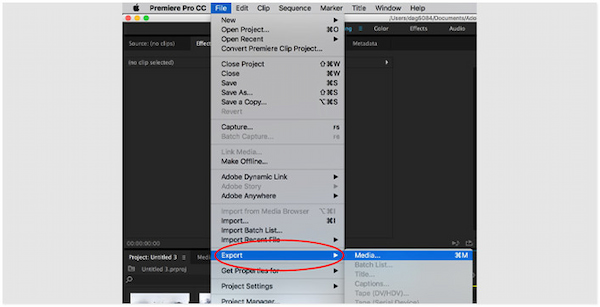
1. Open Adobe Premiere Pro, navigate to the File menu, and select Import. Once the video has been added, drag it from the Project panel onto the Timeline to begin editing.
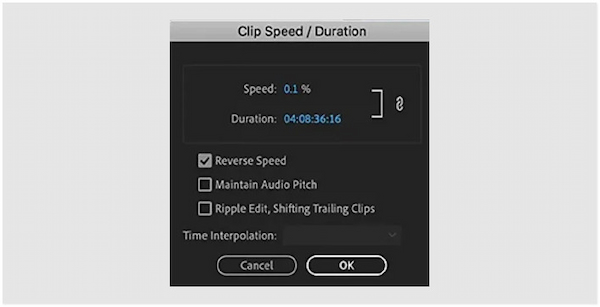
2. On the timeline, right-click the video clip and select Speed/Duration from the context menu. This is the control center for reversing and adjusting playback speed.
3. In the Speed/Duration dialog box, tick the Reverse Speed box to flip the video direction. Adjust the Speed (%) setting to control the speed at which the reversed video plays.
4. Premiere Pro provides Time Interpolation tools to ensure your reversed clip plays smoothly:
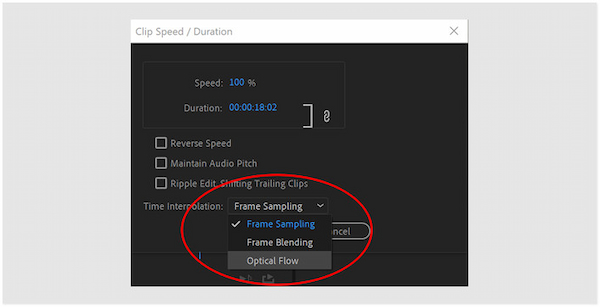
Frame Sampling: Adds or removes frames when you change the clip’s duration.
Frame Blending: Smooths motion by blending adjacent frames for a more fluid playback experience.
Optical Flow: Generates extra frames for ultra-smooth slow-motion reverse effects.
To keep the audio sounding natural, select Maintain Audio Pitch in the Speed/Duration menu. This helps preserve sound quality even if the speed has been altered.
5. Once your reversed video looks the way you want, proceed to the File menu. Select the Export option and click Media to choose your desired export settings.
That’s how to reverse a clip in Premiere! Adobe Premiere Pro is a powerful tool to create rewind video clip effects. This professional desktop software lets you fine-tune every detail to achieve high-quality results. However, it requires time and patience to master fully.
Ezgif is a free browser-based tool primarily known for its GIF and video editing tools. As a basic video editing tool, you can use it as a YouTube video reverser. It supports many common formats, including MP4, WebM, AVI, MPEG, MKV, and more.
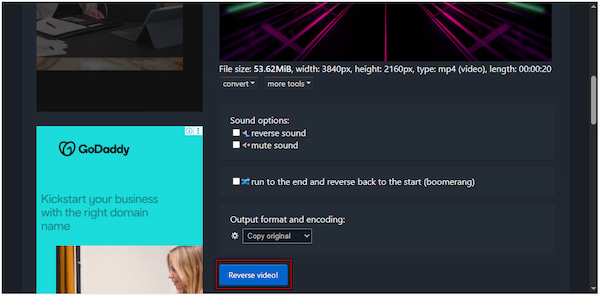
1. On the Ezgif homepage, click the Choose File button to load the YouTube video. Alternatively, you can drag and drop the clip or paste a video URL directly from YouTube.
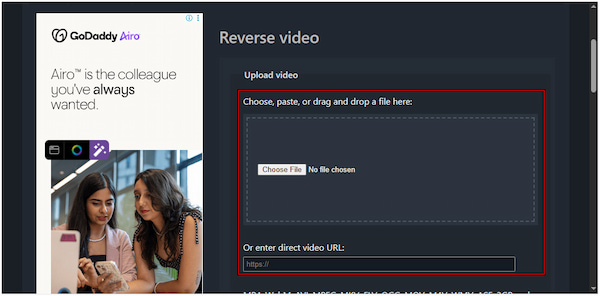
2. Once your video has been uploaded, scroll down and click the Reverse Video button. Ezgif will automatically process your clip and generate a reversed version.
Ezgif stands out for being free, browser-based, and an easy-to-use tool to rewind YouTube videos. However, the tool has slower processing for long or large video files. Additionally, very large clips may fail to upload and take longer to render.
Kapwing Reverse Video is another internet-based tool you can use to reverse videos on YouTube. It allows you to reverse the motion of a video, so that everything plays backward. It supports videos saved locally, pasted from a URL, or imported from cloud storage.
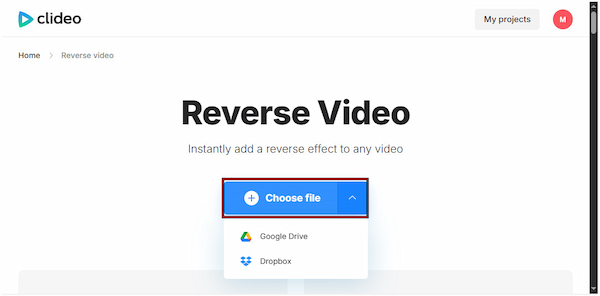
1. Navigate to the Kapwing Reverse Video site and click Choose a Video to upload the video. Alternatively, you can paste a YouTube video URL to import the clip automatically.
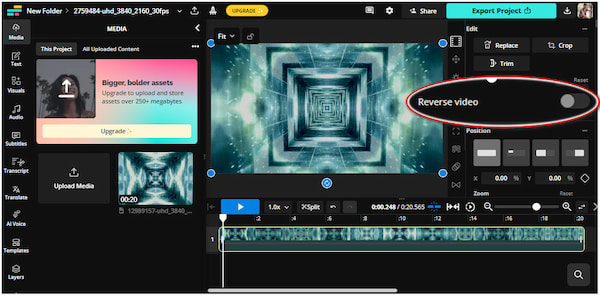
2. Once your video has loaded into the Kapwing editor, locate the Reverse button. Toggle the Reverse switch to turn your video into a backward-motion clip.
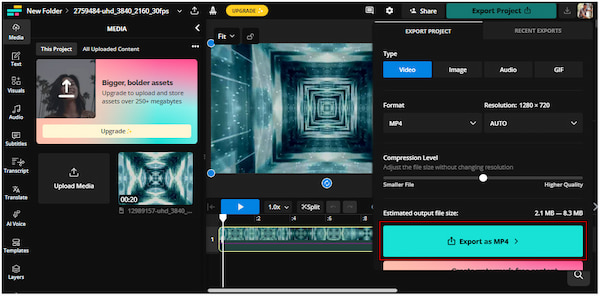
3. Once the video is reversed, click the Export Project button. Specify your file type, format, and resolution, and click Exports as [Format] to download the reversed video.
Kapwing Reverse Video helps you instantly apply a rewind effect to your YouTube videos online. However, the free plan limits the export resolution to 720p. Additionally, watermarks appear on exports, which are only removed once you upgrade your membership.
Can I reverse a YouTube video without downloading it first?
No, you can’t reverse a YouTube video directly without downloading it first. Most online tools or editors require the video file to be uploaded to their platform for processing. However, some tools let you paste a YouTube URL to automatically fetch the video.
Does reversing the video also reverse the audio?
Yes, when you reverse a video, the audio track is also reversed. This means that any dialogue, sound effects, or music will play in reverse. Some software, such as Adobe Premiere Pro, allows you to maintain the audio pitch after reversing it to make the sound more natural.
Will reversing a video cause quality loss?
Yes, it can cause minimal quality loss, depending on the tool you use and the export settings. Online tools often compress videos during upload and export, which can reduce their resolution. Meanwhile, software like AnyMP4 Video Converter Ultimate allows you to retain original quality.
Is it legal to reverse and re-upload someone else's YouTube video?
Reversing and re-uploading someone else’s YouTube video can violate copyright laws. Copyright protects the creator’s original work, and simply reversing the footage doesn’t make it your own. To stay safe, always check the video’s license or use your own clips.
Mastering how to reverse a YouTube video is one of the most creative ways to make your content stand out and captivate your audience. Whether you use an online tool or desktop software, there’s a tool available for you. However, if you're looking for an all-in-one solution, AnyMP4 Video Converter Ultimate is the best choice. It allows you to reverse, edit, and enhance videos effortlessly, all in one powerful desktop tool.
Secure Download
Secure Download
 Updated by Mark Cristobal to Edit Video
More readings
 How to Reverse a Video on CapCut in One Minute [Updated]
Learn how to reverse a video on CapCut with this easy-to-follow guide. Our detailed guide works for both desktop and mobile apps to create engaging edits.
 How to Reverse a Video in DaVinci Resolve: Complete Guide
Do you want to learn how to play a clip in reverse in DaVinci Resolve? Read this article for a complete guide on how to apply this effect using two options.
 Easy Guide to Reversing Videos Online with Kapwing
By reading this guide, you will learn how to use Kapwing to reverse videos online to get your video to play backwards.
 How Do You Reverse a Video in iMovie for Mac and iOS
Learn how to reverse videos in iMovie with the help of our detailed tutorial guide on using the video editor on Mac and iOS to apply video reverse adjustments.