If you want to learn if iMovie is suitable as a movie editing software, you're in luck, as the free video editing software for Apple devices is specially designed for beginner-friendly editing. In this article, we will provide a detaield guide to help our readers learn how to edit a video in iMovie by featuring the program’s top video editing features, quick guides about essential video editing skills, and an alternative software for users who want to try a third-party video editor also designed for ease of use.
When it comes to video editing features, iMovie Video Editor is equipped with essential options to help its users easily apply adjustments to their video editing work with iMovie. For an overview of these essential editing features, we have provided a summary of five key editing options in the program.
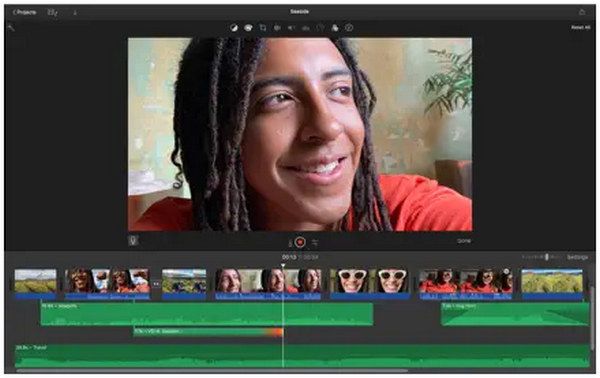
Although iMovie was developed to be a beginner-friendly editing tool, the software was still optimized to be suitable for experienced video editors. Due to this design principle, a timeline-based editing window is used in the software. This industry-standard interface made editing video in iMovie viable for all skill levels, from novice to advanced.
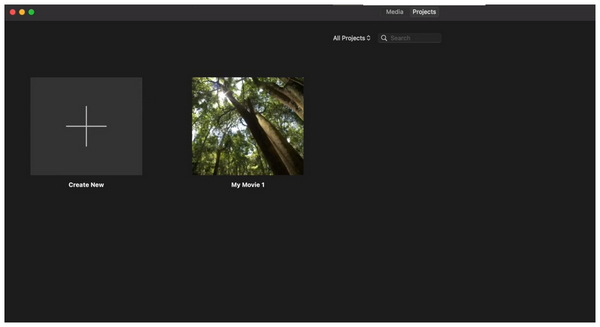
For an easier time creating video projects, iMovie offers a seamless project creation menu that allows its users to save previous and future works saved in the software's memory. This made editing multiple projects a smooth and organized process.
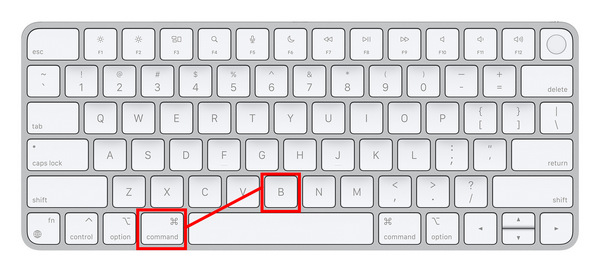
To make editing videos easier, the video trimming feature in the iMovie editor was designed to be user-friendly and optimized for beginners. In fact, multiple options are available if you want to trim videos. The simplest among them is the Command + B shortcut.
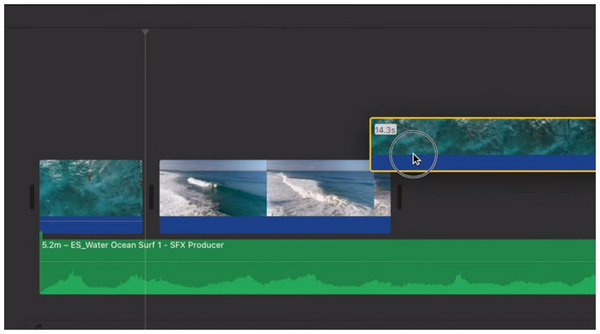
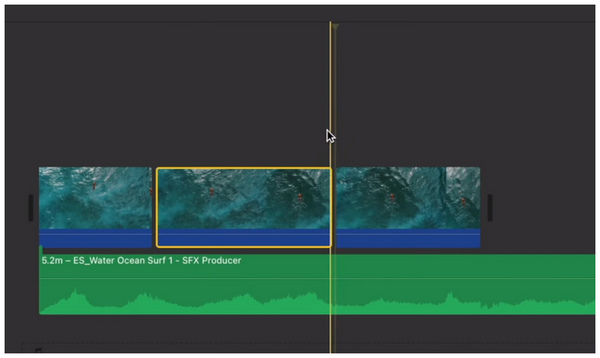
In relation to video trimming and splitting, arranging clips is also designed to be simple in the program. Once you have clipped a portion of the video, simply arrange it by dragging the video to another section of the editing timeline. These easy-to-use features make it simple to edit in iMovie.
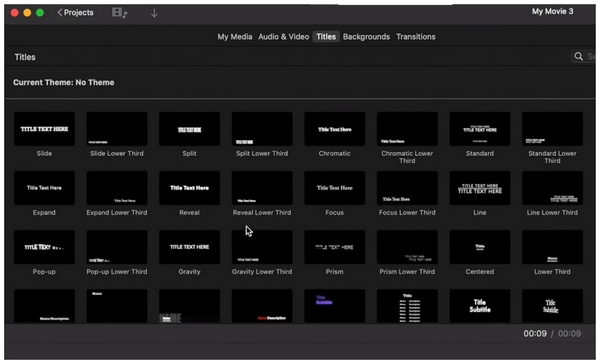
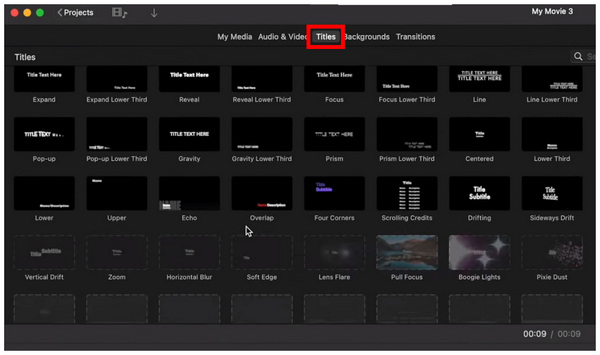
Finally, text overlays are also easily added in the program. A wide selection of titles can be chosen in the software to select the design of the text overlay that you will add. Once these overlays are included in the timeline, you can easily change the text written in the video.
With the features of the iMovie video editor now highlighted, let's proceed to the detailed, step-by-step guides on how to use the essential editing features available in the software.
One of the essential video editing skills is learning how to trim videos in the editing timeline. Fortunately, this editing skill may be done using multiple options in iMovie. Since using the clip command is the most accessible, it will be the highlight of our video trimming tutorial.
1. Select the video in the editing timeline that you want to trim. Make sure to position your cursor in the part of the video that you want to cut.
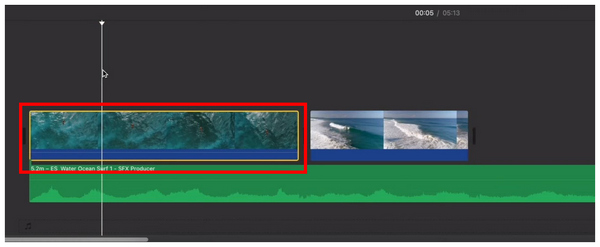
2. Once your cursor is set in the part of the video that you want to trim, press the shortcut Command + B on your keyboard.
3. Once your video has been trimmed, you can now move the trimmed video into the timeline. Next, click on the trimmed portion of the video and then press Delete to remove it from the timeline.
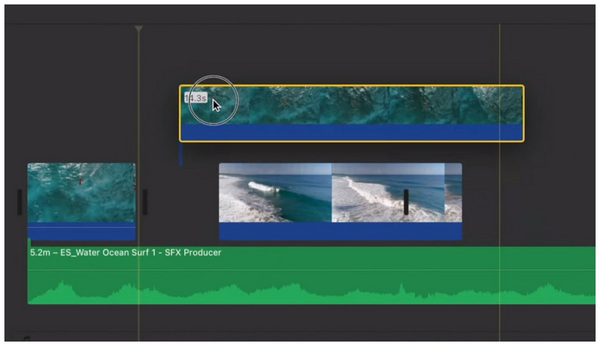
In addition to the keyboard shortcut option, users can also use the video duration slider when clicking on the video to trim its duration. However, this is less accurate than the proposed keyboard shortcut trimming.
To improve the informative content of your video, adding text is a good step. Fortunately, adding text in the iMovie editor is straightforward. To learn how, please read our quick guide below.
1. Click on the Titles tab of the video editing window. Then, choose the template you want to use for your text overlay.
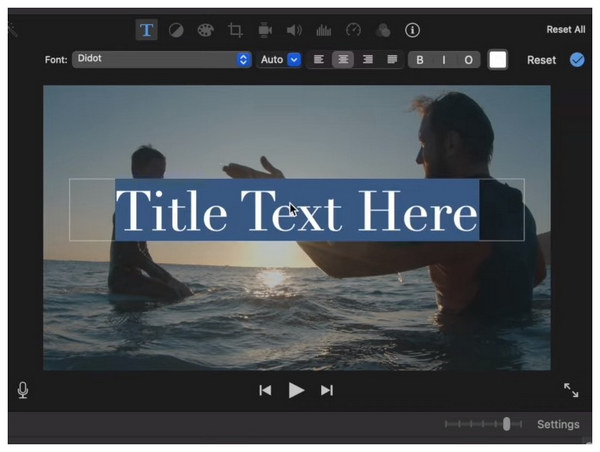
2. Next, click and drag the selected template to the video editing timeline. Place it on top of the video clip.

3. Click the Text Box in the video preview window to access the text editing options for the text overlay that you added.
Due to the wide selection of text templates, it is recommended to select only the text design that is applicable to the type of video you are editing. Keep this in mind when learning how to edit on iMovie on Mac.
Since video enhancement is the skill with the highest ceiling among video editors, learning the basic options such as color balance, video filters, and color corrections is essential to make minor but noticeable adjustments to your projects.
For a quick overview of using this feature, please read our guide below.
1. Click on the Titles tab of the video editing window. Then, choose the template you want to use for your text overlay.
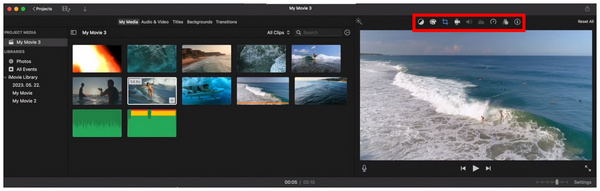
2. After choosing an adjustment option, multiple advanced tools will be available. These adjustment options will vary based on your selected editing option.
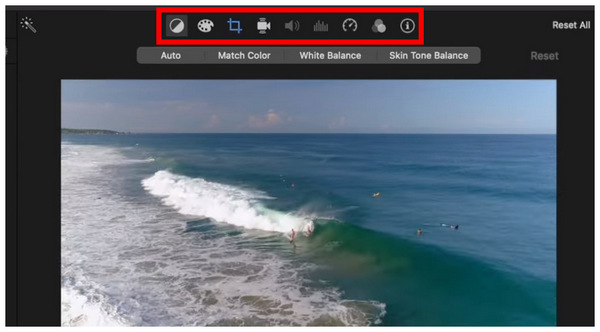
3. For an easier time enhancing your video, select the Auto option to automatically improve the video quality using the software's preset settings.

Since video enhancement is the most advanced skill among video editors, our recommendation for this section is to explore and experiment with the available adjustment tools in iMovie, based on your preferences for video quality. These video enhancement tools are also important to learning how to edit vertical videos in iMovie.
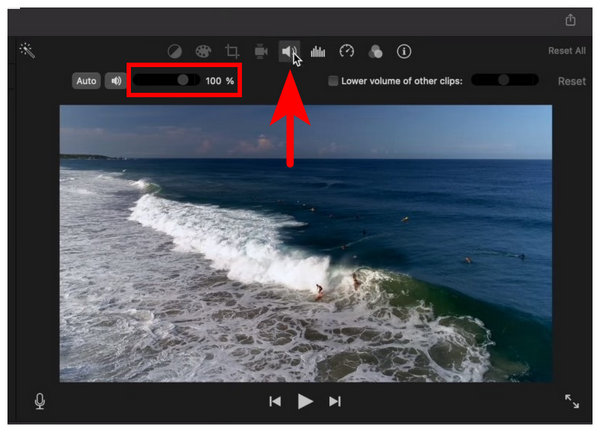
When editing videos, audio quality also holds high importance. With that in mind, video editors using iMovie should also learn how to edit audio in the software. Fortunately, it is also simple to do. To learn how, please continue reading below.
1. To change the volume of the clips in the editing timeline, select the Volume icon in the preview window. Then, adjust the slider to edit the audio of the videos in your editing window.
2. To edit background noise, click on the Equalizer icon in the preview section. Then, click on Reduce Background Noise to enable it. Adjust the slider to edit the intensity of the background noise reduction effect.

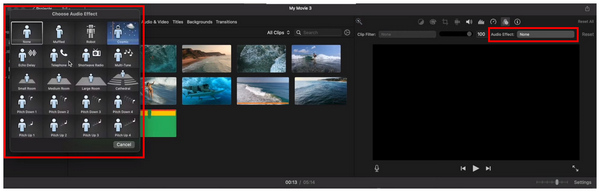
3. To add audio effects, click on the Filter icon in the preview section. Then, click on Audio Effect and choose the effect you want to use in the menu that will open.
Although audio enhancements are equally important, editing them at the basic level is slightly easier than editing videos. This is because audio enhancement tools are readily available in iMovie.
With these features now discussed, labeling the easy-to-use nature of iMovie as a double-edged sword might be reasonable. This is because the software compromised its more advanced capabilities to make it suitable for beginner use. For example, using iMovie as a 4K video editor is now impossible due to the software's technical limitations. You cannot edit 4K videos in iMovie.
Now that we have highlighted the features of iMovie, the lack of advanced editing tools in the program is an apparent compromise to make it easier to use. If that trade-off is not worth it for you, an equally beginner-friendly video editor with more advanced editing capacities might be a better option. With that in mind, AnyMP4 Video Converter Ultimate should be one of your top considerations.
Available on both Windows PCs and macOS platforms, this multimedia processing software was designed to be flexible, allowing for multiple video-related adjustments. These include the video format converter, as its name suggests, as well as a fully functional video editing tool.
Equipped with multiple video, audio, and image editing tools, the software was designed to provide for the diverse needs of its users. Some tools available in the program include the Video Compressor, Video Trimmer, Video Reverser, Video Watermark Remover, Video Cropper, and Noise Remover tools.
In addition to the practical tools mentioned, a fully functional MV editor feature is available in the software. This supports the addition of video theme templates, video trimming tools, video filters, and audio adjustment options on the go.
For improved accessibility, the MV editor feature supports a flexible option of video formats, including MP4, MOV, AVI, MKV, and more.
To learn how to edit video in AnyMP4 Video Converter Ultimate, please read our detailed guide below. Don’t forget to download the program for an easier time following our tutorial.
Secure Download
Secure Download
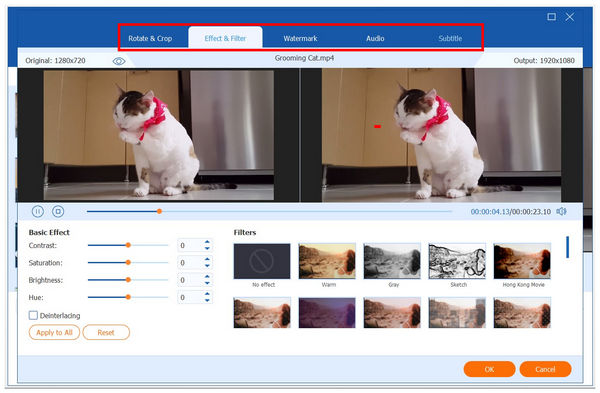
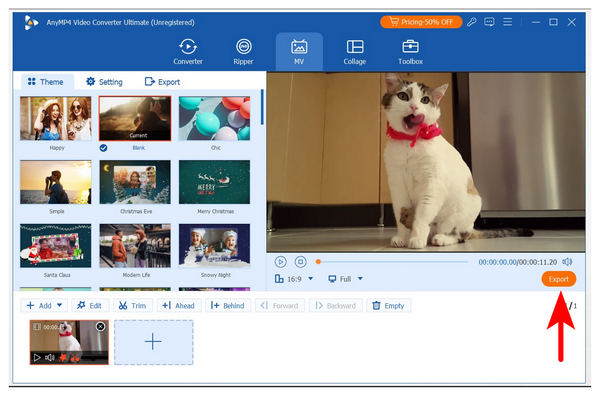
1. Open AnyMP4 Video Converter Ultimate and go to the MV Editor tab. Then, click on the Add Button to import the video you want to edit. After importing the clip, you can click the Edit or Trim options to make these adjustments to the video.

2. Inside the Edit tab, you can apply multiple editing tools, including Rotate and Crop, Effects and Filters, Watermark, Audio, and Subtitle adjustments.
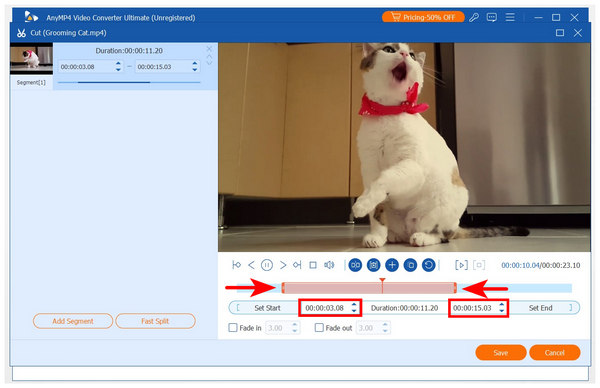
On the other hand, selecting the Trim tab will open the video trimmer section. Simply adjust the video sliders in the menu to trim the imported video. You can also edit the Start and End timestamps of the video clip specifically.
3. Once these adjustments are applied, close the editing menu and return to the MV Editor tab. Then, click on Export to save the edited video on your computer.
Although the MV Editor feature is an added tool in AnyMP4 Video Converter Ultimate, it was designed to be a capable video editing tool that can compete with other video editors, such as iMovie, in terms of ease of use and accessibility.
Now that we have provided you with a detailed guide on editing videos with iMovie and its alternative, we hope that the guides provided in this article will prove useful for your next video editing projects. For an easier time with video editing gigs, consider using the free video editing software in AnyMP4 Video Converter Ultimate, available for download using the link below.
Secure Download
Secure Download
 Posted by Angelica Liwanag to Edit Video
Related Articles
 How to Add Subtitles in iMovie on Mac and iPhone
Want to learn how to make subtitles on iMovie? This article is made for you since we will discuss five simple steps to learn how to use iMovie to add subtitles.
 Ultimate Guide to Use VLC to Crop Videos [Best]
Can I crop MP4 video in VLC? How do I crop and save a video in VLC? Can VLC resize video? Learn how to crop, resize or zoom video in VLC media player.
 Kapwing Video Editor Review, Is It A Good Video Cropper
Is the cropping feature in Kapwing Video Editor user-friendly? Check the answer from the review and get more alternatives to crop videos online and offline.
 How to Make 3D Films on Final Cut Pro 3D Editing
Can you compress a large video file in Dropbox? This article answers the question in detail and help you to reduce video file size easily on desktop or online.