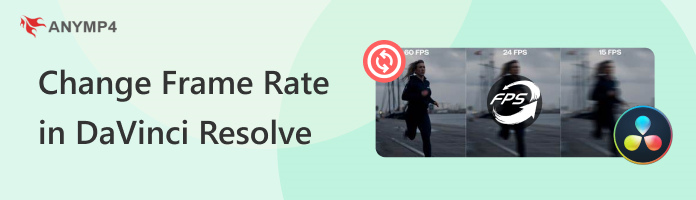
How to Change Frame Rate in DaVinci Resolve: A Full Guide
DaVinci Resolve slowly emerged in recent years as one of the most reliable video editor software programs for graphics-heavy projects. Although it is famous for VFX editing, it remains a standalone video editor, with fundamental editing options still available. In this article, we will provide detailed guides on how to change the frame rate in DaVinci Resolve, covering multiple options within the program. We will provide a step-by-step guide on how to change the video frame rate within the project settings, timeline, and individual clips. Moreover, we will also explore simple tips to resolve common frame rate issues, as well as an alternative video editor that is more accessible than DaVinci Resolve.
Part 1. What is Frame Rate (FPS)
Before proceeding to our guides, let us first discuss what Frame Rates are and how important they are when it comes to video editing. First, the most important factor that frame rate adjustments affect is the smoothness of the video, together with more advanced effects such as motion blurs. Generally, a higher frame rate results in a smoother-looking video.
Since frame rates are equal to the number of frames per second (FPS), a 60 FPS video will have 60 frames per second, and the same is true for other common FPS values, from 50 FPS, 30 FPS, and 24 FPS. To provide an exact visual example of how FPS works, movies and series are typically recorded at 24 FPS, while video games operate at a range of 30 FPS to 60 FPS.
With that in mind, let us now proceed to the guides on adjusting FPS in DaVinci Resolve, which cover the different FPS adjustment options within the program, including Project Frame Rate, Timeline Frame Rate, and Clip Frame Rate.
Part 2. How to Change Project Frame Rate in DaVinci Resolve
We will start this guide by featuring the solution to change Frame Rates in DaVinci Resolve before creating a project. Since the program offers an option to change the frame rate of projects themselves, setting the FPS of your video before starting the project is the most practical option.
To learn how to do this, please follow our three-step guide below.
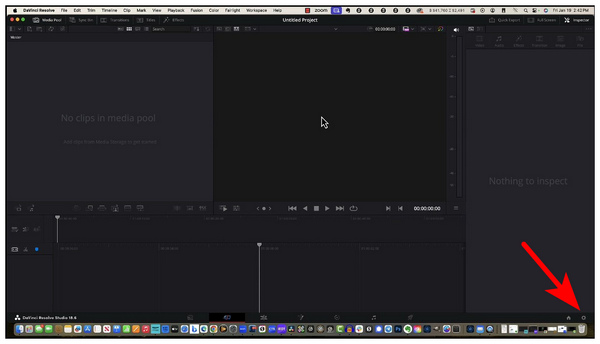
1. Open DaVinci Resolve and then create a new project by selecting the New Project option.
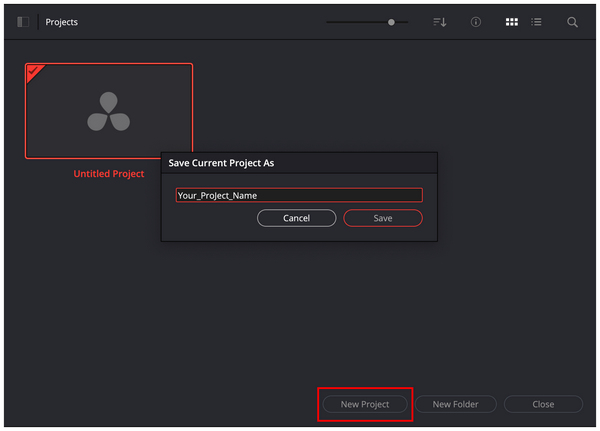
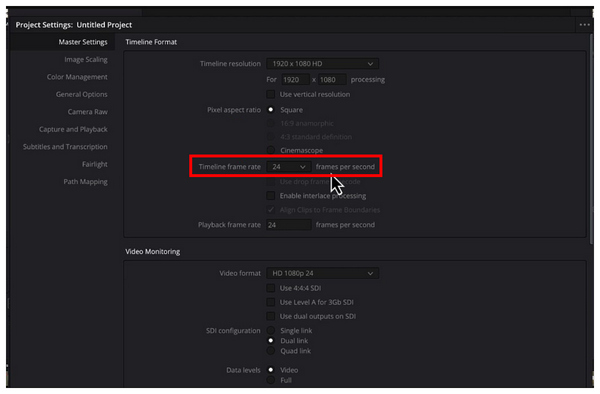
2. After opening the new project, click on the Settings in the lower right section of DaVinci Resolve’s editing window.
3. In the settings that appear on the screen, select the Timeline Frame Rate tab and choose from the available frame rate options.
Since DaVinci Resolve is designed to save previous projects, edited outputs that are already imported may still have their frame rate changed if the steps above are used before importing the project again.
Part 3. How to Change Timeline Frame Rate in DaVinci Resolve
Similar to Project Frame Rate, Timeline Frame Rate also works by changing the frame rate of the entire video editing project. However, changing the timeline frame rate after the entire project is more challenging than setting the project frame rate alone.
You need to create a new timeline with a brand new template to change the frame rate of the entire timeline that you are editing. To learn how to adjust the timeline frame rate, please refer to our guide below.
1. In DaVinci Resolve’s editing menu, click on the Media Pool tab and then right-click on it. Hover on the Timelines and then select Create New Timeline from the menu.
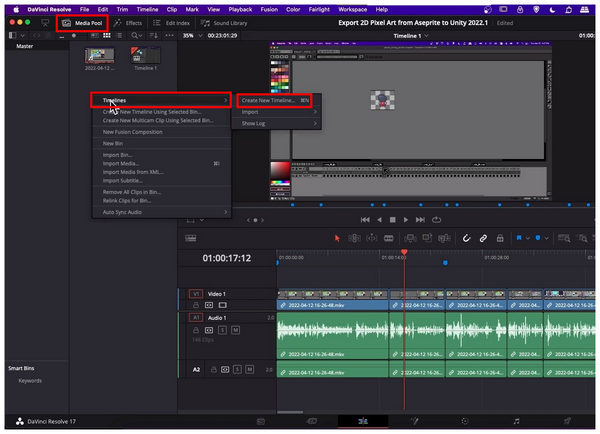
2. In the new timeline creator menu, uncheck the Use Project Settings option.

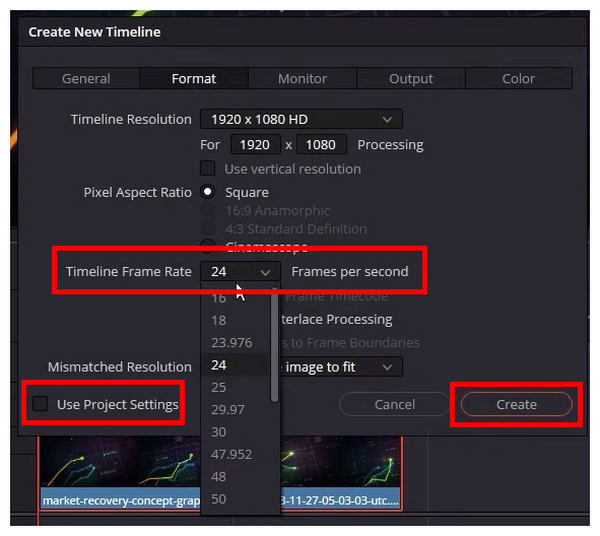
3. Then, go to the Format tab and change the Timeline Frame Rate. After setting the frame rate to your desired value, click Create.

4. Once the new timeline has been created, go to the old timeline you are using, then use the Ctrl + A shortcut to select all the editing elements. Press Ctrl+C to copy the elements.
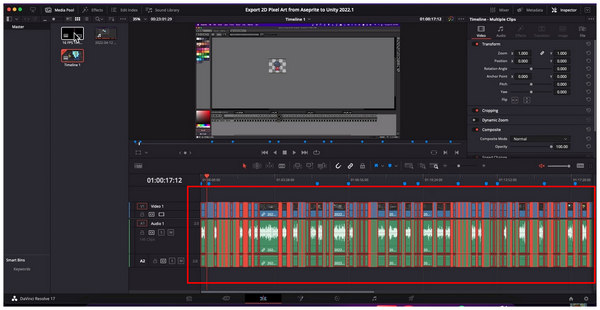
5. Go to the new timeline that you have created and then press Ctrl+V to paste the elements from the old timeline.
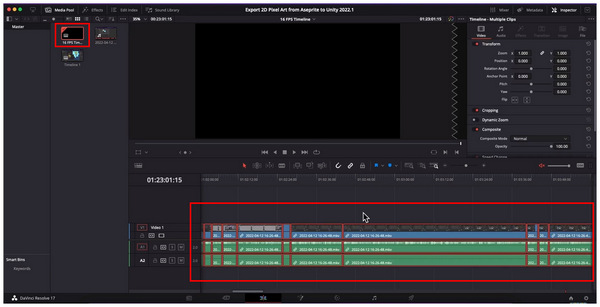
Since changing timeline settings is not possible for a project with numerous resources, creating a new timeline is the most efficient solution. This is due to the advanced editing options in the program, such as DaVinci Resolve freeze frames and advanced visual effects settings.
Part 4. How to Change Clip Frame Rate in DaVinci Resolve
Finally, changing the frame rate of a single clip will be the last option in this guide, as it is the most unlikely scenario that may occur during the editing process. This is because it is more practical to change the frame rate of projects in bulk in the DaVInci Resolve video editor timeline.
Despite that, learning how to change the frame rate of specific clips is still important to learn. With that in mind, the three-step tutorial below will guide you through this process.
1. Select the single or multiple clips that you want to adjust the frame rate of in your editing timeline.
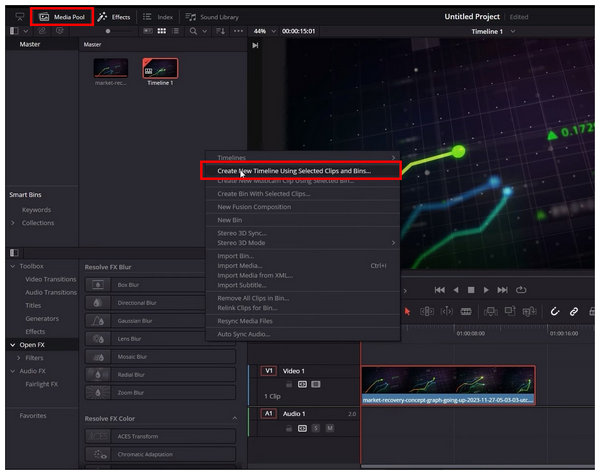
2. Once the clip you want to change is selected, go to the Media Pool and right-click on it. Select the Create New Timeline Using Selected Clip and Bins option.
3. In the Create Timeline menu, uncheck Use Project Settings and click on Format. Then, change the Timeline Frame Rate to your desire value.
After creating the new timeline, the video clips that you have selected will be automatically imported into the custom timeline that you created.
Part 5. Common Frame Rate Issues and Troubleshooting
Timeline Frame Rate is Greyed Out
The Timeline Frame Rate in the project settings can only be edited during the initial setup of the project. If you attempt to change this value after editing elements have been added, you will be unable to change the timeline frame rate. You need to create a new timeline to adjust the frame rate of an editing project with numerous elements.
Playback Stuttering and Frame Rate Drops
Playback stuttering may occur if your editing work involves a lot of demanding effects. These performance indicators typically indicate that your hardware may not be sufficient to handle the media you are editing.
Audio Sync Issues
Audio sync issues are one of the most common errors of frame rate adjustments. To fix this, you can use the Time Stretch option or the more straightforward Change Clip Speed, although the latter is less accurate.
Part 6. Best DaVinci Resolve Alternative to Change Video Frame Rate
Since DaVinci Resolve is an advanced video editing program, changing frame rates on it may be challenging for beginner editors. If that is the case, using an automated framerate option is more advisable, and AnyMP4 Video Converter Ultimate is exactly that.
With the help of the program’s MV Editor feature, converting videos to various frame rates, including the commonly used 24 FPS, 30 FPS, and 60 FPS, as well as more unconventional options, can be done within a few clicks. Additionally, the program's resolution support is also superb, as it can process videos up to 4K or 8K quality while maintaining efficient conversion speeds.
Finally, the tool also offers more advanced features for users, including video adjustments, file compression, functional video editing, and even AI-powered video enhancement options.
With all these bonus features out of the way, let's now proceed to the tutorial on how to use AnyMP4 Video Converter Ultimate to adjust the frame rates of videos edited within it.
We recommend downloading the program first for a smoother experience following the guide.
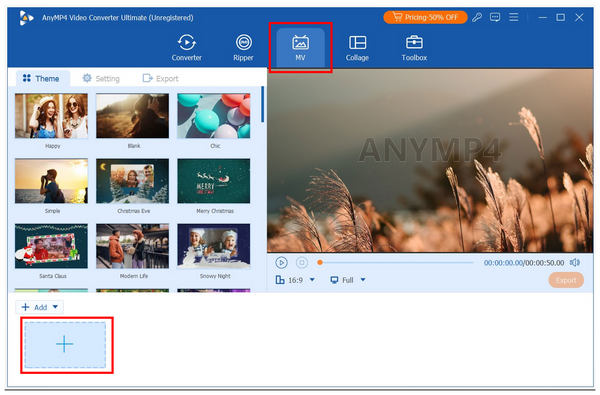
1. Open AnyMP4 Video Converter Ultimate and go to the MV Editor tab. Then, select the Add Media icon to upload the video you want to edit.
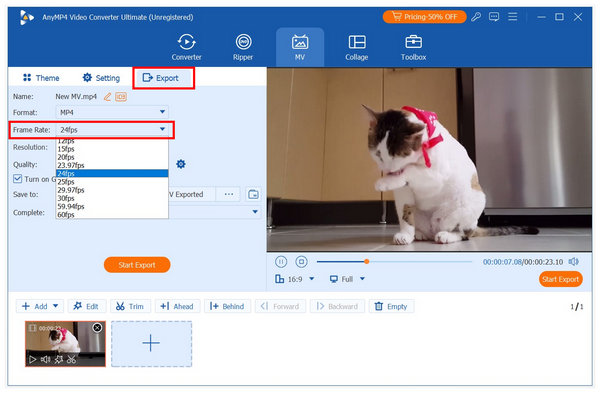
2. After importing the video you want to edit, navigate to the Export Settings and select the Frame Rate option. Then, choose the frame rate value you want to use.
3. Once your selected Frame Rate has been set, simply click Start Export to start saving the frame rate-adjusted video to your computer.
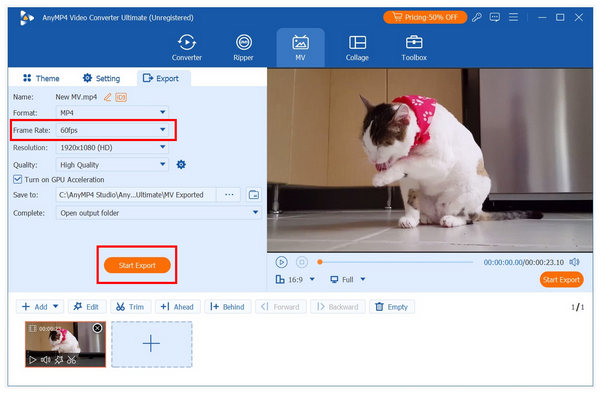
After the exporting process, AnyMP4 Video Converter Ultimate will automatically redirect you to the location of the edited video. You will now be able to watch the clip with adjusted frame rate instantly.
Conclusion
Now that we have provided you with multiple options to change frame rate in DaVinci Resolve, alongside an easier alternative that can also do so, we hope that this article has helped you learn how to use the advanced video editing program of DaVinci Resolve. However, if you prefer an alternative option, be sure to consider AnyMP4 Video Converter Ultimate.