The limited internal storage is the main reason that you need to transfer photos from Android to computer. Today, we have become comfortable to record wonderful moments with photos using our smartphone. Soon, our mobile devices are full of photo files and no space for new data. The solution is to back up these photos to computer and then delete them on Android phone. We share 5 ways to do it in this article.
AnyMP4 Android Data Backup & Restore is a powerful way to transfer pictures from Android phone to computer. No matter you need to sync all photos or select pictures, it can meet your demand simply.
Apparently, it is the fast way to transfer photos from Android to computer.
Secure Download
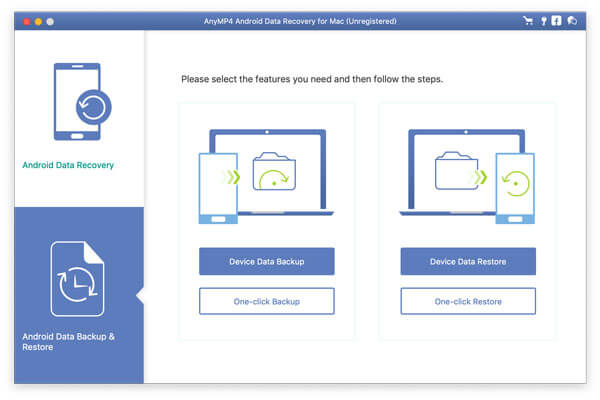
Step 1. Get the Android photo transfer
Firstly, you need to download the Android photo transfer tool and install it on your computer. Then launch it from your desktop and connect your Android phone to the computer with a USB cable. It will recognize your device immediately.
Tip: Turn on the USB Debugging mode on your Android.
Step 2. Transfer photos from Android to computer
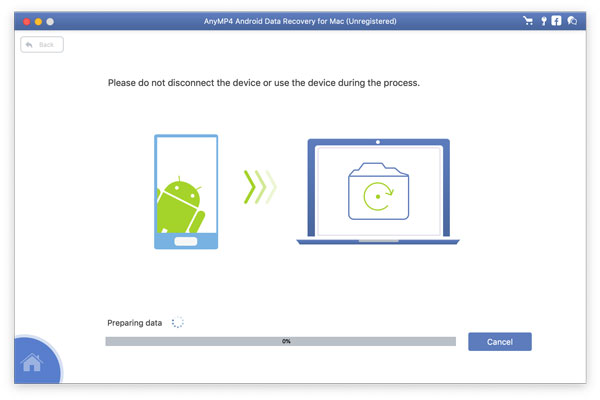
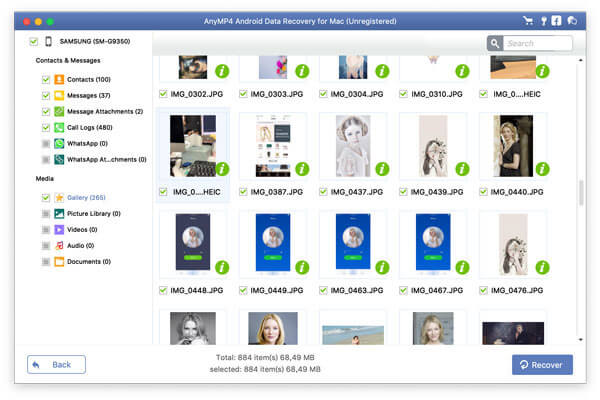
Click the Device Data Backup button in the home interface, and then select Gallery under the Media section on the Data type window. Once click the Start button, your photos will be transferred from Android to PC in a few minutes.
Step 3. View Android photos on PC
When it is done, you can open the backup file within the software and view Android photos on your computer at any time.
USB cable may be the easiest way to transfer photos from Android to PC. It does not require extra software or hardware except a USB cable. However, this way is not available to all Android devices.
Step 1: Turn on your phone and enable the USB Debugging mode in Settings app.
Step 2: Then connect your phone to the computer with a USB cable. If prompted, trust the computer.
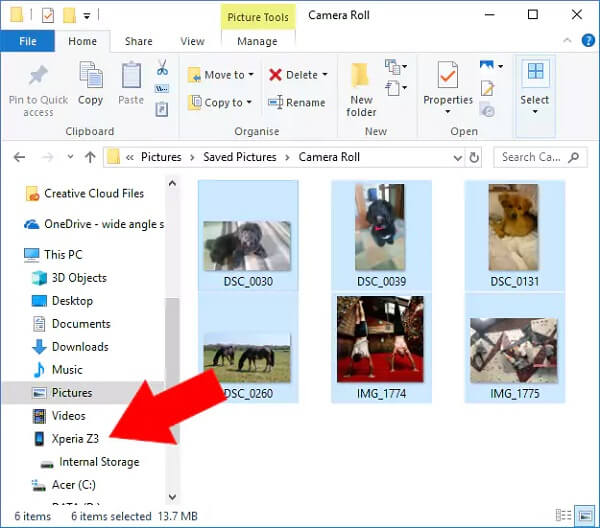
Step 3: Open an Explorer window, find your phone and go to the DCIM folder, which is used to store photos on Android. Then all you need to do is select the photos and transfer them from Android to computer.
Google Drive is a data manager service available to most Android devices. If you have the Google Drive app on your Android phone, it is a good way to transfer photos from Android to computer.
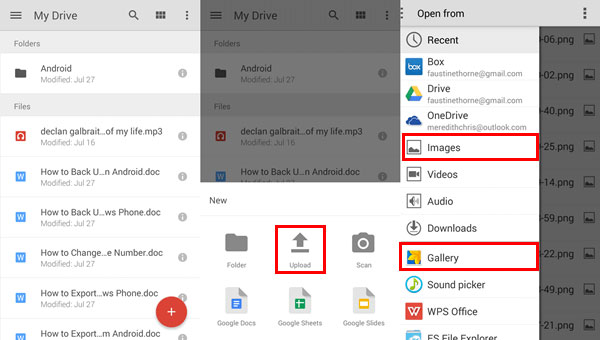
Step 1. Run the Google Drive app from app tray and sign in your Google account.
Step 2. Tap the Plus icon and choose Upload -> Image or Gallery to access your photo gallery. Select the photos that you wish to transfer to your computer. Hit Done to start uploading.
Step 3. Now, turn to your computer, open Google Drive in your browser and sign in the same account. Then download the Android photos to your PC.
Note: In addition to Google Drive, Google Photos is another data manager service dedicated for photos and videos. It works similar to Google Drive when it comes to transfer photos from Android to PC.
If you just want to transfer several photos from Android to PC, email is one of your options. People usually sign in email account on their Android device to check and access quickly, like Gmail, Outlook, and more. They are all available to photo transfer.
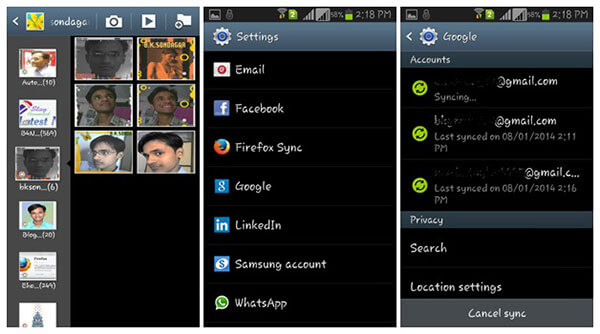
Step 1. Go to your Gallery app and select all photos you wish to sync.
Step 2. Tap the Share icon on the top of the screen, select Email and choose your email address to create a new mail.
Step 3. Enter your email address in the To field and tap the Send icon to email Android photos as attachment. Then you can download these photos to your computer later.
Note: Email provides have maximum attachment size for each mail. Gmail, for example, allows you to send a mail up to 25MB. Make sure your photos are not larger than the limit.
Some people use SD card on their Android phones to extend the internal storage. In fact, it is fast way to transfer photos from Android to computer.
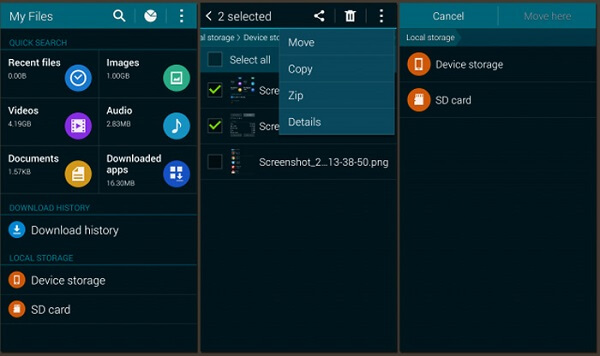
Step 1. Firstly, you need to move your photos from Gallery to SD card. If you set SD card to store your photos, skip this step. Go to your Gallery app, select all photos you want to sync, tap More -> Move and select SD card.
Step 2. Take out the SD card from your phone and insert it into your computer.
Step 3. Open an Explorer window, access the SD card, and copy and paste the Android photos to computer.
Note: This way does not require Wi-Fi network or extra software; however, SD card is vulnerable. Once it is damaged, your photos will be lost forever.
Conclusion
This article tells you 5 ways to transfer photos from Android to PC or Mac. These ways are available to most Android devices, such as Samsung Galaxy S8/S7 and more. To sync several photos, email and cloud services are good options. If you want to transfer entire photo gallery from Android to your computer, AnyMP4 Android Data Backup & Restore is the best option. It is not only easy to use, but also able to do it in a single click. You can pick up your favorite method based on your situations. More questions? Please write down in the comment area.
 Posted by Ted Klarso to Mobile Transfer
Related Articles
 6 Quick Ways to Transfer Contacts from Android to iPhone 17/16/15/14/13/12/11/XS/XR
Do not know how to move contacts from Android to iPhone? This post gathers the top 6 methods of syncing Android contacts to iPhone 14/14 Plus, 14 Pro, 14 Pro Max, 13, 13 Pro, 13 Pro Max, 13 mini, 12 Pro Max, 12 Pro, 12 mini, 12, 11 Pro Max, 11 Pro, 11, XS, XR, X, 8 (Plus), 7 (Plus), 6/6s (Plus), etc.
 4 Ways to Transfer Videos from PC/Mac to iPhone with/without iTunes
Wondering how to transfer videos from PC/Mac to your iPhone? In this post, we will show you 4 easy-to-use methods to transfer videos efficiently on PC and Mac.
 A Step-by-step Guide to Transfer Messages from iPhone to Android
Transferring messages from iPhone to Android phone or tablet does involve a few steps, but it's not complicated. If you're making the switch, here is a step-by-step guide.
 How to Transfer Data Between Android and iPhone with Top 5 Software
How to transfer data from iPhone to Android or from Android to iPhone? Here are 5 ways of moving files between iPhone and Android with top 5 applications to make it with/without computer.