Free Download100% Clear & Secure
Free Download100% Clear & Secure
A watermark on YouTube videos is a customizable square image that creators can overlay in the bottom-right corner of their videos. It may appear to be just a simple logo, but it is actually an interactive tool. Creators typically use it for several reasons: branding, copyright protection, and subscriber growth. This article will cover the two best methods for adding watermarks to YouTube videos and provide additional tips. Now, let's read on if you are interested in this topic!

There are three types of watermarks for your YouTube content, each serving distinct purposes, such as boosting viewer engagement and enhancing content protection.
1. Branding watermark (via YouTube Studio).
This is the official method provided by YouTube. It is an interactive overlay that sits on top of your video player. On the desktop, this watermark is clickable. When viewers hover over it, a Subscribe button appears, allowing them to follow your channel without pausing or leaving the video.
2. Custom watermark (during Video Editing).
This is a static graphic or text watermark added to your video during the editing process, before you upload it. It is permanent and will become part of the actual pixels of the video file.
3. Subscribe button-style watermark.
This is a strategic approach to subscriber growth, where you use the YouTube Studio method but replace your brand logo with a graphic that resembles a YouTube Subscribe Button. It can act as a clear Call-to-Action (CTA).
Adding a watermark to YouTube videos using the built-in YouTube function is done through YouTube Studio > Customization > Branding. This is the most effective method because it allows you to instantly apply the image to all existing and future videos on your channel. Here is the step-by-step guide to do it:
1. Sign in to YouTube Studio and select Customization on the left sidebar. Then, click the Branding tab at the top of the page.
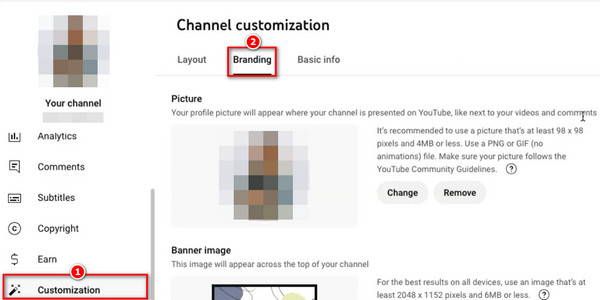
2. Scroll down to the Video watermark section and click UPLOAD to select an image, such as a logo or subscribe button, as your watermark.
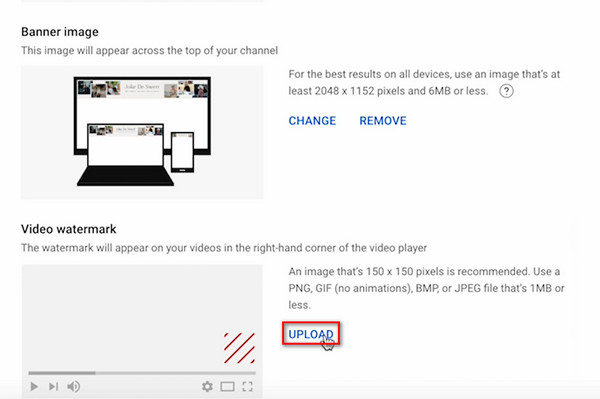
Warm reminder: The best watermark image is a PNG file with a transparent background, 150 x 150 pixels, and a file size of less than 1MB. You can crop it if necessary and then click Done.
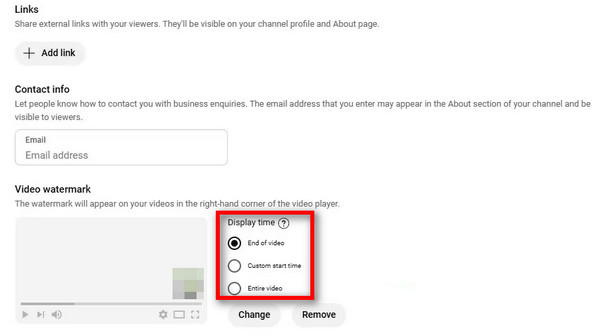
3. Choose when to display the watermark from the three options provided according to your needs:
4. Click the Publish button in the top-right corner of the screen to apply the changes to all your videos.
Adding watermarks to YouTube videos via YouTube Studio is the quickest way. However, if you want to add watermarks during the video editing process and have access to additional watermark editing functions, then consider the next method.
AnyMP4 Video Converter Ultimate is a video editor compatible with both Windows and Mac computers. It features a professional video watermark tool to help you add text or image watermarks to YouTube videos. You can customize the opacity and size of image watermarks, as well as the content, font, color, opacity, and size of text watermarks. Additionally, this powerful tool supports numerous YouTube-compatible video formats, including MP4, MOV, WMV, AVI, and more.
Below, we will show you how to use it to add watermarks to YouTube videos.
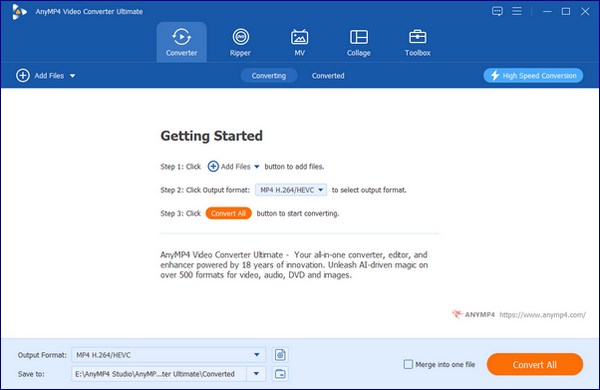
1. Download and install it on your computer by clicking the button below. After installation, it will launch automatically.
Secure Download
Secure Download
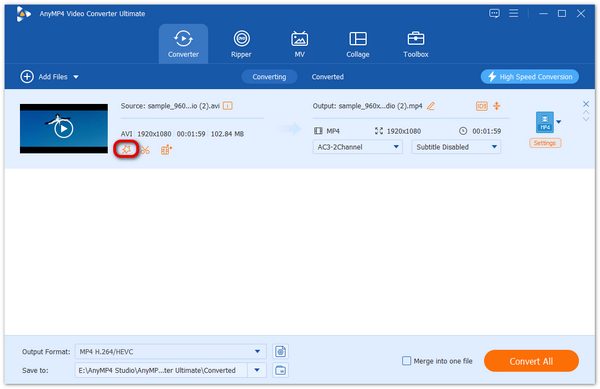
Click the Add Files button to select the YouTube video you want to add a watermark to, or drag it directly into this program.
2. Click the Edit button to enter the editing window.
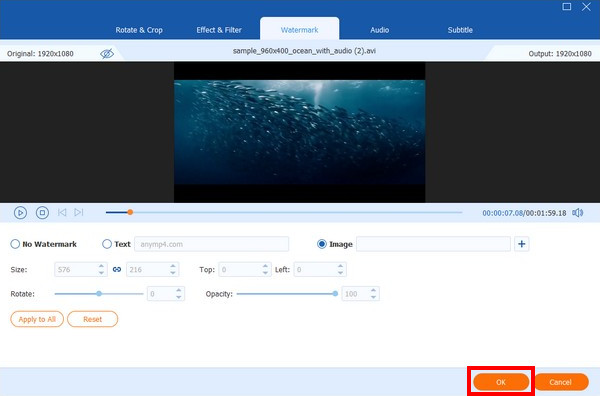
Then, choose the Watermark tab. Here, you can add an image or text watermark to the YouTube video and check the effect in the Preview window. Click the plus button next to the Image option to select an image, and then adjust the size and place it on your YouTube video.

3. After successfully adding an image watermark to the YouTube video, you can also rotate it, adjust its opacity, and perform other editing. Finally, click the OK button to save your settings.
Compared to YouTube Studio's limited watermarking capabilities, AnyMP4 Video Converter Ultimate, as a dedicated video editor, offers richer features for adding and editing watermarks, providing you with greater creative freedom.
To maximize the effectiveness of YouTube watermarks, here are some detailed bonus tips to help you:
What is the best image size for a YouTube watermark?
For 2025, the best image size for a YouTube watermark is 150 x 150 pixels. This resolution is the platform's standard for maintaining clarity without unnecessary file weight.
Does a watermark help protect against copyright claims?
Strictly speaking, it does not change the legal status of your video, but it can provide a powerful defense for your original content.
Can I remove a watermark from someone else’s YouTube video?
Removing a watermark from someone else's video is illegal in many jurisdictions and a violation of YouTube’s Terms of Service, which exposes you to significant legal and platform-related risks.
For subscriber growth, content protection, and other reasons, many YouTubers need to put watermarks on their YouTube videos. Using YouTube Studio is a quick and easy way to do this, while AnyMP4 Video Converter Ultimate offers more advanced watermarking features, rather than simply adding a watermark. Download it now and start your free trial!
Secure Download
Secure Download
 Updated by Mark Cristobal to Edit Video
More readings
 Apowersoft Watermark Remover Review and Best 2 Alternatives
Is Apowersoft Online Watermark Remover reliable in removing watermarks? Are these alternative tools also reliable? Let's find out what these tools can do.
 2026 Reviews of HitPaw Watermark Remover and its Alternative
HitPaw Watermark Remover is a tool to erase watermarks powered by AI tech. This article will review HitPaw Watermark Remover and propose an alternative.
 2 Efficient Ways to Compress Videos for YouTube Upload Free Online
When uploading a video more than 1 hour on YouTube, it may take a long time. Here are 2 efficient ways to compress videos for uploading or sharing quickly.
 What Is YouTube Shorts Aspect Ratio and Resolution
Read this article to learn everything you need to know about YouTube Shorts resolution, including the recommended aspect ratio and how to change them.