When it comes to high-grade video editing tools, Adobe Premiere Pro is one of the most used software that experienced editors will often mention. This is because the tool was optimized for professional editing, making the software a competent video editing tool for high-level productions. Unfortunately, its technical background has made the tool a challenging program for beginners. With that in mind, this article will serve as a detailed guide to help our readers learn how to zoom in on Premiere Pro using two zooming methods that can be used in the software with the Transform and Magnify effects. We will also explore alternative options that are more beginner-friendly than Premiere Pro.

We will start this guide by using the more advanced option to solve how to zoom in on Adobe Premiere Pro with none other than Transform Effect. Although this option demands more skills to be applied effectively, this option is the ideal zooming effect to be used if you want to apply an increasing zoom effect in the entire video. Zooming effects are one of the users' top arguments when discussing DaVinci Resolve vs. Premiere Pro.
A detailed three-step guide may be followed below to learn how to zoom in on a video in Premiere with the effects option.
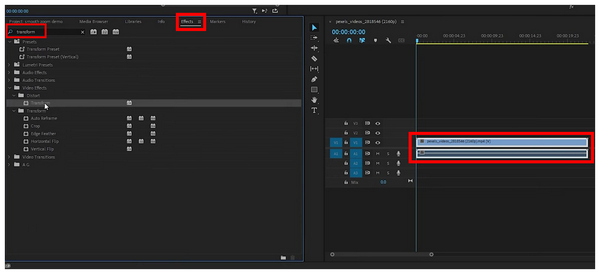
1. Add the video you want to edit into Adobe Premiere Pro’s timeline. Then, click on Effects and search the Effects library for the Transform option. After selecting the transform effect, it will be applied to your video.
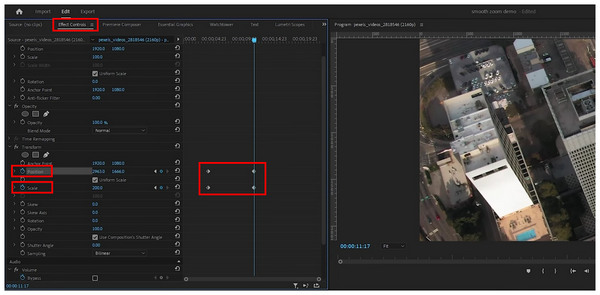
2. With the Transform Effect now applied, click the Effect Controls to modify the effect that has been added. First, click the zooming Scale and adjust its value based on your desired setup. Then, select Position to alter the video where the zoom effect will be set. Finally, two keyframes for Scale and Position are added to indicate the start and end of the zoom effect.
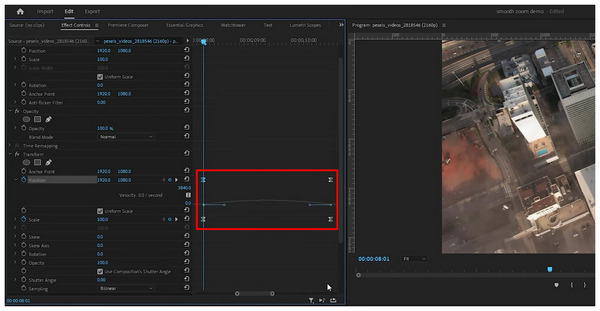
3. To add more advanced in-between effects between each keyframe, click on each frame and use the more advanced Effect Controls available in the menu. Unfortunately, these options are more advisable for professional-level editing.
Proper usage of the Effect Controls sets amateur video editors to professional ones. With that in mind, make sure only to use the Transform effect as a zooming option if you have learned how to operate the basics of the settings.
Moving on to the second option to apply zooming effects in Premiere Pro 2026, we have the Magnify Effect. Unlike the Transform Effect option, which can add a zooming effect in the entire video frame, the Magnify Effect only zooms on sections of the video where your cursor will be set. As its name suggests, the Magnify Effect emulates the perspective you can see behind a magnifying glass.
Please read the three simple steps below to learn how to zoom in on a clip in Premiere Pro using the Magnify Effect option.
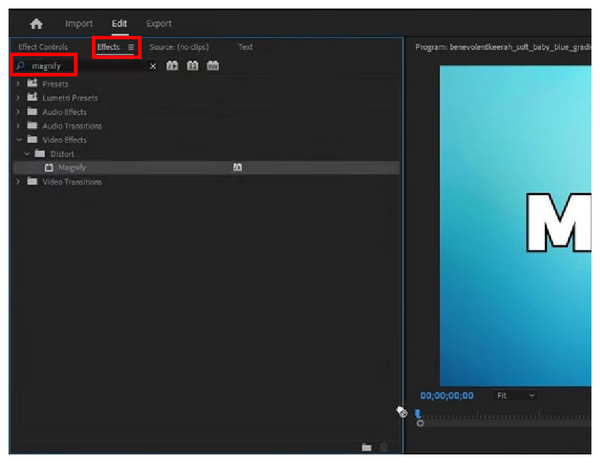
1. Add the footage you want to edit in Premiere Pro and select the Effect tab. Search for the effect that you want to use by searching for it in the effect search bar. Simply look for the Magnify Effect.
2. Once the Magnify option has been added, go to the Effects Control and adjust the shape and position of the Magnify effect once your mouse cursor activates it.
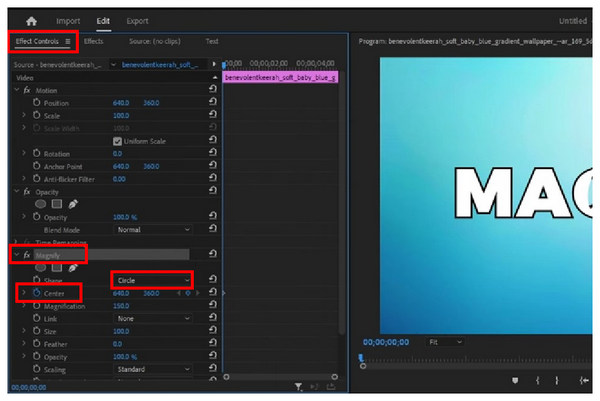
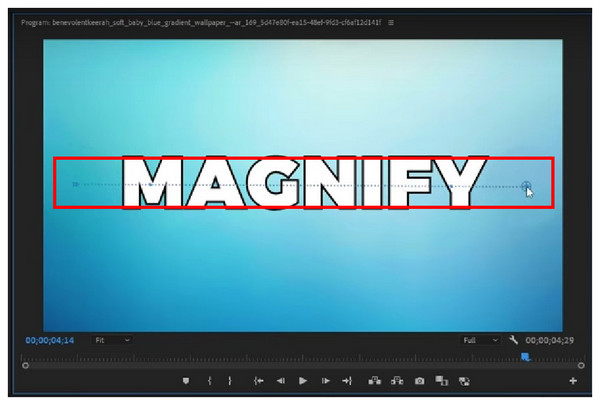
3. Finally, go to the video preview window and control the path of the Magnify effect. Based on your set Effects Control parameters, the appearance of the Magnify effect will be changed.
Although the Magnify effect uses scaling on a smaller portion of the screen than Transform, this option still has its niche. It is more applicable for highlighting specific sections of the screen or for beginner editors looking for an easier option than the Transform effect.
Transform and Magnifcy Effects can add a zooming effect to your editing videos. However, both options work well on specific niches. For example, using the transform option is more advisable for zooming on the whole frame of a video. On the other hand, Magnify works best for highlighting minor details.
However, the most significant difference between the two is the proper application. Transform is more complicated to apply, while Magnify can be added to your video with a few clicks. With these differences out of the way, use the zooming effect based on the nature of the video you are editing and your current experience level. We hope this section has helped you learn how to zoom in on a video in Premiere Pro.
Compatibility: Windows 11/10/8.1/8/7, Mac OS X 10.12 or above.
Although Adobe Premiere Pro is a solid option for advanced video editing, both the zooming methods available in the software were designed to be too technical and complex. A beginner-friendly option like AnyMP4 Video Converter Ultimate would be wiser.
Primarily designed as a file converter tool, this versatile Premiere Pro alternative can apply zooming effects and general editing to videos using its MV Editor feature. When applying zooming effects on videos, the versatile option of having Video Cropper, Aspect Ratio editor, and Zoom Mode makes the tool an ideal choice to zoom videos regardless of their quality. Even up to 4K, 5K, and 8K ultra-HD files. Making it an excellent option for processing UHD videos.
Compared to Premiere Pro’s magnify and transform effect, AnyMP4 Video Converter Ultimate takes the win regarding ease of use. This is because all the zooming modes available in the program can be applied within a few clicks. This is true for all of its zooming options; however, Video Crop zooming makes video editing a lot simpler since this option can apply zoom adjustment to edited videos using an easily adjustable yellow box selector. To learn how to use this option, the provided guide below features the video crop zooming mode.
On top of AnyMP4 Video Converter Ultimate’s video editing tools and video quality support, exporting formats such as video resolution, output format, file encoder, and video quality may be modified before exporting edited videos.
With the practicality and convenience that AnyMP4 Video Converter Provides, the software makes it the number one option when looking for a Premiere Pro alternative.
To learn how to apply zooming on videos edited in the tool, please proceed to our tutorial on how to use it. Make sure to download the program first to follow each step more easily.
Secure Download
Secure Download
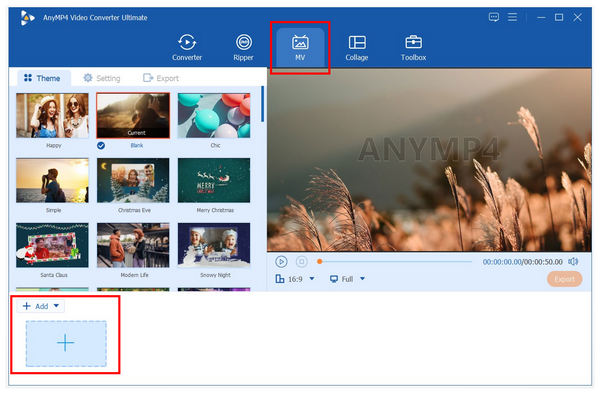
1. Open AnyMP4 Video Converter Ultimate and click on the MV Editor tab to go to its video editing section. In the MV Editor menu, click the Add File button to export the media file you want to edit.
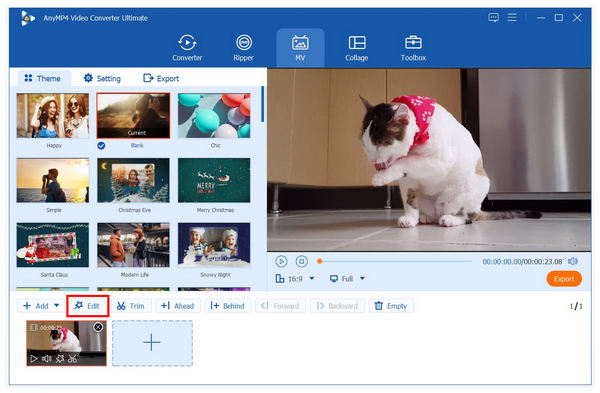
2. Once your video has been exported to the video editing window, click the Edit icon to access the editing menu to apply essential video editing adjustments such as the Zooming effect.
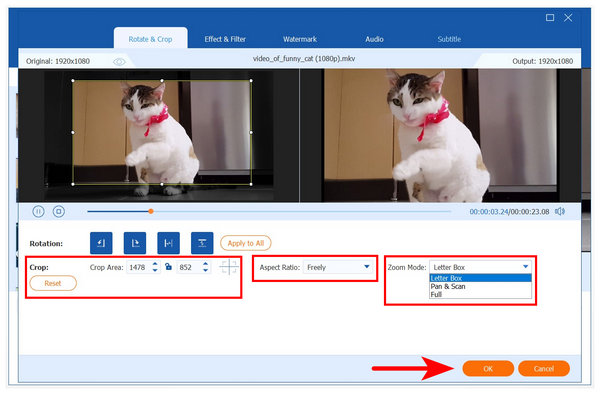
3. Once you are inside the Edit menu, you can use the zoom effect by adjusting the Yellow Box on the window on the left side. While it is being adjusted, the preview window on the right side menu will be zoomed in. You can adjust the zooming method by changing the Zoom Mode in the Edit menu. Once done with the adjustments, click OK to import the zoomed video back onto your computer.
Using only three simple steps, AnyMP4 Video Converter Ultimate can apply high-quality zoom effects to the videos edited in it.
When it comes to an alternative to apply partial zooming that the Magnify Effect on Premiere Pro provides, AnyMP4 Screen Recorder’s Magnifier Tool makes for a better alternative if you are looking for a more beginner-friendly option.
Partial zooming can be applied on screen recordings captured by the tool with the help of its Magnifier Mode, which can be accessed in the real-time editing tool of the program's multiple recording modes.
Since partial zooming may be applied in the live recording, additional editing work will not be necessary to use the mentioned effect. Because of that, AnyMP4 Screen Recorder is the best zooming option if you are looking for a more efficient zoom effect option.
To learn how to use the real-time editing options of AnyMP4 Screen Recorder to apply partial zooming, a detailed guide may be followed below. To learn more about the software, download it for free using the link provided before the first step.
Secure Download
Secure Download
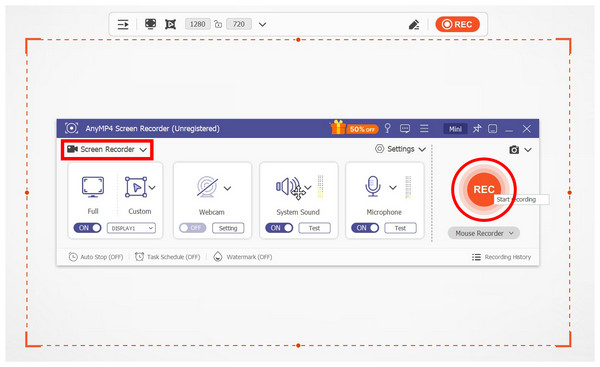
1. Open AnyMP4 Screen Recorder and use the tool’s Screen Recorder mode. Modify your recording settings, such as the System Sound, Microphone, Webcam Recorder, or Recording Display. Afterward, click on the REC button to start the recording process.
2. While the recording is live, open the program's real-time editing tool by clicking the Briefcase icon. Inside it, look for the magnifying glass button and click it to activate the Magnifier Mode.
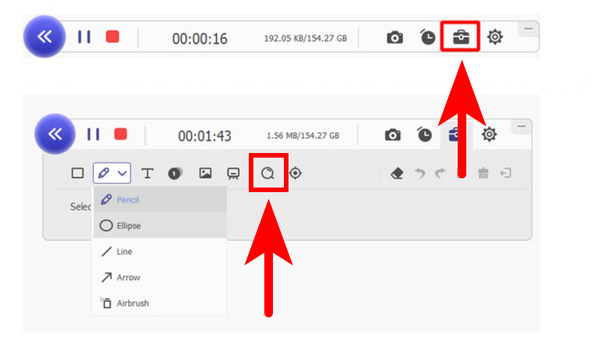
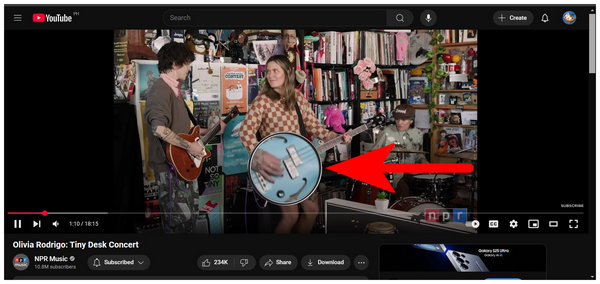
3. While the Magnifier Mode is active, your cursor will transform into a magnifying glass function, and the screen section where your cursor moves will be magnified. After the recording, your footage will also capture the magnifying effects in the video.
If the technical requirement of Premiere Pro may be too steep, fear not because AnyMP4 Screen Recorder can apply partial zooming using three simple steps. This makes the tool practical and beneficial for different screen recording purposes
Now that we have provided you with different options to apply zooming effects while video editing, we hope this article has been helpful in your search to learn how to zoom in on Premiere Pro 2023/2024/2025/2026. If you want beginner-friendly possibilities, check out the best watermark-free video editor in AnyMP4 Video Converter Ultimate and the most practical screen recorder tool in AnyMP4 Screen Recorder.
 Posted by Angelica Liwanag to Edit Video
Related Articles
 Concrete Tutorial – How to Compress Video in Adobe Premiere Pro
You just installed Adobe Premiere Pro but don't know how to use it? This post will tell you in detail how to compress videos in Adobe Premiere Pro.
 How to Flip/Rotate a Video in Adobe Premiere Pro [Easy Guide]
Whether you need to tweak to align the horizon of a video or adjust the video's orientation by 90 to 180 degrees, download Premiere to rotate video.
 Verified Tutorial to Crop a Video in Adobe Premiere Pro Correctly
How to resize or crop a video or change video aspect ratio in Adobe Premiere? This is a concrete tutorial for beginners.
 Step-by-step to Speed up a Video in Adobe Premiere Pro Properly
There are three ways to speed up a video in Adobe Premiere Pro in a variety of conditions. You can learn the workflow of each way in this single tutorial.