How to Fade Out Audio in DaVinci Resolve: Step-by-Step Guide
Multimedia editing has evolved over the years, becoming more accessible to new users. This led amateur editors to learn how to apply editing techniques to their personal multimedia work using freeware editing tools. In this article, we will provide a guide on one of the most reliable free-to-use editors with DaVinci Resolve. We will explore four methods for fading out audio in DaVinci Resolve, three of which are built-in solutions and the other a beginner-friendly alternative.

Method 1: Using Fade Handles in the Edit Page (Quickest Way)
Locating the White Audio Handles
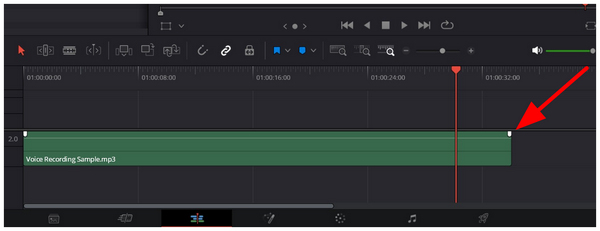
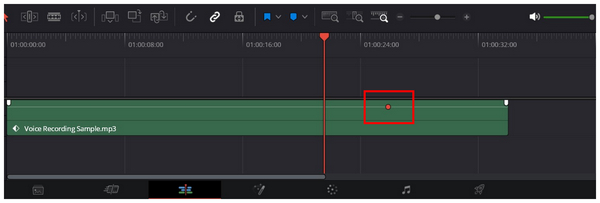
1. Move your cursor to the ending portion of your audio file in the editing timeline. The White Audio Handle will appear automatically.
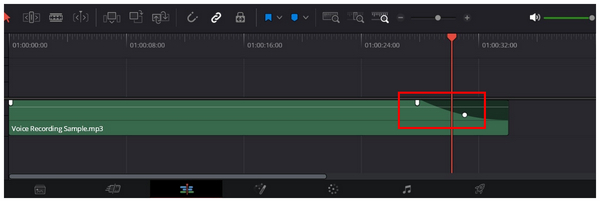
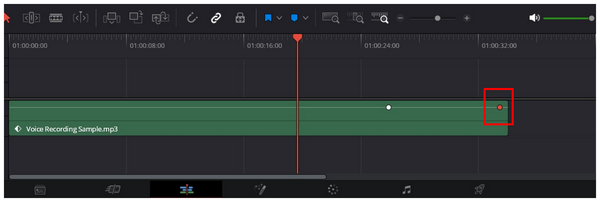
2. To add a fade using the White Audio Handle, scroll it to the left. The fade curvature will be added automatically.
Among the program's built-in tools, sliding the audio handle is the easiest way to fade out a video or audio clip in DaVinci Resolve. Moreover, it is also easy to adjust and simple enough to use.
Adjusting Fade Curvature
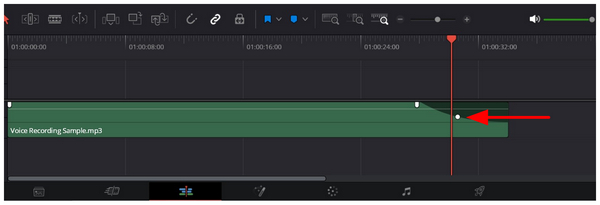
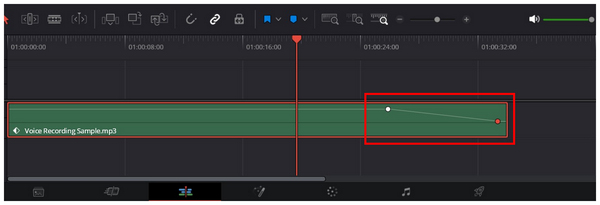
1. To adjust the automatic fade curvature, slide the White Dot close to the audio handle to set the starting point of the audio fade.
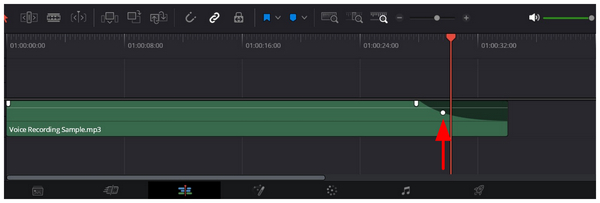
2. To edit the volume fade, you may slide the White Dot up or down.
Since audio fades are affected by volume curvature, learning how to do a fade-in in DaVinci Resolve follows the same steps we used in this method, but at the start of the audio rather than at the end.
Method 2: Using the Inspector Panel for Precision Volume Control
Since the first method uses semi-automated audio fade-out editing, let us now move forward to the manual adjustment option, which uses audio keyframes. To learn how to apply keyframes and edit them for a precise volume fade out, please read our three-step guide below.
1. Move your cursor to the part of the audio you want the Fade Out effect to start. Then hold Alt and Right-Click to add a keyframe.
2. Move your cursor to the part of the audio where you want the audio fade to stop. Then hold Alt and Right-Click to add another keyframe.
3. With the second keyframe added, click and drag downwards to lower the volume and add an audio fade effect.
Although it requires more steps than the simpler fade-out option of the audio handles, using keyframes for volume adjustments is still a good choice. It is also more precise and gives you more control, whether you want to learn how to fade in/out audio in DaVinci Resolve or use it with other tools, such as cutting clips in After Effects.
Method 3: Advanced Audio Mixing in the Fairlight Page
For aspiring audio editors, using Crossfades is one of the first advanced techniques intermediate users learn. This effect allows a smooth transition between two different audio files.
To learn the basics of applying crossfade in DaVinci Resolve, please read our guide below:
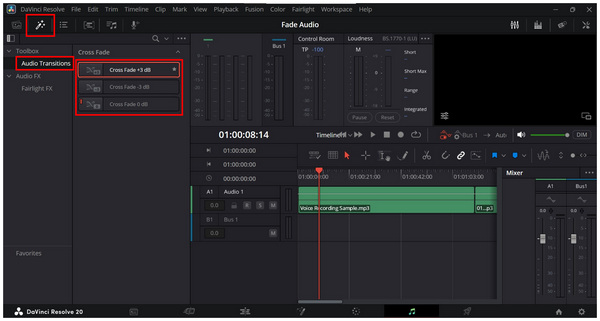
1. Go to the Fairlight page, then import another audio file into your editing timeline. A second audio file is necessary to make the crossfade function.
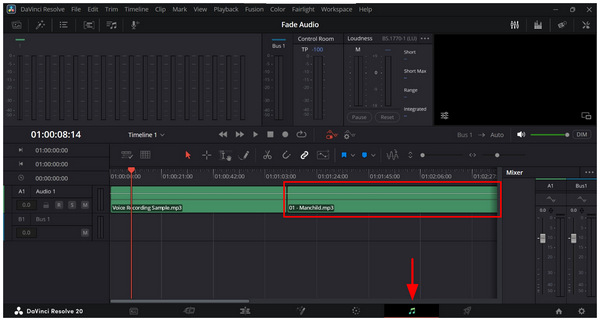
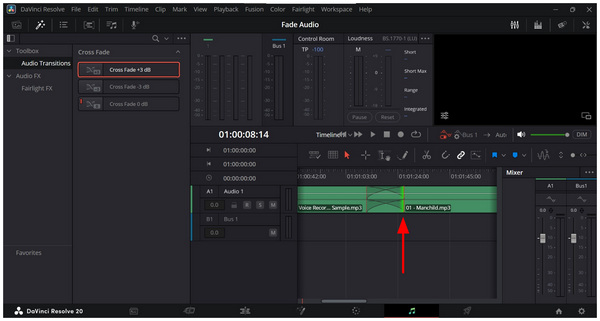
2. Next, click on Effects, Audio Transition, and then choose the Crossfade effect you want to use. Click-and-drag the Crossfade effect and place it in-between the two audio files in the editing timeline.
3. With the crossfade effect added, click and drag it in the editing timeline to change its duration.
Although Crossfade is highly effective once you learn to use it, it has a major flaw: it is very tricky to learn. However, learning to use it is well worth it, especially if your work involves many audio-related mixing tasks. This is especially true if you also want to learn how to fade in/out audio in DaVinci Resolve.
Method 4: Best Alternative for Quick Fixes
Since DaVinci Resolve is a traditional multimedia editor, it is bound by its development background, such as its technical editing tools and file rendering for imports, regardless of how small your adjustments are. As a solution to this problem, AnyMP4 Video Converter Ultimate is a great alternative for quick fixes.
In addition to bypassing file rendering during project import, this software is also optimized for beginners, with a simple UI designed for ease of use. In fact, adding Fade In/Out on videos can be done in the software via checkboxes.
Moreover, it is also lightweight and functions well even on entry-level computers. The software also allows batch editing to apply an audio fade to up to 50 videos at once. These features are significant advantages over DaVinci Resolve, which requires powerful hardware to run properly and lacks batch processing.
To learn how to use AnyMP4 Video Converter Ultimate, make sure to read our three-step guide below.
1. Open AnyMP4 Video Converter Ultimate and select the MV Editor tab. Then click the Add button to import the video whose audio you want to fade out.
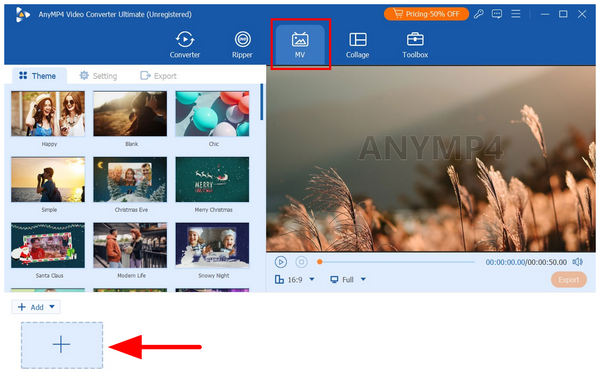
After adding the video, click Trim.

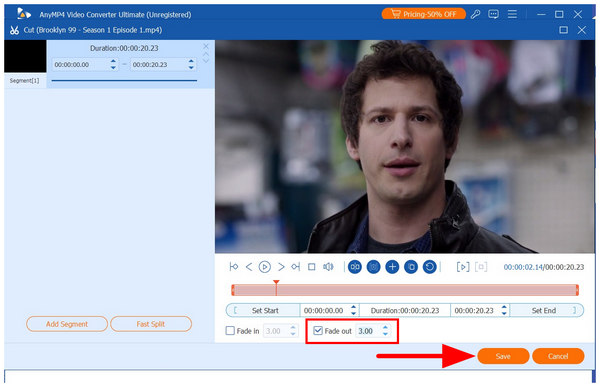
2. In the MV Editor’s Trim menu, click the checkbox beside Fade Out. Then adjust the time value to set where you want the fade-out effect to start. Click on Save to confirm your fade-out setting.
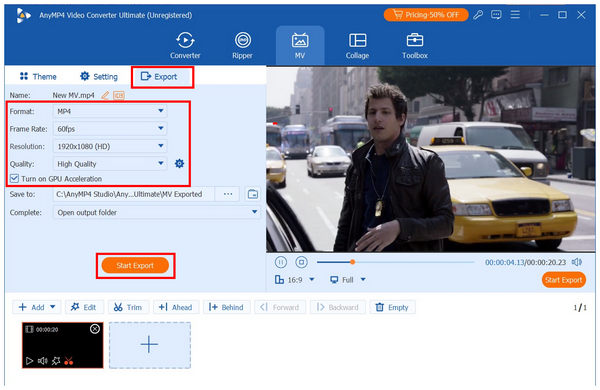
3. With the Fade Out timing now set, go back to MV Editor and click on the Export section. Here, you can adjust additional editing options for your video, such as Format, Frame Rate, Resolution, and Quality. To produce the video with smooth fade-out audio, select Start Export.
With three built-in methods for fading out audio in DaVinci Resolve, as well as the easier alternative in AnyMP4 Video Converter Ultimate, now discussed, let us discuss which software you should use based on your skill and needs.
For users looking for immediate audio and visual adjustments, DaVinci Resolve is a better option. This is also advisable for users with enough experience in multimedia editing. Meanwhile, beginner creators looking for a fast, lightweight solution for video files should opt for AnyMP4 Video Converter Ultimate.
To sum it up, DaVinci Resolve is recommended for experienced editors, while AnyMP4 Video Converter Ultimate is best for beginners or users who prefer simplicity and ease of use.
Expert Tips for Smooth Audio Transitions
Avoid Abrupt Volume Drop
When adding audio fade-outs, avoid abrupt volume drops by ensuring the fade-out duration is not too short. This will be possible if you extend the time between the start and end points of your fade effect. Instant volume drop could also give the impression that your DaVinci Resolve audio is not working.
Properly Set the Start and End Points of the Fade Out Effect
To ensure that your fade-out transition is smooth, make sure to add the start and end points of the fade-out effect in a reasonable section of your audio. For example, make sure the fade-out starts a few seconds before the end of the music, not at the very end.
Learn How to Edit Crossfades
Once you are skilled enough with audio fade editing, the next step is to learn how to play and apply crossfades. This concept involves finding the right fade transition between two audio tracks to make the transition as smooth as possible. This involves intermediate fade-in and fade-out editing.
FAQs About Fading Audio in DaVinci Resolve
Why can't I see the fade handles?
You need to place your cursor in the editing timeline. Then, edit the audio handles at the start or end point of your audio. Finally, click and drag the audio handle to add a fade-in or fade-out effect.
Can I fade all audio tracks at once?
It depends on what software you are using. However, most traditional audio editors support editing multiple files via the timeline. Unfortunately, this option is not the most accurate, and editing audio one by one is generally more advisable.
How do I make the fade longer?
You can make the fade effect last longer by extending its endpoint. This is easier to apply when editing with keyframes. However, the most beginner-friendly tool to apply a longer fade is via time-based editing, like the one used by AnyMP4 Video Converter Ultimate.
Does audio fade-out result in a smoother listening experience?
Yes, it will. A properly set fade-out will result in an audio file that ends much smoother. It also enhances the transition if you are listening to music.
Why is learning crossfade advisable?
Learning crossfading is very beneficial if you use a lot of audio mixing. This is a crucial skill of audio mixers and video editors. For casual use, a properly set-up crossfade drastically improved the listening experience.
Conclusion
Now that we've discussed the built-in options for fading out audio in DaVinci Resolve, we hope this article has provided you with practical tips to enhance your audio editing skills and listening experience. If you think the options in DaVinci Resolve are too technical, we recommend using AnyMP4 Video Converter Ultimate for easier, faster fade-out editing. Download the tool with the link below.