These days, trimming videos has become one of the most in-demand editing skills. A simple trim can instantly make your video more engaging, professional, and to the point. To help with this, Clipchamp offers an easy-to-use platform. As Microsoft’s free video editor, it includes a built-in trimming tool that allows you to shorten clips and remove unwanted sections. This post will guide you on how to trim videos in Clipchamp in detail. This post aims to make trimming a simple and approachable process. This way, you can edit your videos, improve flow, and create content that looks clean and professional.

Trimming is one of the most basic yet powerful video editing techniques. It lets you cut out unnecessary parts from the beginning, middle, or end of a video. Clipchamp offers a straightforward trimming tool that lets you remove unwanted parts of a video. It allows you to refine your content and improve workflow, all without needing advanced editing skills.
Here’s how to use Clipchamp to trim video:
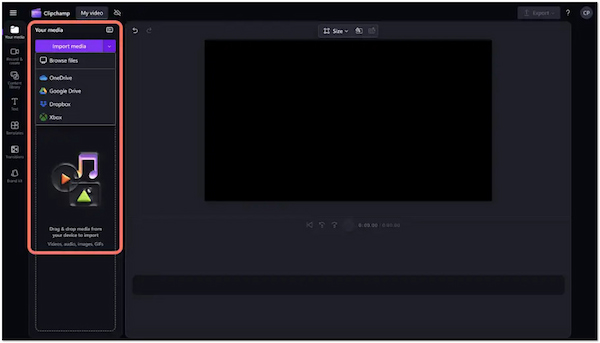
1. In the Your Media tab, click the Import Media button to upload a video file. Once added, drag and drop the media onto the timeline in the lower section.
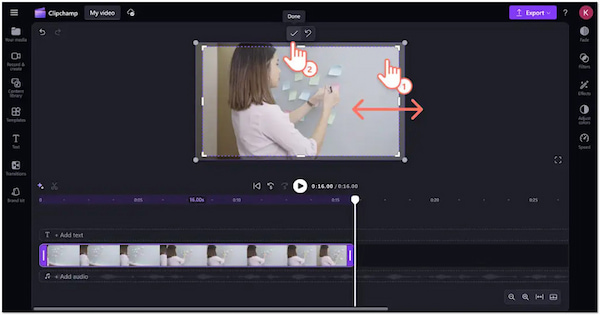
2. Once the video is on the timeline, click on the video clip to select it. Move the handles on either side of the clip inward to trim off parts you don’t want.
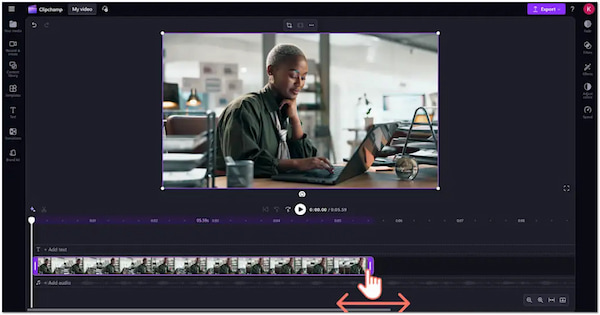
Creative Tip: You can trim multiple clips simultaneously by holding down Shift while selecting the clips. Then, drag one of the handles to trim them all together.
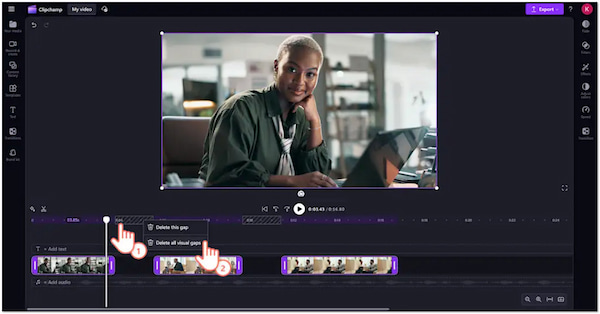
3. When trimming clips, gaps may appear between them on the timeline. Right-click the gap and select Delete all visual gaps to remove all gaps.
In Clipchamp, trim video is an easy process to remove unwanted footage. It lets you trim video to the perfect length and clean up your timeline by removing gaps. However, if you want to cut out specific sections in the middle of a video, you’ll need to use the Split tool instead.
Looking for easier, faster, and more powerful video editing? Discover the top Clipchamp alternatives for creating professional videos without limitations.
While basic trimming helps shorten the length of your clips, sometimes you need more advanced editing. If you want to remove unwanted areas within the frame or eliminate black borders, Clipchamp’s crop tool is what you need. Unlike trimming, which only reduces time, cropping focuses on adjusting the visible area of your video.
Here’s how to trim video in Clipchamp using the crop tool:
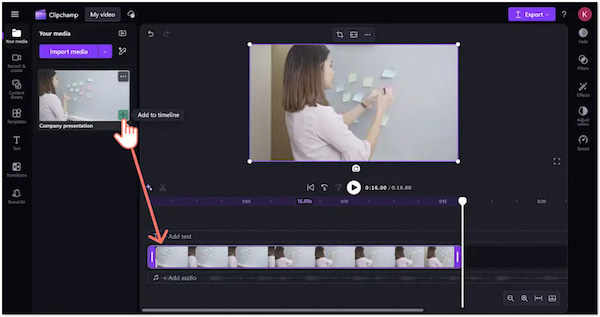
1. Click the Import Media button in the Your Media tab to upload from your computer. Once loaded, drag and drop it onto the timeline at the bottom of the editor.
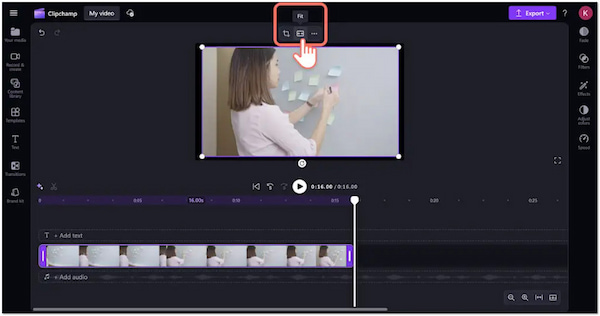
2. Select your clip and click the Crop button from the floating toolbar. Drag the cropping handles inward or outward to remove unwanted areas and focus on the subject.
3. If you want Clipchamp to handle cropping for you, highlight your video on the timeline. Click the Fit button on the floating toolbar to auto-crop and resize your video.
Cropping in Clipchamp gives you more creative control than basic trimming. You can manually crop or auto-fit to remove part of a video. Now, a small heads-up: Cropping can make your video look pixelated or blurry, especially if the original file wasn’t high-resolution.
Want to learn other ways to edit video in Clipchamp? Check out our complete guide here.
Instead of constantly clicking through menus, you can quickly perform actions like splitting or selecting clips. For example, pressing Ctrl + Z instantly undoes the last action, which is handy if you trim too much. Similarly, S is often used for splitting clips on the timeline.
Trimming requires accuracy, especially when you want to cut at a precise moment. Clipchamp allows you to zoom in on the timeline, enabling you to view your video frames in greater detail. This makes it easier to place trim points right where you want them.
Clipchamp is an online editor, which means it depends on your internet connection. Unexpected connectivity drops can cause you to lose progress if you don’t save frequently. Although it has auto-save features, it’s a good habit to manually save your project periodically.
Trimming with the drag handles is useful for cutting the start or end of a clip. However, the Split tool is more flexible for cutting out specific sections in the middle. Simply position the playhead where you want to cut and press S to delete or move unwanted segments.
After trimming or splitting, gaps often remain between clips. If left unattended, these gaps can result in blank screens in your final video. Right-click the gap and select Delete this gap or Delete all visual gaps to automatically close the spaces.
While you can trim video with Clipchamp, some users may prefer a more flexible video trimmer. A great alternative is AnyMP4 Video Converter Ultimate, a powerful software available for Windows and Mac. This software goes beyond media conversion, providing over 20 editing tools, including the Video Trimmer. It allows you to professionally trim videos with high precision. You can also fast split, add segments, and merge clips into one file. Optionally, you can apply fade-in and fade-out effects for smoother transitions. For high-quality exports, it allows you to customize video and audio settings, including format, encoder, resolution, and frame rate.
1. Begin by downloading the AnyMP4 Video Converter Ultimate. Install the video trimming software on your system and wait for the installation process to complete. Once finished, run the software to start the video trimming process.
Secure Download
Secure Download
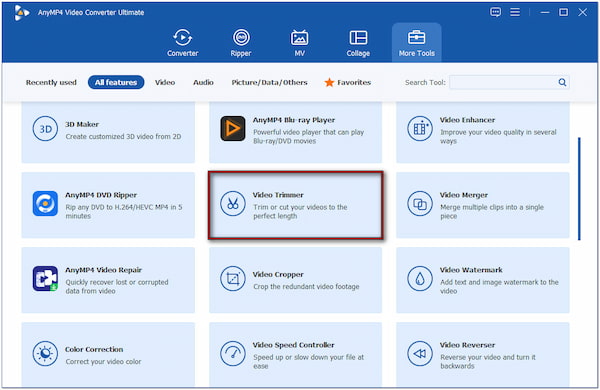
2. Upon launching it, the Converter tab will open by default. Although you can trim video here, there’s a dedicated tab for video editing. Move to the More Tools tab, select the Video Trimmer tool, and click it to open. Click + to select and upload the video you want to trim.
3. In the Video Trimmer window, use the progress bar to manually drag and set the video’s start and end points. Alternatively, enter exact times in the Set Start and Set End boxes for precise trimming. You can also click Add Segment or use Fast Split to cut your video into multiple clips. Finally, click the Export button to save your trimmed video.
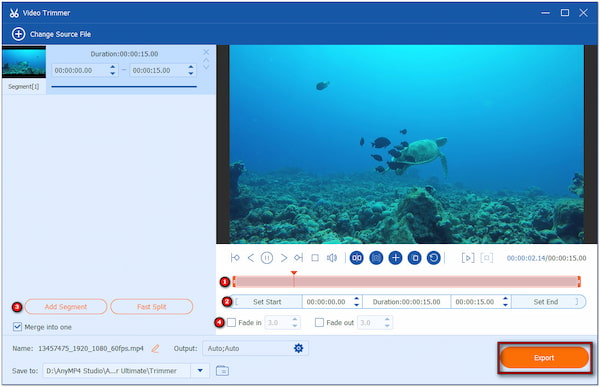
With AnyMP4 Video Converter Ultimate, trimming becomes faster, more accurate, and more versatile. For added creativity, use Fade In to create a smooth start instead of a sudden one. Also, apply Fade Out to provide a smooth ending instead of cutting off suddenly. If you’d like all trimmed clips to play continuously, check the box for Merge into one.
Clipchamp trim video is a straightforward way to remove unwanted sections, shorten clips, and create polished content. With it, you can easily refine your videos and ensure they flow smoothly. However, if you’re looking for a more advanced solution with greater precision, AnyMP4 Video Converter Ultimate is a powerful alternative. It allows you to trim with accuracy, split videos into multiple segments, merge clips, and even add fade-in and fade-out effects.
Secure Download
Secure Download
 Updated by Mark Cristobal to Edit Video
Related Articles
 Trim Videos on Windows Without Quality Loss
Want to get free or professional clip tools for Windows? This post shows you how to cut the video length with some tools to keep the attention of your viewers.
 How to Trim H.264 Without Re-encoding - H264 Video Cutter
How do I trim an h.264 file? Which is better, H 264 or H 265? What is the best H264 video cutter? You can get an H264 cutter to trim H.264 without re-encoding.
 How to Edit Videos on iPhone with The Best Video Editor Apps
In addition to edit videos on iPhone with Photos for iOS, this article tells you more video editing apps to crop, trim, rotate, or adjust videos on iPhone.
 Edit Contrast on Video - Increase and Lower Video Contrast
What is a contrast ratio video? How do you edit the contrast in a video? You can get a detailed guide to increase or lower the video contrast from this post.