Effective communication is the key to a successful meeting, especially today, as information flows faster than ever before. Taking meeting minutes is an essential skill that ensures no detail or decision is missed. By documenting discussions, action points, and decisions, meeting minutes bridge communication gaps. Also, they provide a reliable reference for future actions. In this post, we will show you the ideal ways to record meeting minutes. This way, together with your team, you can take full advantage of the flexibility of remote work and online meetings.

The term Meeting Minutes could seem related to time, but it’s actually referring to brief, detailed notes. Simply put, it is a process of documenting the details and outcomes of a meeting using a pen and paper. It aims to keep everyone on the same page and ensures nothing gets lost in the shuffle. The meeting minutes serve as a formal record of what happened during the meeting and include several details. Some of these are the date, time, location, attendees, agenda, discussions, decisions, and assigned actions. During the meeting, focus on documenting the discussions objectively, noting major points and decisions rather than every word spoken.
Evernote is a note-taking and task-management meeting recorder app used to create digital notes, including meeting minutes. It is built for creating and archiving notes with overlaid audio, images, and saved web content. Notably, notes are stored in virtual notebooks and can be annotated, edited, exported, searched, and tagged.
Here’s how to record minutes of a meeting using Evernote:
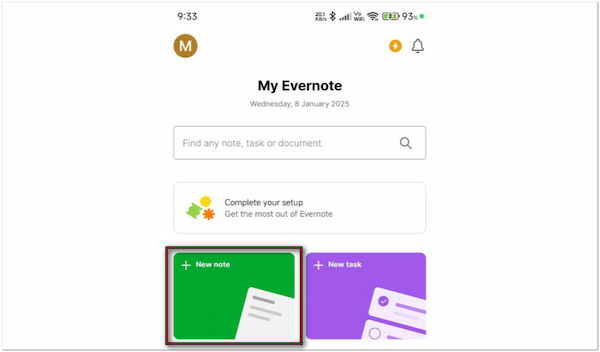
1. On the Evernote app, tap + New Note to create new meeting minutes. In the Title section of the blank canvas, type a descriptive title, such as Meeting Minutes. This will help you locate your meeting notes easily.
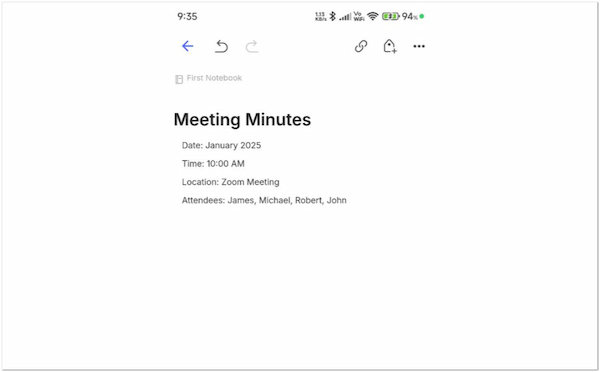
2. In the space below, start typing your meeting minutes. Begin by including the basics, such as the date, time, location, and attendees (including absentees). Following that, outline the agenda or the key points to be discussed.
3. During the meeting, turn on the audio recording feature to capture verbal discussions. Tap + in the toolbar and look for the Audio feature from the available selection. This allows you to create a voice memo directly within the note and embed it for easy playback.
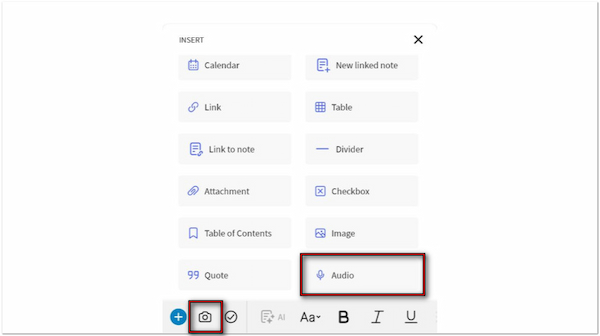
Note: If the meeting involves visual content, tap the Camera button to snap or upload a photo.
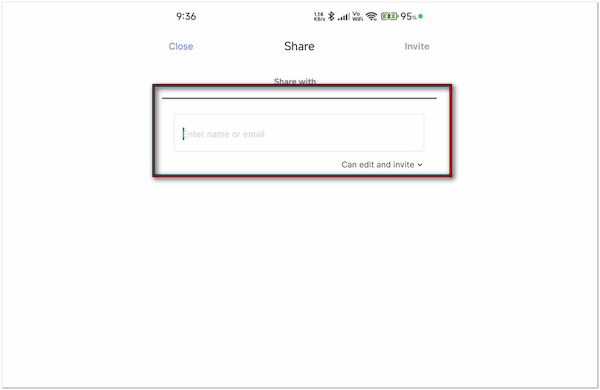
4. Once your meeting is complete, save the note in a specific notebook. Optionally, tap the three-dotted button and select the Share Note option to send the meeting minutes directly to participants via email or generate a link.
Evernote provides a convenient solution for taking notes anytime, anywhere. Even without pen and paper, you will be able to jot down important meeting details. However, you should be aware that it requires internet connectivity for syncing and accessing some features.
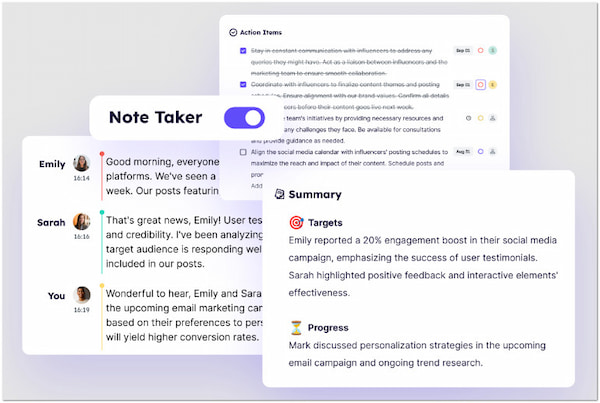
Krisp is an AI meeting notes recorder that can transcribe meetings from audio to text. It is integrated with noise cancellation and transcription features, allowing you to capture detailed meeting notes. Plus, it enables you to summarize the meeting with AI. Whether you're using Zoom, Teams, or looking to record Google Meet sessions, Krisp works seamlessly with any video conferencing apps, call center platforms, and all types of headphones or devices.
Here’s how to record and transcribe meeting minutes free using Krisp:
1. First things first, register and create a new account with Krisp. Then, download the Krisp tool and open your preferred online meeting app. Don’t forget to change your default microphone and speaker settings to use Krisp.
2. After setting up Krisp, start or join the online meeting as you normally would. The tool will work in the background, silently transcribing and summarizing everything said during the meeting. The good thing is that it has noise cancellation, minimizing the chances of errors.
3. Once the meeting is over, access the transcribed meeting on the Krisp dashboard. Afterward, use Krisp’s AI note-taker to summarize the transcription into formal minutes.
Krisp offers an AI-powered solution to transcribe and summarize automatic meeting notes. However, the tool’s accuracy decreases when multiple participants talk simultaneously. Also, AI struggles to pick up accents correctly, as it’s used to a standard language database.
If you’re in a virtual meeting and don’t have pen and paper but need to record meeting notes, dedicated software is what you need. AnyMP4 Screen Recorder is a multifunctional recorder software built to capture anything from a computer’s screen. It can record your display in full, in specific windows, or custom regions, along with high-quality audio. Since taking notes during meetings is essential, the software provides drawing and annotation tools. This includes the Whiteboard tool, which you can use to jot down minutes, draw graphs, and more.
Here’s how to record meeting minutes using AnyMP4 Screen Recorder:
1. Start by downloading the AnyMP4 Screen Recorder for free. Install the meeting minutes recorder and allow the installation process to complete. After the installation finishes, launch the AnyMP4 Screen Recorder on your computer.
Secure Download
Secure Download
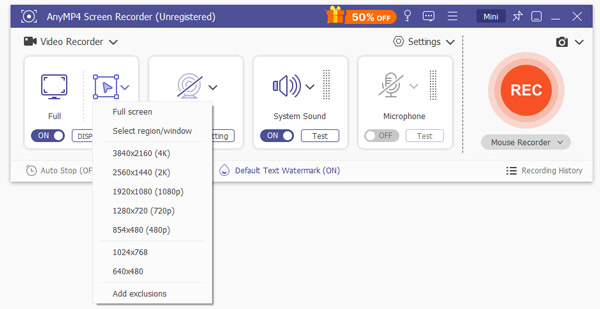
2. Upon opening the screen recorder, you’ll be redirected to the Screen Recorder mode by default. In the Default tab, choose your required recording area to record the meeting minutes. Choose Full to capture the entire screen or Custom to focus only on the meeting.
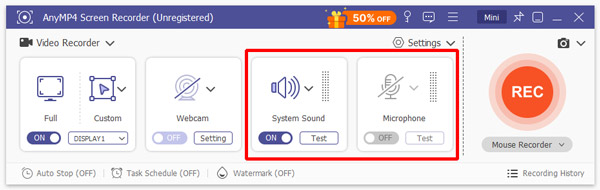
3. Toggle on the Sound System to capture meeting discussions, including system audio. If required to provide commentary, turn on the Microphone to include your voice in the recording. Adjust volumes and enable the microphone enhancement and noise cancellation feature for better sound results.
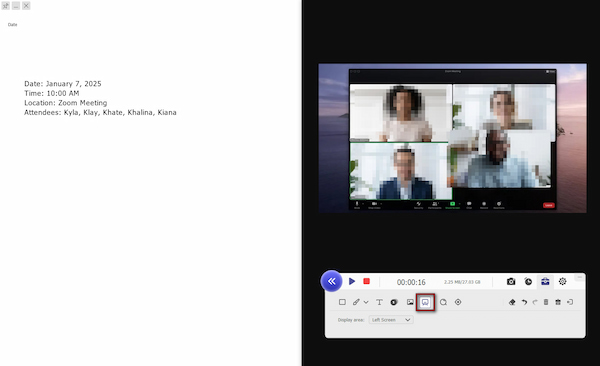
4. Once everything is set, click the big REC button to start recording the meeting minutes. A three-second countdown gives you time to prepare before the recording starts. During the session, a floating bar will appear with helpful tools:
Toolbox: Use the Whiteboard tool to jot down ideas, sketch diagrams, or organize thoughts. As you select it, your screen will turn into a full white canvas. Still, you can change the display area in Full Screen, Left Screen, Right Screen, Top Screen, or Bottom Screen.
5. Once the meeting is adjourned, click the Red Square button to end the recording. Following this, it will bring up the preview window, where you can review the recorded clip. If needed, use the additional tools to trim, merge, boost/extract sound, and more.

AnyMP4 Screen Recorder provides a one-stop solution for capturing video and audio from computer screens. Professionals commonly use it as a Livestorm recorder, Zoom Meeting recorder, Google Classroom recorder, and any other video conferencing platforms.
Taking notes during meetings ensures that all discussions, decisions, and actions are accurately documented. With the tools featured above, recording and managing meeting minutes becomes effortless. Among these tools, AnyMP4 Screen Recorder is a top-recommended tool to record meeting minutes. It can record online meetings and conferences in high-quality with the Whiteboard feature for note-taking. In times you manage remote meetings or in-person, having a reliable solution ensures no detail is left behind.
 Posted by Riley Mitchell to Record Video
More readings
 AnyMeeting Recording: How to Record AnyMeeting Conferences Easily
When you want to record AnyMeeting conferences, you can choose to record AnyMeeting conferences by the built-in recorder. There is also a professional way.
 Concrete Guide – How to Record Google Meeting in High Quality
Want to record Google Meet for those who cannot attend the meeting? This article will teach you two efficient methods to record Google Meet on Windows and Mac.
 How to Record and Download BlueJeans Meetings [Detailed Steps]
Want to record the BlueJeans recording without time limitation? Here is the step-to-step guide to record and share a meeting in BlueJeans.
 3 Quick Solutions on How to Record GoToMeeting (Windows & Mac)
Want to record a GoToMeeting session? Here, in this post, we are going to introduce you 3 efficient solutions to record GoToMeeting on Windows 10/8/7 and Mac.