
"I just wanna back up iPhone photos to PC without losing quality. But I have no idea which iPhone backup app to use. Can anyone tell me where can I copy and paste my iPhone pictures safely?"
Even though your iPhone is large enough to save all your photos and other iOS data. It will be safer to backup iPhone photos and videos. You can delete those backed up iPhone photos to make more space. And you will not suffer the data loss damage when those iPhone photos got deleted by mistake. Some people prefer to back up iPhone photos to PC and other hard drives, and others tend to transfer photos from iPhone to cloud storage including Google Drive, Dropbox and, etc. No matter which photo backup method you choose, you can get step-by-step guidance below.
If you want to transfer iPhone photos to computer for backup, then you can use the following iPhone backup tool to manage all your iOS files with ease.
AnyMP4 iOS Data Backup & Restore enables users to backup and restore iOS data to computer by one click. All iOS devices are supported including iOS 17, iOS 16, iOS 15, iOS 14, iOS 13, iOS 12, iOS 11, iOS 10 and former. Yes, you can backup photos from iPhone 15, iPhone 15 Plus, iPhone 15 Pro, iPhone 15 Pro Max, iPhone 14, iPhone 14 Plus, iPhone 14 Pro, iPhone 14 Pro Max, iPhone 13, iPhone 13 Pro, iPhone 13 Pro Max, iPhone 13 mini, iPhone 12, iPhone 12 Pro, iPhone 12 Pro Max, iPhone 12 mini, iPhone 11, iPhone 11 Pro, iPhone 11 Pro Max, iPhone XS, iPhone XS Max, iPhone XR, iPhone X, iPhone 8 or further new released iOS models as well. It is totally safe to backup iPhone photos to PC with no data loss.
Secure Download
Secure Download
Step 1: Launch iOS Data Backup & Restore on PC
Download and install FoneLab iOS OS Data Backup & Restore app on your Windows computer. Launch it, and then connect your iPhone with the USB cable.
Step 2: Scan Your iPhone
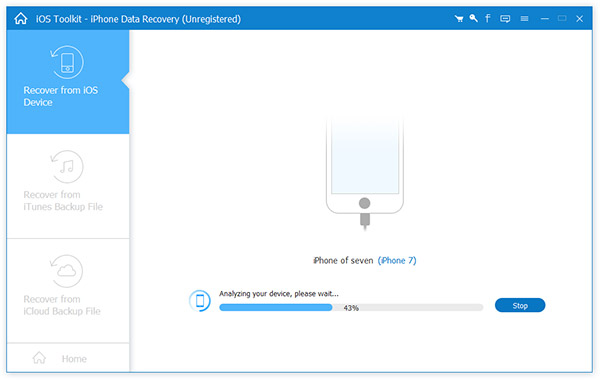
Enter "Recover from iOS Device" mode on the left pane, and then it will start detecting your iPhone. Later, tap "Start Scan" icon below. Now the iOS data backup app will scan your iPhone thoroughly. Remember to turn on your iPhone and tap "Trust" to confirm the request of scanning your iPhone pictures and other files.
Step 3: Backup photos from iPhone to PC
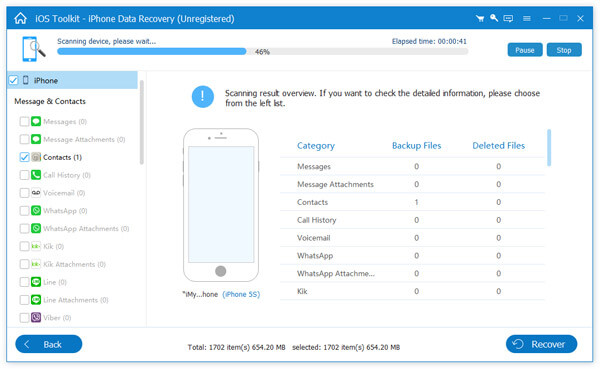
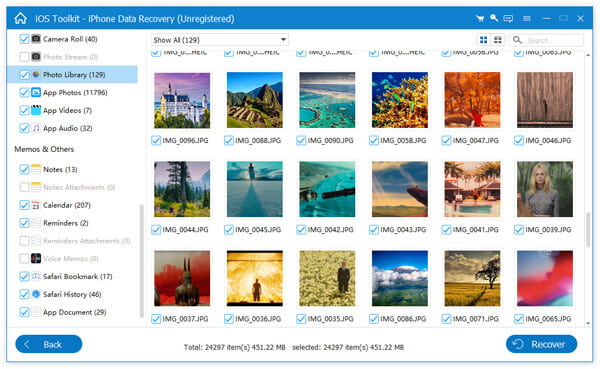
After the iPhone photos scanning, all categories will list on the left pane. As for backing up iPhone pictures, you can tap "Camera Roll", "Photo Stream", "Photo Library" and "App Photos" under "Media". If you are not sure whether to back up the iPhone picture or not, you can preview on the right window. Click "Recover" button after all iPhone photo selected. Now you can get backed up iPhone photos to PC selectively.
Note: You can restore photos and other data from the backup to iOS device or to PC without hassle.
Step 1: Connect iPhone to Mac and open Photos app
Use the USB cable to plug iPhone in Mac computer. Under most cases, the Photos app will open automatically after iPhone to Mac connection. If not, you can open it manually. Find your iPhone icon in the top left corner of Photos app.
Step 2: Transfer Pictures from iPhone to Mac computer
Tap "Import" button to see all your photos and videos stored inside. You can select all iPhone pictures, and then click "Import Selected" to backup pictures from iPhone to Mac. Or you can tap "Import All New Items" button to backup new taken iPhone photos to Mac with Photos app afterwards.

Or you can backup iPhone photos to iCloud Photo Library wirelessly. Once you sign a new iCloud account, you can get 5G free storage space to save photos and videos. it is enough to back up iPhone photos free for most people.
Step 1: Enable auto backup with iCloud Photo Library
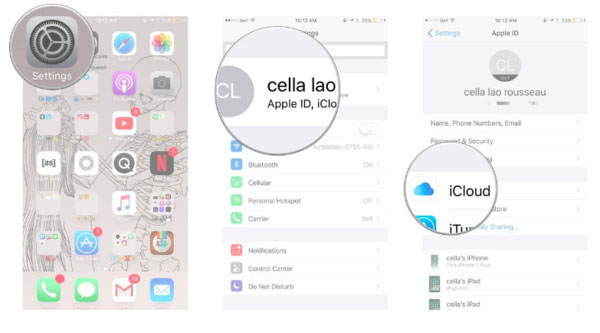
Open "Settings" on your iOS device. Choose your name and Apple ID on the top of the screen, later, click "iCloud" icon. For iOS 10.2 or earlier users, tap "Settings" and then choose "iCloud" directly. Select "Photos" and then turn on "iCloud Photo Sharing". It will upload and store all your iPhone pictures in iCloud automatically.
Note: You can tick "Optimize iPhone Storage" or "Download and Keep Originals" below that enables you to backup original iPhone photos in iCloud and then clean up your iPhone storage space.
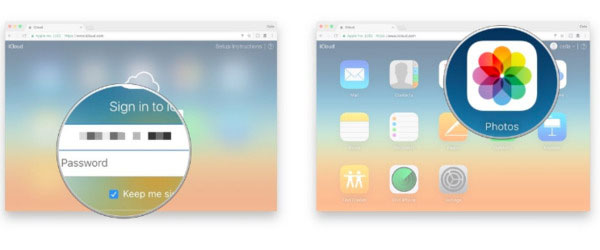
Step 2: View backed up iPhone pictures on computer
Open iCloud.com. Enter your username and password. Tap "Photos" button to access all backed up iPhone photos in iCloud. Or you can upload pictures through iCloud.com too.
Dropbox offers 2GB free storage space for users to backup iPhone pictures and other items. So you are able to backup photos from iPhone to Dropbox straightforward as well.
Step 1: Launch Dropbox app on iPhone
Download and install Dropbox on your iPhone. Launch it and sign up a Dropbox account.

Step 2: Backup iPhone Pictures to Dropbox
Turn to "Camera Upload" page. Tap "Enable" option in the top right corner. It means you allows Dropbox access all your iOS pictures and then back up to Dropbox cloud storage automatically. In addition, you can set backing up iPhone pictures with Wi-Fi only. The more iPhone photos you own, the longer you need to wait to complete iPhoto photos to Dropbox backup process.
Among the above methods to backup photos from iPhone, iOS Data Backup & Restore is obviously the winner, especially for people who have large amounts of photos, videos, contacts, messages and other iOS data to backup. There is no data loss, and you can back up and restore all your iPhone files safely and flexibly. Since new released iPhone 15, iPhone 15 Plus, iPhone 15 Pro, iPhone 15 Pro Max, iPhone 14, iPhone 14 Plus, iPhone 14 Pro, iPhone 14 Pro Max, iPhone 13, iPhone 13 Pro, iPhone 13 Pro Max, iPhone 13 mini, iPhone 12, iPhone 12 Pro, iPhone 12 Pro Max, iPhone 12 mini, iPhone 11, iPhone 11 Pro, iPhone 11 Pro Max, iPhone XS, iPhone XS Max, iPhone XR, iPhone X, iPhone 8 and other iOS models are supported, just feel free download it and backup iPhone photos selectively in ultrafast speed.
 Posted by Ted Klarso to Mobile Transfer
Related Articles
 Top 6 Programs to Backup SMS on Android
Do you know how to backup SMS on Android? The article explains 6 excellent ways to backup SMS.
 How to Backup Text Messages on iPhone
Do you know how to backup iPhone text messages? Here we recommend 5 ways to do it.
 Best Ways to Backup Text Messages on Android
Worry about your text messages got lost? You just need to backup text messages on Android timely.
 How to Retrieve Voicemail on iPhone
AnyMP4 iPhone Voicemail Recovery offers the best solution to retrieve Voicemail from iPhone.