Still, you want to transfer video to DVD.
We have to admit that, with so many video saving solutions, we almost don’t create DVD discs any more like old days. While for some special days and memories like graduations and weddings, we still like to transfer videos to DVDs and keep them in the traditional way.

Actually, there are many benefits of transferring video to DVD. Comparing with the new digital data saving ways, a DVD can better protect these valuable moments. What’s more, many computers which carry DVD drives and DVD players are still readily available in stores to help you play your DVD discs with ease. So you don’t need to worry about the DVD can’t playback problem. Now we back to the key point, how to transfer video to DVD?
Surely you don’t want to buy a new DVD recorder for transferring video to DVD. You are looking for kind of thing, like software to directly create DVD with your video on computer. And considering your need, here at the first part, we like to recommend a professional DVD Creator for you.
AnyMP4 DVD Creator is specially designed to transfer video to DVD. It has the capability to burn videos in any popular formats like MP4, MOV, FLV, AVI, etc. to standard DVD discs. The created DVD will keep exactly the original image and sound quality. In addition, this video to DVD converter enables you to edit video, adjust effects, and enhance video quality before transferring video to DVD. You can free download it and take the following guide to burn your video to DVD.
Secure Download
Secure Download
Step 1. Double click on the download button above to free download, install and run this video to DVD transfer on your computer. Insert a writable DVD disk into your computer.
If you want to transfer video to DVD disc, not a DVD folder or ISO file, here you need to ensure your computer is equipped with a DVD driver. Or you should connect an external DVD driver.
Step 2. When you enter the main interface of this video to DVD transfer service tool, click the "Add Media File(s)" button to load the video you want to transfer to DVD. As it mentioned above, this DVD creator highly supports any frequently-used formats like MP4, MOV, AVI, MKV, MTS, M2TS, FLV, SWF, 3GP, ISO, and more, so here you can easily import any videos you like.
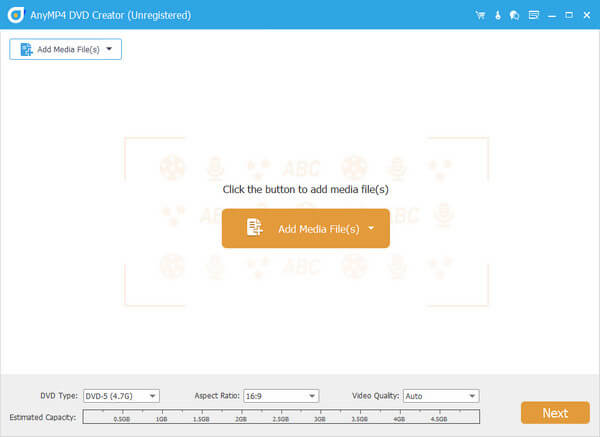
Step 3. After loading videos, you can set the “DVD Type”, “Aspect Ratio” and “Video Quality” first. Then click on the “Next” button to move to the next step.
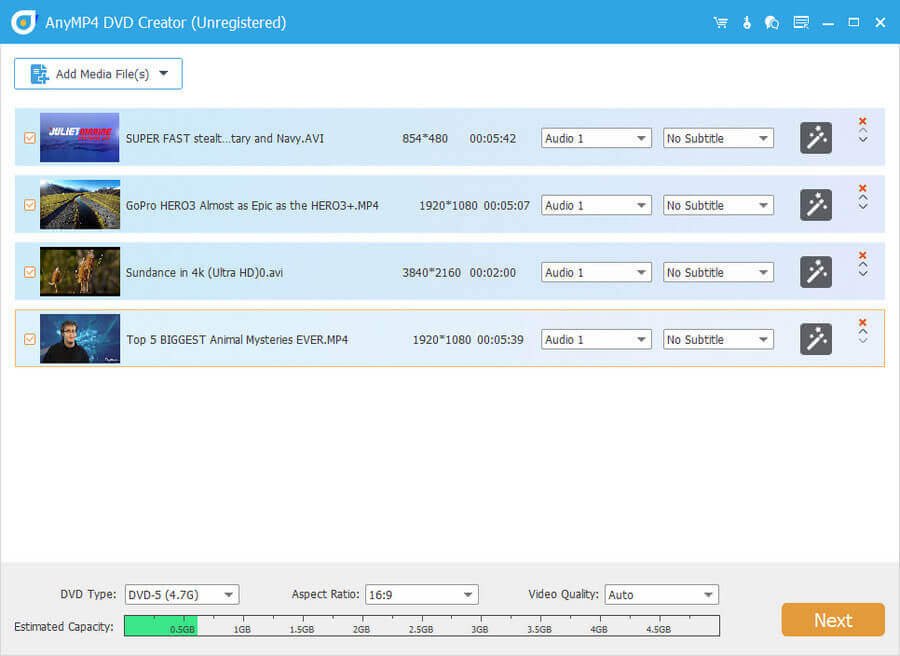
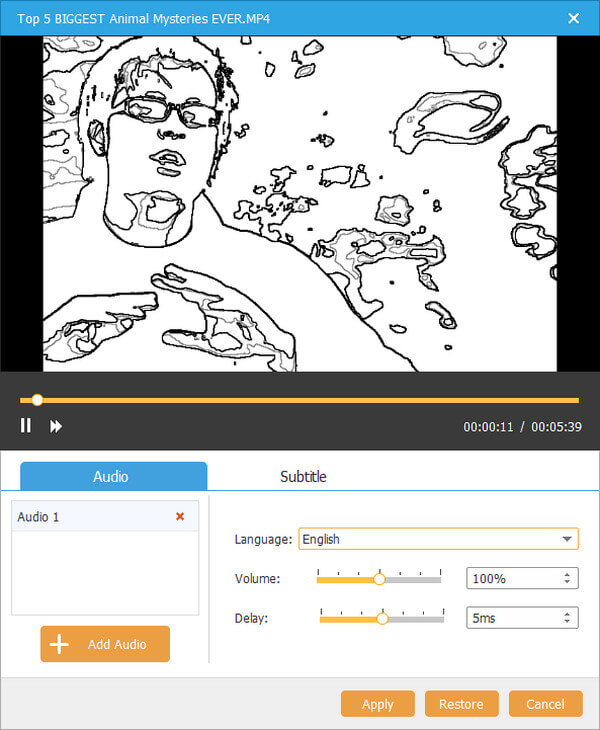
Step 4. You can change and select a new audio track and subtitle for the created DVD. After doing that, click “Apply” to confirm the operation.
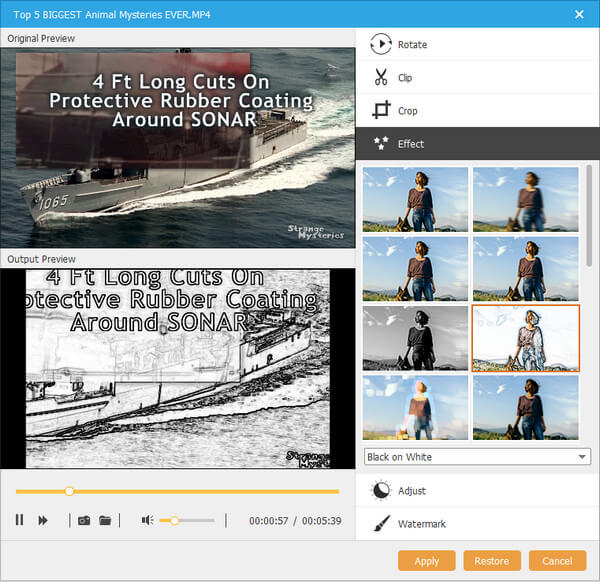
Step 5. If you want to edit the video, you can enter the "Edit" window. You can adjust video effect by setting brightness, contrast, saturation, hue and volume, rotate/clip/crop video, or apply filter based on your need.
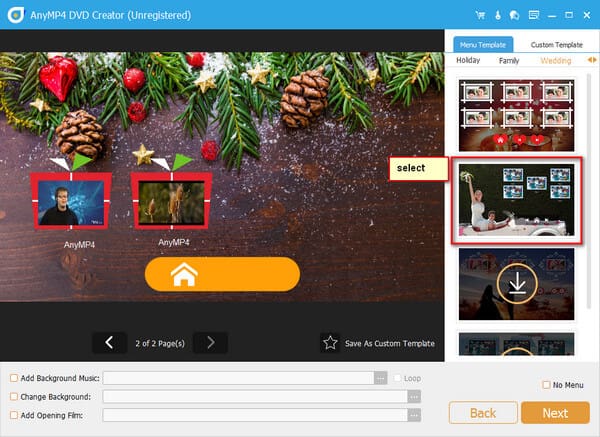
Step 6. You are also allowed to edit the DVD menu. Here you can click the "Edit menu" button to open the "Edit Menu" window where you can customize the DVD menu as you like.
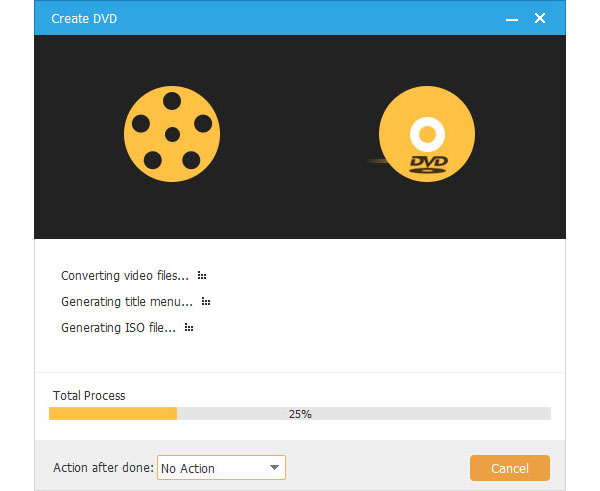
Step 7. After all these operations, you can click on the "Burn" button to start transferring video to DVD. Besides DVD disc, this video to DVD converter also allows you to transfer video to DVD folder, or convert video to ISO file.
If you are a Windows PC user and have the need to transfer video to DVD, you can rely on the Windows Media Player. The following steps will show you detailed steps.
Step 1. Run Windows Media Player on your PC and go to the "Windows Media Player Library".
Step 2. When you get there, click "Burn" > "Burn options" > "Data DVD" to prepare for the video to DVD transferring. Here you need to insert a writable DVD disc.
Step 3. Find the specific video you want to burn to DVD, and drag it to the list pane to create a burn list.
Step 4. If you add several video clips to the DVD burn list, here you can adjust the video order or remove the unnecessary ones. Click on "Start" to transfer video to DVD.
Windows Media Player is no longer available in Windows 10. What’s more, Windows Media Player doesn’t support all popular video formats. To transfer video to DVD with this method, you’d better use a Windows 7 PC to convert MP4 video to DVD.
If you are using a Mac, you can rely on iMovie to transfer video to DVD. Most Mac products don’t carry a DVD driver. So you should connect an external DVD driver for burning video to DVD with iMovie.
Step 1. Run iMovie on your Mac and then click "File" on the top-left menu bar. Choose "Import" option from the drop-down list to load the video.
Step 2. iMovie is not compatible with many video formats. So here you need to import an MP4 or MOV file. As a built-in video editor, iMovie is equipped with many basic editing features. You can edit the video before converting it to DVD.
Step 3. Click "Share" and then choose "iDVD" option to start converting video to DVD. During this step, you can select a DVD theme and customize the DVD menu.
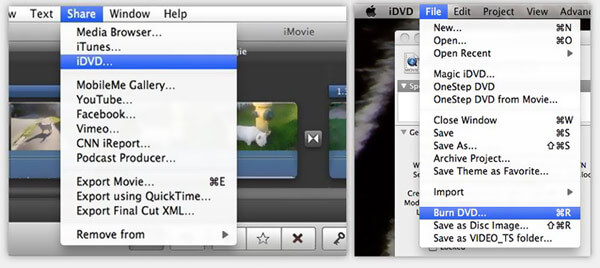
Step 4. Insert a blank DVD into your Mac and then click "Burn" to confirm the operation of transferring video to DVD.
We have talked about how to transfer video to DVD in this page. Here in this post, we share 3 effective ways to help you convert video to DVD disc on your computer. If you still have any questions, you can leave us a message in the comment or directly contact us.
 Posted by Riley Mitchell to Mobile Transfer
Related Articles
 How to Do Split Screen/Make a Video Collage on TikTok
Want to do a split screen for your videos on TikTok? This article will show you how to do it most easily. Plus, you can learn how to make more overwhelming split-screen videos here.
 What Format do DVD Players Use
All digital video disc players support the DVD Video format, the most commonly used format for movies. Learn the formats supported by DVD players.
 Top 9 DVD Player Software All Time
We have compared the best dvd player software for 2017. See up-to-date reviews for these top rank DVD player programs in this article.
 3 Best Ways to Convert AVI to DVD on Windows, Mac and Online
What should be the best methods to convert AVI to DVD with ease? Here are 3 frequently used AVI to DVD converter to make DVD disc for any DVD player with ease from the article.