Summary: This tutorial shows 2 simple ways to transfer music from iPhone to your computer. If you don't want to sync iPhone purchased songs with iTunes, you can turn to the professional iPhone music transfer, iPhone Transfer Pro. It provides you with a straight-forward way to copy music from your iOS device like iPhone, iPad and iPod to computer.
With the daily usage of your iPhone, you may collect lots of purchased songs. Do you know how to easily transfer iPhone music to computer? After syncing iPhone songs to computer, do you know where to access these music files?
For different needs, you will often have the need to transfer all types of files between your iPhone and computer. In most cases, you can handily sync your iPhone data to Mac/PC with iTunes. However, after doing that, you don't know how to find and open these data. That's why most iOS users don't want to transfer data with iTunes. Here in this post, we will show you how to transfer music from iPhone to computer with or without iTunes.
As it mentioned above, most iOS users don't like to transfer various iOS files with the iTunes sync way. So at the first part, we will tell you a direct way to copy iPhone music to computer. Here we recommend the powerful iPhone Transfer Pro for you again to do the music transferring work.
It has the capability to directly transfer iOS data including iPhone music, videos, contacts, messages, photos, etc. between iOS device and PC/Mac. It also offers a simple way to access and manage all existing songs on your iPhone. You can free download it and follow the steps below to transfer music from iPhone to computer.
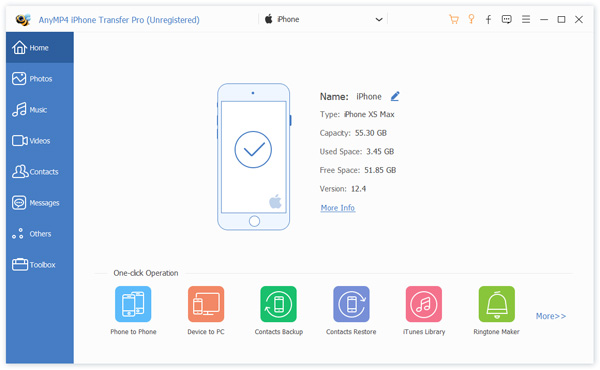
Step 1. First, you need to double click the download button to quickly install this iPhone music transfer on your computer. Then run it and connect your iPhone to it with a USB cable.
Secure Download
Secure Download
To help your computer recognize this iOS device, you need to tap "Trust this computer" on your iPhone screen. Then this iPhone music transferring software will detect your iPhone and show some basic information about it in the main interface.
Some frequently-used iOS data types like Music, Photos, Videos, Contacts, Messages and Others are listed on the left control to help you quickly locate the specific files on your iPhone.
Step 2. Click "Music" option on the left panel and you are allowed to check all existing songs on your iPhone.
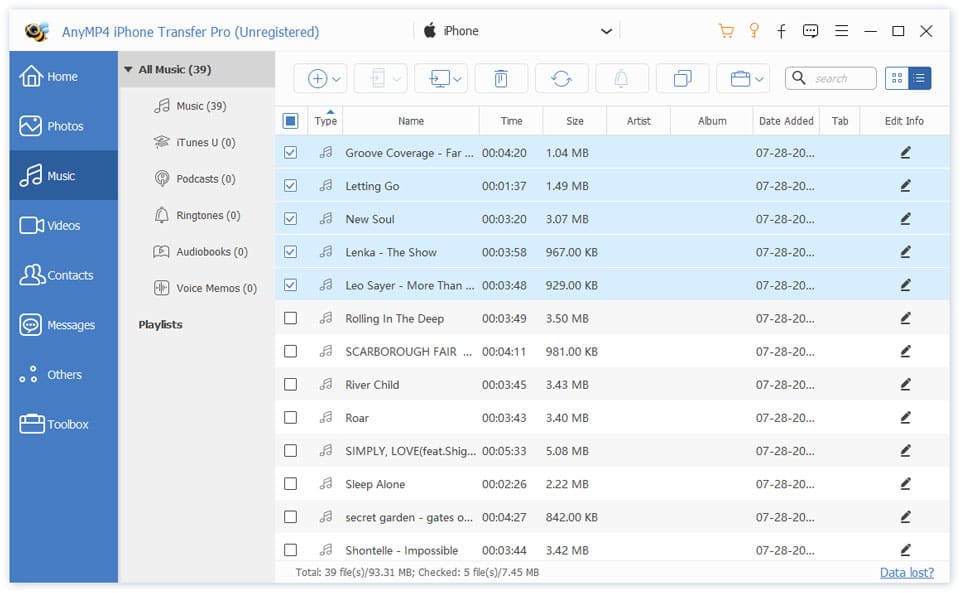
Step 3. Select the iPhone music files you want to transfer to your computer, and then click the computer like icon and choose "Export to PC/Mac" option to start importing songs from your iPhone to computer.
Within just a few clicks, all selected iPhone music including purchased iTunes songs will be transferred to your computer. If you want to add computer music to iPhone, here you can click the "+" icon.
As an iPhone user, you will be quite familiar with iTunes. In fact, in old days, you can only rely on iTunes to mange and transfer various iOS data on your iPhone. You have to admit that, iTunes is not a good transfer app due to its data sync way. Still, this part will show you detailed steps to transfer purchased songs from iPhone to computer with iTunes.
Step 1: Launch the latest version of iTunes on your computer and connect your iPhone to it with a USB cable. For the first connection, you may need to tap "Trust this computer" on your iPhone screen. At the same time, you should click "Continue" on your computer to allow iTunes to read your iPhone data.
Step 2: Click the "iPhone" icon the left corner of the interface. Click "Options" under "Summary" tab to manually manage media files on this iPhone. Here you can check the "Manually manage music and videos" option. Click "Done" to confirm the operation.
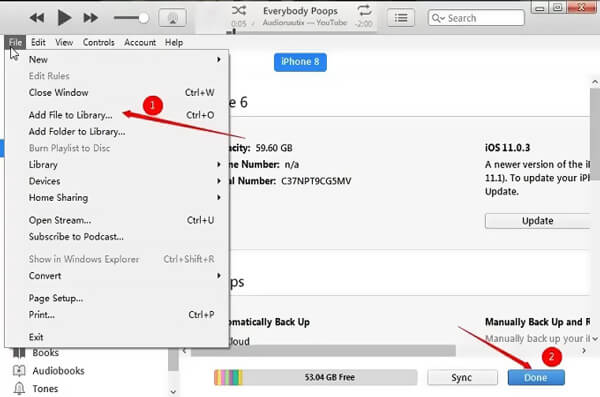
Step3: Click "File" on the top-left menu bar and then select "Devices" option from the drop-down list. Then click on the "Transfer Purchases from iPhone" option. After that, iTunes will automatically transfer these songs to the "Music Library" of iTunes.
Step 4: In some cases, iTunes will ask you to authorize your computer to play these songs. You can go to "Accounts" and then choose "Authorization" to authorize your computer.
After reading this post, you can get 2 solutions to transfer music from iPhone to computer. If you don't like to sync iPhone music to computer with iTunes, you can choose the recommended iPhone Transfer Pro. Besides iPhone music, it also enables you to transfer other iOS data between iPhone/iPad/iPod and PC/Mac. Just free download it and have a try!
 Posted by Ted Klarso to Mobile Transfer
Related Articles
 Top 10 Music Converter Apps to convert music
There are 10 best Music Converters, which is user-friendly and easy to use.
 Best Video Background Changers for Computer and Mobile
This article collects some of the best video background changers that you can use to replace the original background with your favorite scenes on computer and mobile.
 3 Best Ways to Delete Music from iPhone/iPad/iPod
Don't know how to delete music from iPhone, iPad or iPod? Don't worry. Just follow this article to get these methods.
 How to Edit a Song in iTunes and Remove Hidden Parts out of Tracks
How to edit a song in iTunes? Here is a step-by-step guide to tell you remove unwanted parts from your song using iTunes and add it to your video simply.