Cropping video is a good way to cut the unwanted areas from your footages, so that your audiences can focus on the essential subject. Sometimes, it is also a significant skill for sharing videos on social media since they usually have the recommended aspect ratio. Anyway, this guide shows you how to crop a video on Mac with iMovie, the new Photos app and more way. Let's start the journey if you are ready.
AnyMP4 Video Converter Ultimate is the easiest way to crop videos on Mac. It is not only easy to use, but also able to produce high quality output.
Key Features
Secure Download
Secure Download
1.Open videos
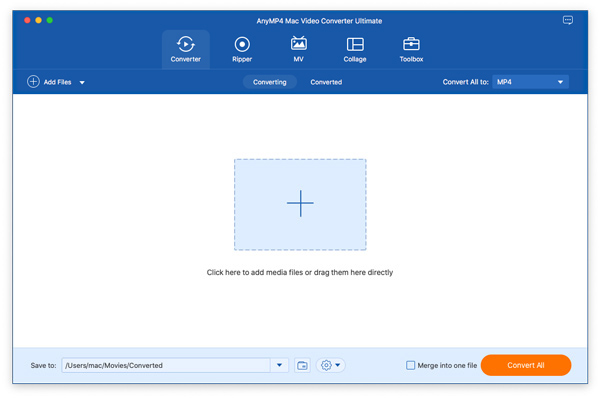
Run the best video editor after you install it on your Mac. There is another version for PC. Pull down the Add Files menu at upper left side and select Add Files to add the source videos.
2.Crop video on Mac
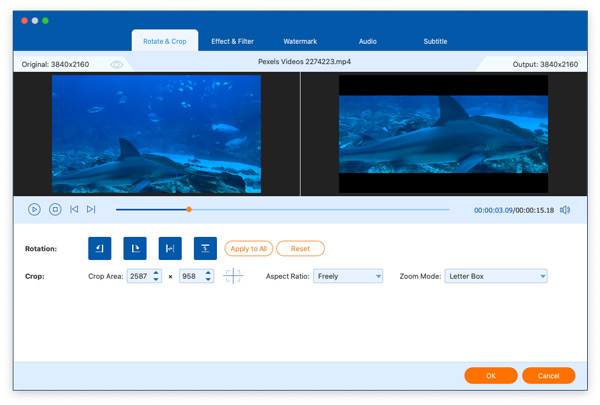
After video loading, they will appear in the library pane. Click the Edit button with a magic-bar icon under a title to enter the video editor window. Select Rotate & Crop tab and locate the Crop area.
There are two ways to crop a video on Mac. Drag and move the cropping box in the editor pane and remove unwanted areas. Alternatively, you can set the Crop Area options to crop video on Mac accurately.
You can also change the aspect ratio of video on Mac. Pull down the Aspect Ratio option and select a proper one. Click OK button and crop other videos.
Tip: If you intend to apply the cropping to all videos, click the Apply to All button.
3.Export cropped videos
Finally, set a destination folder in the Save to field and click the Convert All button. If you want to convert the videos after cropping, set it in the Convert All to option at upper right corner.
PROS
CONS
QuickTime is video built-into macOS. And the built-in QuickTime Player is the basic version that can only trim a video. If you want to crop your video, you must upgrade to the Pro version for $30 to access more editing functions.
1. Open QuickTime Pro on your Mac to add a video you want to crop. Find the Edit menu and click Copy to capture the image of a frame. Then, export it in .jpg format.
2.Open Photoshop to create a new project and paste the image. Then use the Rectangular Marquee Tool to adjust the area you want to keep. Then, fill it with black color and other space with white color. Finally, save the mask file as GIF or TIFF.
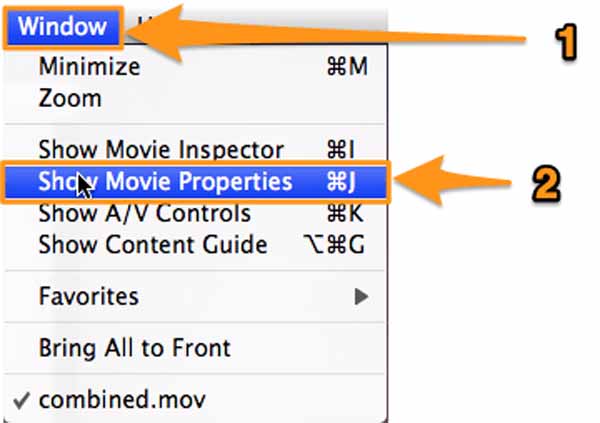
3.Return to QuickTime Pro and enter the Windows option. Then, select Show Movie Properties and then click Visual Settings. Next, click Choose and import the mask file. After applying the mask file to the video, you only can view the selected area.

4.Finally, find the File menu and click Export to output the cropped video.
PROS
CONS
iMovie is the preinstalled video editor on Mac, so it is an easy way to crop video and do other editing on MacBook Pro and other devices running macOS.
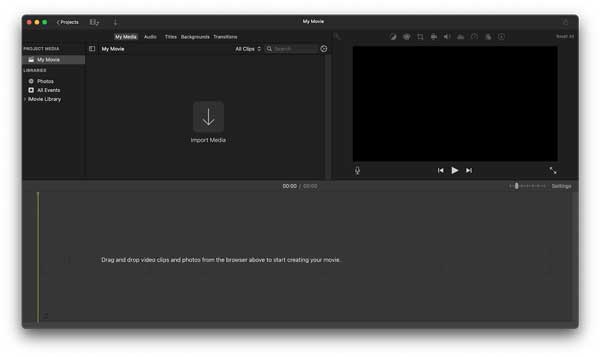
1.Run iMovie from the Applications folder, create a new movie project or open an existing project, and click Import Media to add the video that you want to crop.
2.Put the video to timeline and it will appear in the preview pane. Click the Cropping icon above the preview pane and you will get three styles, Fit, Crop to Fit and Ken Burns. Choose a proper one and move the cropping box to enclose the desired area.
3.When video cropping on Mac is done, click the Share icon at upper right side. Here you can share the video to social media, or send it via email. To save the cropped video to Mac, choose File, set the output options, click Next and follow the instructions.
PROS
CONS
There are some tutorials on the web for cropping a video on Mac in QuickTime Player. However, according to our research, the player is only able to trim and cut video. There is no function related to video cropping. In the past, you can only view and trim videos in the Photos app too. Since the macOS Big Sur update, Apple has introduced new features into the Photos app, including cropping video.
1.Make sure to update your Mac to the latest system. Open the Photos app, and select the video that you want to edit.
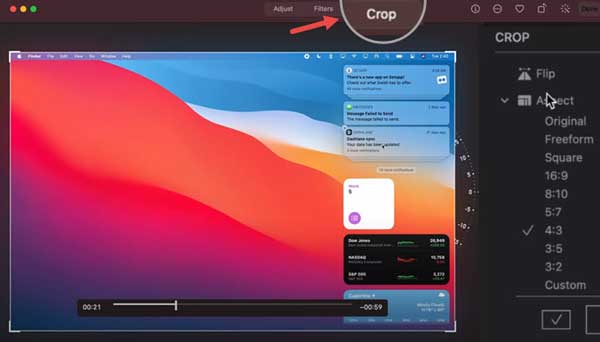
2.Click the Edit menu on the right upper side and you will be presented the brand new video editor. There are three options on the top ribbon and choose Crop.
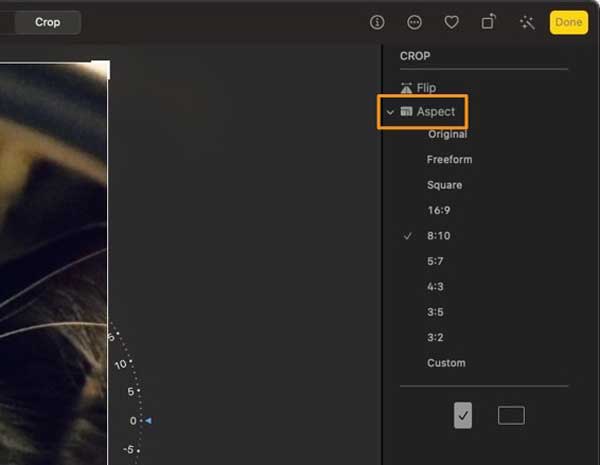
3.Then the cropping box will appear around the video image. Firstly, decide the video aspect ratio. Click Aspect and you will see presets. Select your favorite one. If you do not wish to change the aspect ratio, select Original.
4.Then adjust the box to crop the video on Mac. The four corners are adjustable and you can click and move it to do it easily.
5.Once video cropping on Mac is done, click the Done button at upper right corner to export the cropped video.
PROS
CONS
VLC Media Player is a free player that is compatible with different platforms. It can play various format files easily. And its interactive zoom feature allows you to magnify into video during playback. Please install VLC on your desktop first, then follow the steps to crop your video.
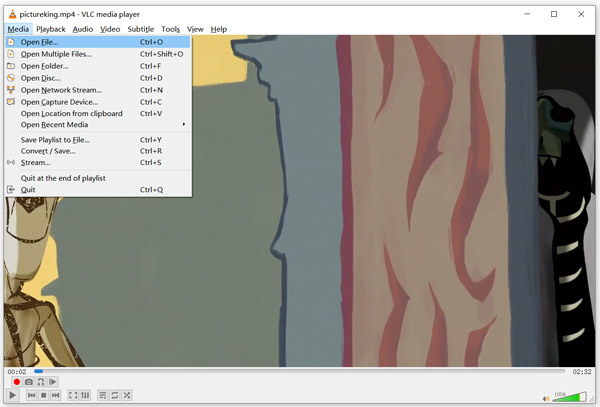
1.Open the player and find the Media menu on the top. Select Open File to add a video to VLC. The loaded video can be automatically played.
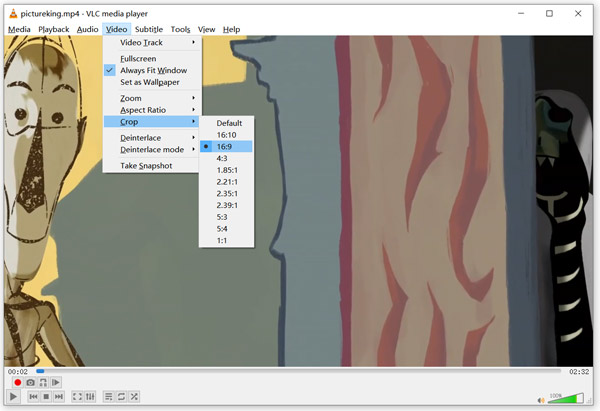
2.Click the Video menu to enter Crop from the drop-down list. Next, choose an option to resize video. For example, you can set it as 16:10, 16:9, 1.85:1, 2.21:1, 5:3, 1:1, etc.
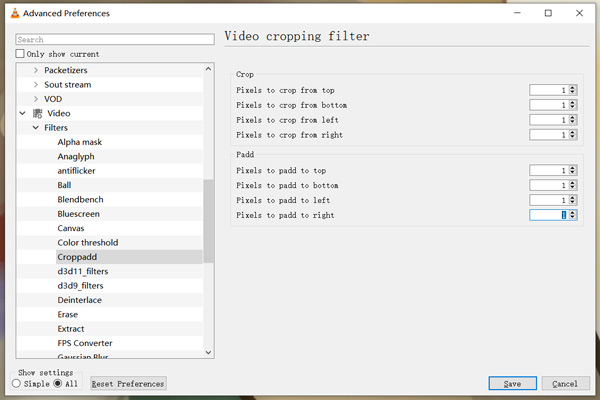
3.After selecting, click the Tool menu on the top and enter the Preferences tab. Tick All in the bottom left corner and scroll down to find Video. Then, click Filters and select the Croppadd section. Now, you can type in the specific pixels to crop the video from top, bottom, left, and right. After that, click Save.
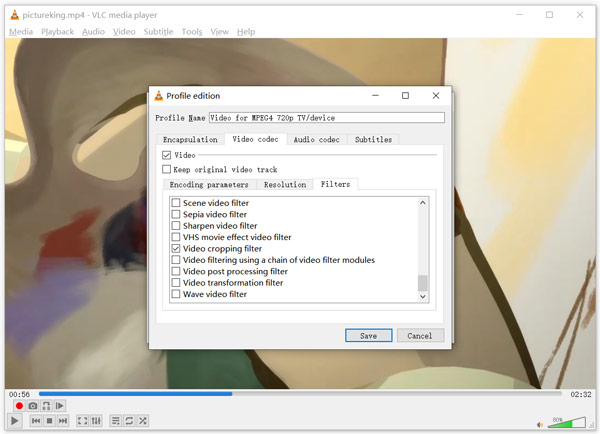
4.Return to the main interface and navigate to the Media menu. Select Convert/Save and then click Convert to set the destination file. Finally, click Start to save the cropped video.
PROS
CONS
Can you crop a video on Mac without iMovie?
Yes. If you do not like iMovie, the preinstalled Photos app is also available to crop a video on Mac. Moreover, you can use third-party photo cropping software to edit your videos.
How do I crop a QuickTime screen recording?
Although QuickTime Play is able to record screen in video, it cannot crop it. After recording, you can open the recording in iMovie and crop it easily.
Can you crop a video on MacBook/MacBook Pro/MacBook Air?
Yes. You can crop your video using the default tools like iMovie, QuickTime, and Photos. Or you can download the third-party software to help you on your Mac computer.
Though there are limited video editors for Apple computers, it is easy to crop video on Mac. Firstly, iMovie is the built-in video editor and has the capacity to crop a video. If you have updated your Mac to the latest version, the Photos app can also meet your need. Of course, there are more options if you do not like the preinstall apps. AnyMP4 Video Converter Ultimate, for example, is able to crop video on Mac while optimize quality. More questions? Please leave a message below this post.
Secure Download
Secure Download
 Posted by Riley Mitchell to Edit Video
Related Articles
 Best Video Croppers and Editors
This post shares the best video croppers for you to consider, which are surprisingly good at cropping video on computers or mobile devices. Plus, you can find the methods to export videos without cropping.
 Top 3 Ways to Easily Crop a Video
How do I crop a video in my gallery? How to crop a video on iMovie? This post tells 3 methods to crop a video on iMovie, in Premiere, and online free.
 8 Best Video Crop Editor You Should Not Miss on Windows/Mac/Android/iPhone
With the best video crop editor software shared in this article, you can easily crop any format videos and do other editing tasks on computer and mobile.
 Review of Kapwing Resizer and 3 Best Kapwing Alternatives
What is Kapwing resizer? How to use Kapwing to crop video? How do I resize with Kapwing? Get a full review of Kapwing video resizer and its best alternatives.
