Store
Store- Multimedia
For Windows
- Converter Tools
- Video Converter Ultimate

- Video Converter
- 4K Converter
- MP4 Converter
- Audio Converter
For Mac
- BD/DVD
For Windows
- DVD Tools
- DVD Ripper
- DVD Copy
- DVD Creator
- DVD Converter
- DVD Toolkit
For Mac
- Mobile
For Windows
For Mac
- Utility
- Freeware
User Guide
Get Started
Download & Install
Download the AnyMP4 MP4 Converter .exe file from the official page, follow the on-screen instructions to install it on your computer.
This software is compatible with Windows 11, Windows 10, Windows 8, Windows 7, Windows Vista, Windows XP (SP2 or later), and you can use it on your Windows PC easily.
Register
The free trial version of AnyMP4 MP4 Converter has limited features, and you are recommended to enjoy the full features.
Click the Register icon (A lock image) in the top menu, or click the Menu option at the top corner and select Register from the drop-down option.
For registering this software, you should enter your Email address and registration code in the bar, and click Register to activate it.
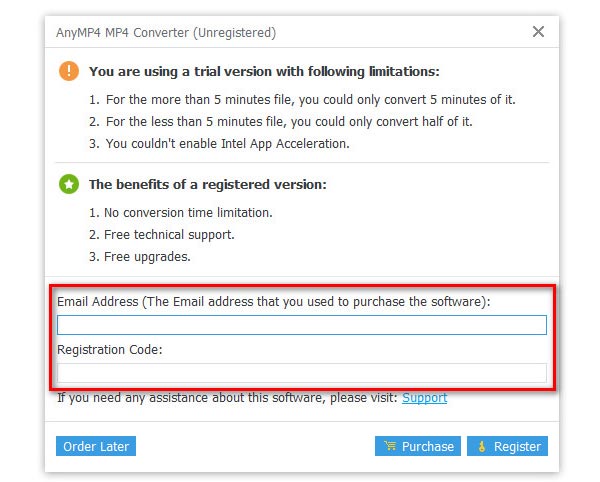
Email Address: The email address that you used to purchase this software.
Registration Code: A string of characters marked as Activation key, license code, or KEYCODE(S) in the order confirmation letter you received after the successful order.
Update
AnyMP4 MP4 Converter always keeps updating to fix some bugs and bring new features.
To update AnyMP4 MP4 Converter, you are given 2 ways to update this program:
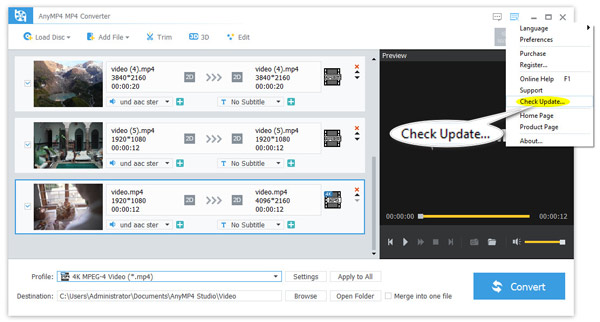
Manually update AnyMP4 MP4 Converter
Run MP4 Converter, and click the Menu option at the top-right corner, then select Check Update…
Then this software will start checking and updating if there is a new version.
Method 2: Choose Preference under the menu.
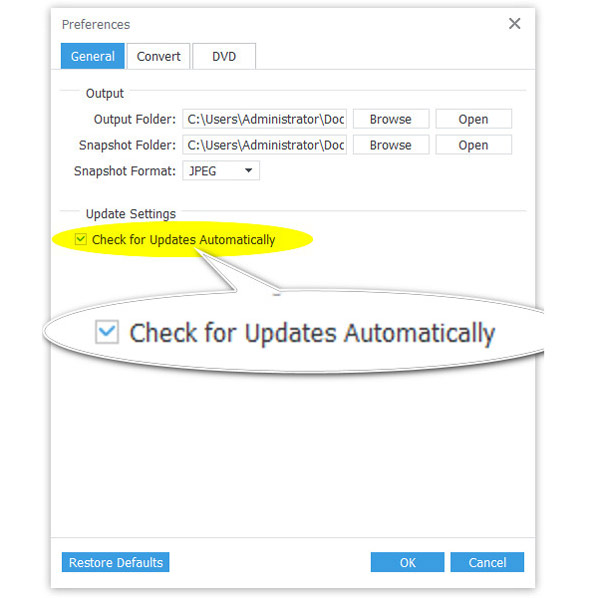
Automatically update AnyMP4 MP4 Converter
If you want to catch every update of this program, then you can enable automatic updates in MP4 Converter.
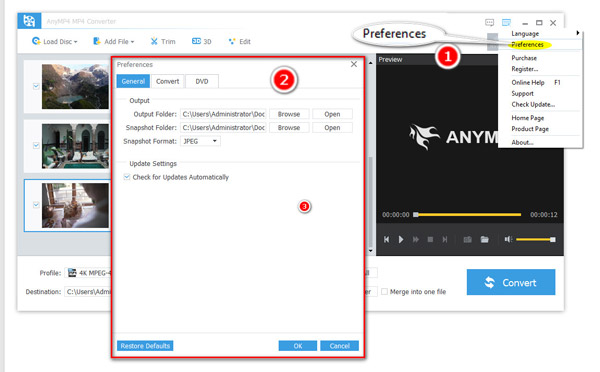
Click the Menu option at the top-right corner and select Preferences. Then you will go to the General tab by default. Here, you should tick the box of Check for Updates Auto automatically.
Preferences
Before starting using MP4 Converter, you can make your preferences to enable hardware acceleration, choose the output folder, and more.
Select Preferences from the drop-down list of the top Menu option.
Then you can switch the different tab to select the location to save the output folder, snapshot format, CPU acceleration, DVD loading settings, and so on.
Convert Video/Audio
AnyMP4 MP4 Converter can convert MP4 and other video/audio formats over 500. Follow the simple steps below to start converting MP4 videos.
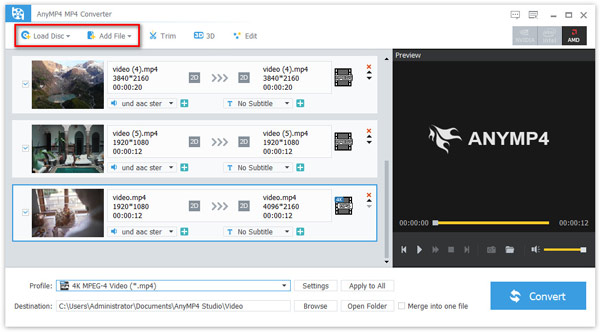
Step 1 Add video files
Click the Add File button or Load Disc button to add one or more video/audio files or DVD movies.
Step 2 Edit video or audio optionally
If you want to edit a video file, just select one video file, and click the Edit button to start editing it.
Step 3 Select the output format
After editing the video file, return to the main interface of this software, select the output format from the drop-down option of Profile.
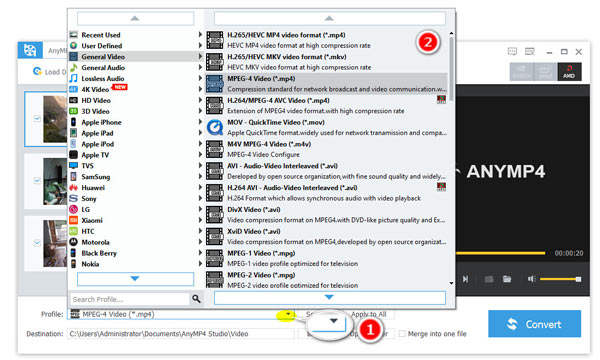
If you want to change the output file parameters, just click the Settings option next to Profile, and change the video encoder, video resolution, video aspect ratio, video frame rate, video bitrate, audio encoder, audio sample rate, audio channel, and more.
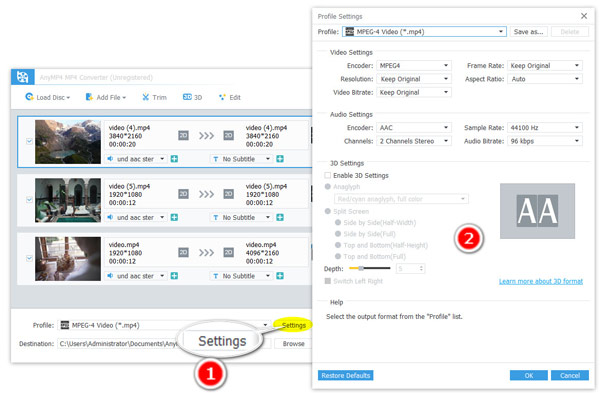
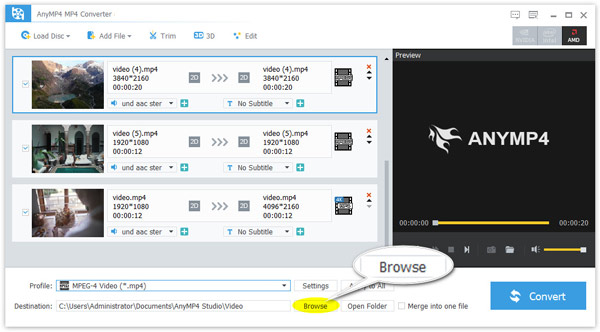
Also, confirm or click the Browse option at the bottom to select the location to store the converted file.
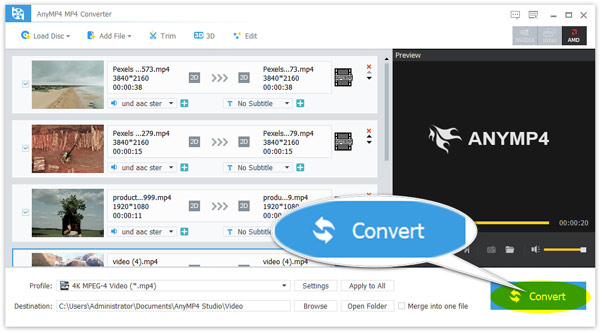
Step 4 Convert video or audio
After all the settings are made well, just find and click the Convert button in the main interface to start conversion.
Edit Video Effects
AnyMP4 MP4 Converter offers you various editing features to refine your videos.
Trim & Split Video/Audio
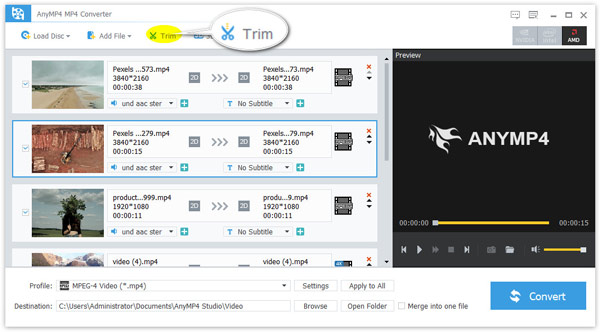
Step 1 Select one video or audio file
After adding the video or audio files into this software, just click one file to select it.
Then click the Trim option at the top menu.
Step 2 Split or trim video or audio
Then, you will go to the Trim window. Here, you can move the play progress bar to set the starting and ending point.
Besides, you can adjust the time from the Start and End option.
Then use the New Clip or Split option to create a new clip or split one file into 2 clips.
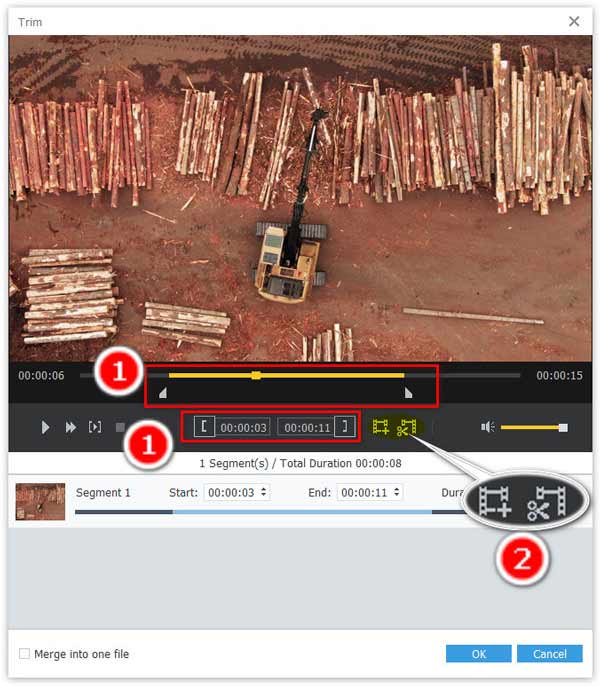
Then click OK to start splitting or trimming a video or audio file.
Convert 3D Video
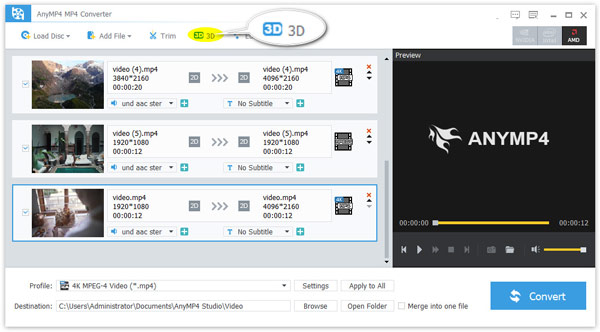
Step 1 Select one video file
After adding a video file to this software, select it and click the 3D option.
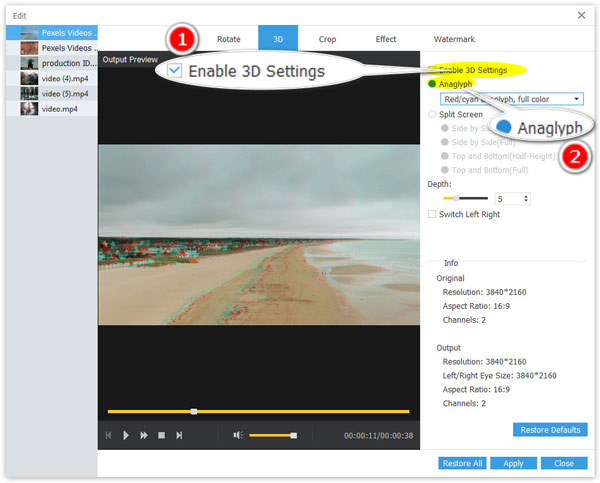
Step 2 Convert 3D video
Then you can start 3D video editing.
Enable the option of Enable 3D Settings, and choose the 3D mode from Anaglyph or Split Screen.
According to your need, and choose the 3D mode you want. Finally, click Apply.
The Restore All option lets you get rid of all the editing effects you applied and get an original video file.
Rotate & Flip Video
Step 1 Select a video file
Select one video file after you add video files to this program, and click the Edit icon at the top toolbar.
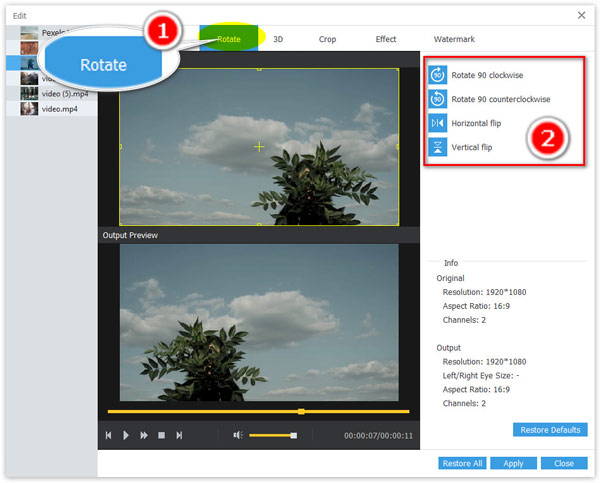
Step 2 Rotate and flip a video
Then you will go to the Edit window, where you should make sure you are in the Rotate tab.
The 4 options at the top-right side let you rotate a video in 90 clockwise or 90 counterclockwise, or flip a video vertically or horizontally.
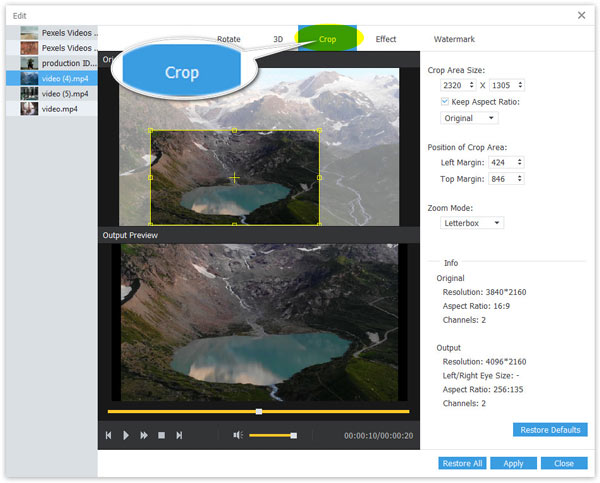
Crop Video
Step 1 Select a video file
Select one video file after you add video files to this program, and click the Edit icon at the top toolbar.
Step 2 Crop video
Switch to the Crop tab, where you can move the yellow frame from the left preview window to adjust the crop area. Alternatively, you can set the crop value by choosing from the right options to confirm the cropping area and position.
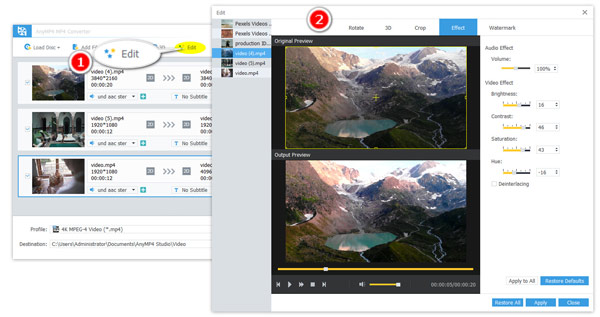
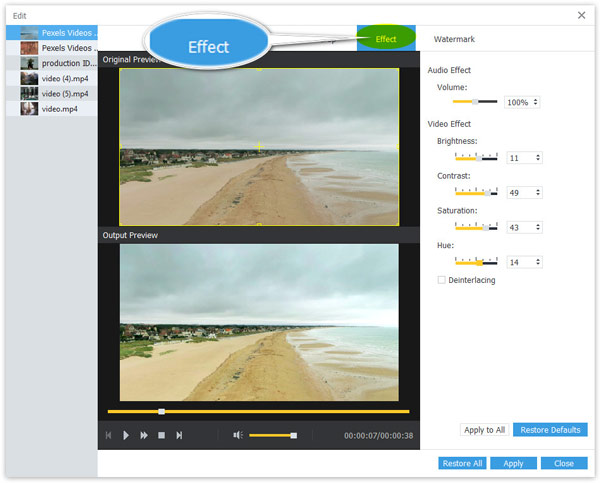
Effect Video
Step 1 Select a video file
Select one video file after you add video files to this program, and click the Edit icon at the top toolbar.
Step 2 Adjust video effects
Here, you should navigate to the Effect tab.
Then move the threshold slider to adjust the brightness, contrast, saturation, and hue.
Besides, the video audio volume is also available for you to choose.
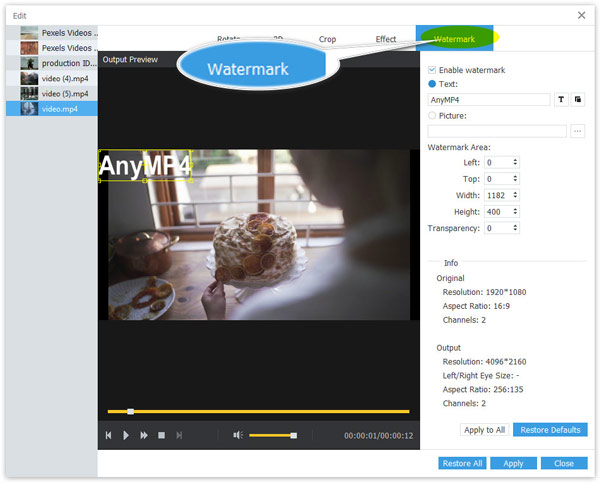
Watermark Video
Step 1 Select a video file
Select one video file after you add video files to this program, and click the Edit icon at the top toolbar.
Step 2 Watermark video
Go to the Watermark tab, and checkmark the option of Enable Watermark.
Then select Text or Picture to input the text watermark or add an image as your video logo.
You can adjust the text style, size, font, color, and move the watermark area to any place in this video.