To rip the DVD movie and convert any video to your needed video format on Mac, AnyMP4 DVD Converter for Mac can help you. This two-in-one Mac DVD Converting software has the capability to rip any DVD and convert video to any popular video format you need on Mac at the same time. And also the flexible editing functions are available to help you customize the DVD/video effect to get the perfect one. How to rip DVD and convert video on Mac with the best DVD Converting for Mac? This step-by-step guide would help solve the problem and provide you the operating process in an easy way. Firstly of all, you should download AnyMP4 DVD Converter for Mac to your Mac and install the program.
Secure Download
Secure Download
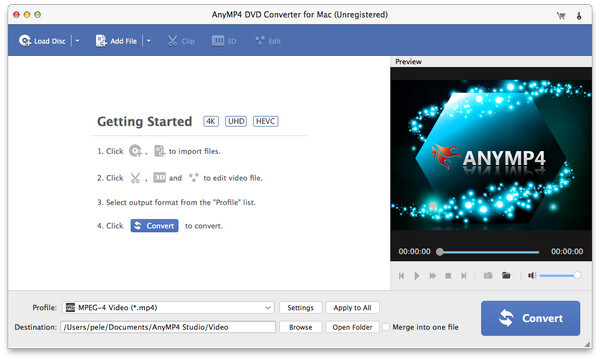
After installing AnyMP4 DVD Converter for Mac software, you can launch the program and open it on your Mac. Here is the screenshot of the main interface.
Inset the DVD disc to the DVD drive and then click "Load DVD" to load the DVD disc to the program, and you can also press "Load DVD" drop-down button to select the Load mode like "Load DVD Rom", "Load DVD Folder" or "Load IFO Files" according to your need. Then you can click "Add Video" button to select the videos you want to convert and add them to the program, also you can click "Add Video" drop-down button to add multiple videos to the program at the same time.
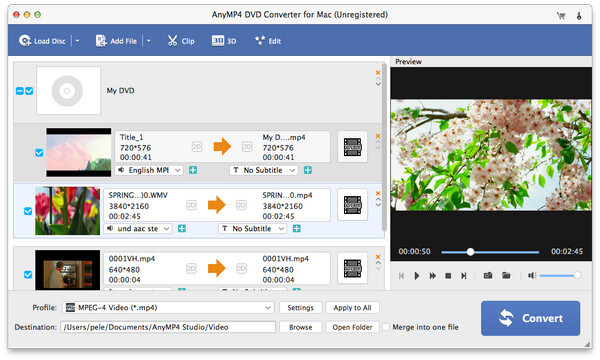
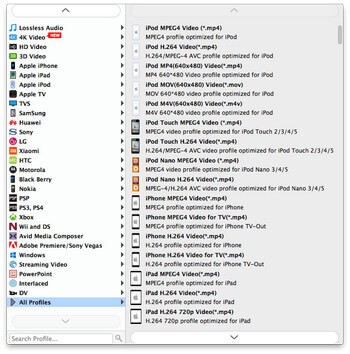
This program allows you to choose different formats for each video and DVD title, just clicking the "Profile" list in line with the corresponding video area and select the specific output video format. If you want to choose one format for all the added videos and loaded DVD titles, you can click "Profile" drop-down button at bottom of the main interface to select the one output format and then click "Apply to All" button to make the output format apply to all the videos and DVD titles.
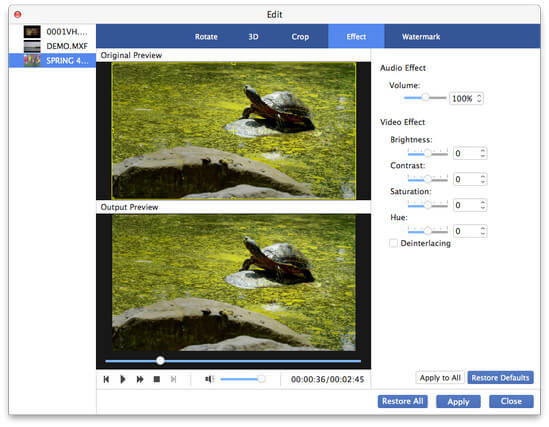
To edit the DVD/video to be perfect, you can click "Edit" button at top of the main interface and open the "Edit" window. Here you can adjust the video effect like brightness, contrast, saturation, hue and volume by dragging the corresponding scroll bar to change the value; trim the DVD/video length by dragging the slide bar to adjust the start and end time of the DVD/video; crop the video frame to remove the black edges by dragging the yellow region in the video image to adjust the cropping size; and add text/image watermark to the DVD/video.
At last, you can start to convert DVD/video to your needed video format by pressing "Convert" button in the main interface, thus you can enjoy your favorite DVD/video on your loved portable media device whenever and wherever you go.
 Updated by Joan Aimee to DVD
Related Articles
 The Easiest Way to Play MP4 on DVD Player
DVD Player can load and play MP4 video now through top 2 methods here with ease.
 10 Best Android MP4 Players for Playback MP4
Here recommend 10 best Android MP4 Players to watch videos on your Android device.
 Best Ways to Play MP4 Video on Google Drive
This article gives you a detailed guide to store and play your MP4 files on Google Drive.
 How to Play MP4 on Windows Media Player
Still don't know how to play MP4 on Windows Media Player? You can read this article.